Wednesday, October 31, 2012


Sunday, October 28, 2012
It may sound a little weird and people may suddenly look askance at
you leaving you thinking that they are thinking you have gotten in touch
with your inner "flower child", when you tell them you are taking up
Bead meditation, but disregard their strange looks as the benefits of
this simple practice are tenfold.
 I was introduced to this last
week after my weekly yoga class, and already can feel many benefits of a
small 5 minute practice, once a day. But seriously, this can be done
anyway and or anytime, as long as you can do it uninterrupted.
I was introduced to this last
week after my weekly yoga class, and already can feel many benefits of a
small 5 minute practice, once a day. But seriously, this can be done
anyway and or anytime, as long as you can do it uninterrupted.
Just 5 minutes of simple Bead meditation can be done whilst waiting in the car for someone, waiting for a bus/train, last thing before bed, even in the loo, or as I do, first thing in the morning, when I know that I should get up soon, but don't want to, just yet. (Warning: probably not a good idea to do it, driving in your car, whilst stopped at traffic lights)
Less anxiety
More control in crisis or stressful situation
Lower Blood pressure
More sustained attention span and improvement in effortless single focus concentration
Relaxed start to the day
Distractions from run-away thoughts or self-destructive negative thinking
Increased sense of compassion and empathy
Increased energy levels
Improved sense of well-being & self-esteem
The secret seems to be in keeping the mind busy on a single activity, and in doing so, worry and stress can not seep into your consciousness. The mind will try to wander and intrusive thoughts will tug at you, and if this happens, gently bring it back to the task at hand (sorry no pun intended there) Do this as often as you need.
"The mind is harder to control than the wind", it was said. So now, not only can the mind be quieted by having something to do, the movement of your fingers on the beads, gives the body something to do and allows the body to be more content and relaxed.
Prayer beads have a similar purpose, however this is more to do with religious devotion and counting prayers, which is not within my realm to recommend or discuss here. Rather than focusing on spiritual growth, secular meditation techniques such as this, emphasizes stress reduction, relaxation and self-improvement.
Wiki tells us, "Most of the ancient religions of the world have a tradition of using some type of prayer beads as tools in devotional meditation.[125][126][127] Most prayer beads and Christian rosaries consist of pearls or beads linked together by a thread.[125][126] The Roman Catholic rosary is a string of beads containing five sets with ten small beads. Each set of ten is separated by another bead. The Hindu japa mala has 108 beads, as well as those used in Jainism and Buddhist prayer beads.[128] Each bead is counted once as a person recites a mantra until the person has gone all the way around the mala, which is counted as 100, with an extra 8 there to compensate for missed beads.[128] The Muslim mishbaha has 99 beads. Specific meditations of each religion may be different."
You only have to say the mantra loud enough for you to hear. It is not necessary to sing it, or say it loudly. Don't worry so much about your breathing technique; it is not so important in this form of meditation.
The following passage is reproduced from Wiki and illuminates the scientific basis for claiming health benefits of meditation.
http://en.wikipedia.org/wiki/Meditation
In a cross-sectional survey research design study lead by Li Chuan Chu (2009), Chu demonstrated that benefits to the psychological state of the participants in the study arose from practicing meditation. Meditation enhances overall psychological health and preserves a positive attitude towards stress. (Chu, 2009)
Mindfulness Meditation has now entered the health care domain because of evidence suggesting a positive correlation between the practice and emotional and physical health. Examples of such benefits include: reduction in stress, anxiety, depression, headaches, pain, elevated blood pressure, etc. Researchers at the University of Massachusetts found that those who meditated approximately half an hour per day during an eight week period reported that at the end of the period, they were better able to act in a state of awareness and observation. Respondents also said they felt non-judgmental. (Harvard’s Women’s Health Watch, 2011)
"Meditation as Medicine" (American Academy of Neurology) [150] cites scientific evidence from various studies which claim that meditation can increase attention span, sharpen focus, improve memory, and dull the perception of pain. The article lists as common types of meditation: Attention Meditation, Mindfulness Meditation, Passage Meditation and Benevolent Meditation.
A review of scientific studies identified relaxation, concentration, an altered state of awareness, a suspension of logical thought and the maintenance of a self-observing attitude as the behavioral components of meditation;[67] it is accompanied by a host of biochemical and physical changes in the body that alter metabolism, heart rate, respiration, blood pressure and brain activation.[46][152] Meditation has been used in clinical settings as a method of stress and pain reduction. Meditation has also been studied specifically for its effects on stress.
Gauranga
Nityananda
Om Hari Om
Gopala
Govinda
Chaitanya Nityananda Gaurhari
Gopala Govinda Rama Madana Mohana
Haribol Nitagaur Nitaigaur Haribol
Madana Mohana Murari
Haribol Haribol Haribol
Some people feel this is an alien concept and take it like medicine, and other embrace it wholeheartedly. I shall ponder on what you will make of it.

Visit Book Blogs
 I was introduced to this last
week after my weekly yoga class, and already can feel many benefits of a
small 5 minute practice, once a day. But seriously, this can be done
anyway and or anytime, as long as you can do it uninterrupted.
I was introduced to this last
week after my weekly yoga class, and already can feel many benefits of a
small 5 minute practice, once a day. But seriously, this can be done
anyway and or anytime, as long as you can do it uninterrupted.Just 5 minutes of simple Bead meditation can be done whilst waiting in the car for someone, waiting for a bus/train, last thing before bed, even in the loo, or as I do, first thing in the morning, when I know that I should get up soon, but don't want to, just yet. (Warning: probably not a good idea to do it, driving in your car, whilst stopped at traffic lights)
Benefits I have enjoyed from Bead Meditation
Overall calming feelingLess anxiety
More control in crisis or stressful situation
Lower Blood pressure
More sustained attention span and improvement in effortless single focus concentration
Relaxed start to the day
Distractions from run-away thoughts or self-destructive negative thinking
Increased sense of compassion and empathy
Increased energy levels
Improved sense of well-being & self-esteem
The secret seems to be in keeping the mind busy on a single activity, and in doing so, worry and stress can not seep into your consciousness. The mind will try to wander and intrusive thoughts will tug at you, and if this happens, gently bring it back to the task at hand (sorry no pun intended there) Do this as often as you need.
"The mind is harder to control than the wind", it was said. So now, not only can the mind be quieted by having something to do, the movement of your fingers on the beads, gives the body something to do and allows the body to be more content and relaxed.
Prayer beads have a similar purpose, however this is more to do with religious devotion and counting prayers, which is not within my realm to recommend or discuss here. Rather than focusing on spiritual growth, secular meditation techniques such as this, emphasizes stress reduction, relaxation and self-improvement.
Wiki tells us, "Most of the ancient religions of the world have a tradition of using some type of prayer beads as tools in devotional meditation.[125][126][127] Most prayer beads and Christian rosaries consist of pearls or beads linked together by a thread.[125][126] The Roman Catholic rosary is a string of beads containing five sets with ten small beads. Each set of ten is separated by another bead. The Hindu japa mala has 108 beads, as well as those used in Jainism and Buddhist prayer beads.[128] Each bead is counted once as a person recites a mantra until the person has gone all the way around the mala, which is counted as 100, with an extra 8 there to compensate for missed beads.[128] The Muslim mishbaha has 99 beads. Specific meditations of each religion may be different."
Method
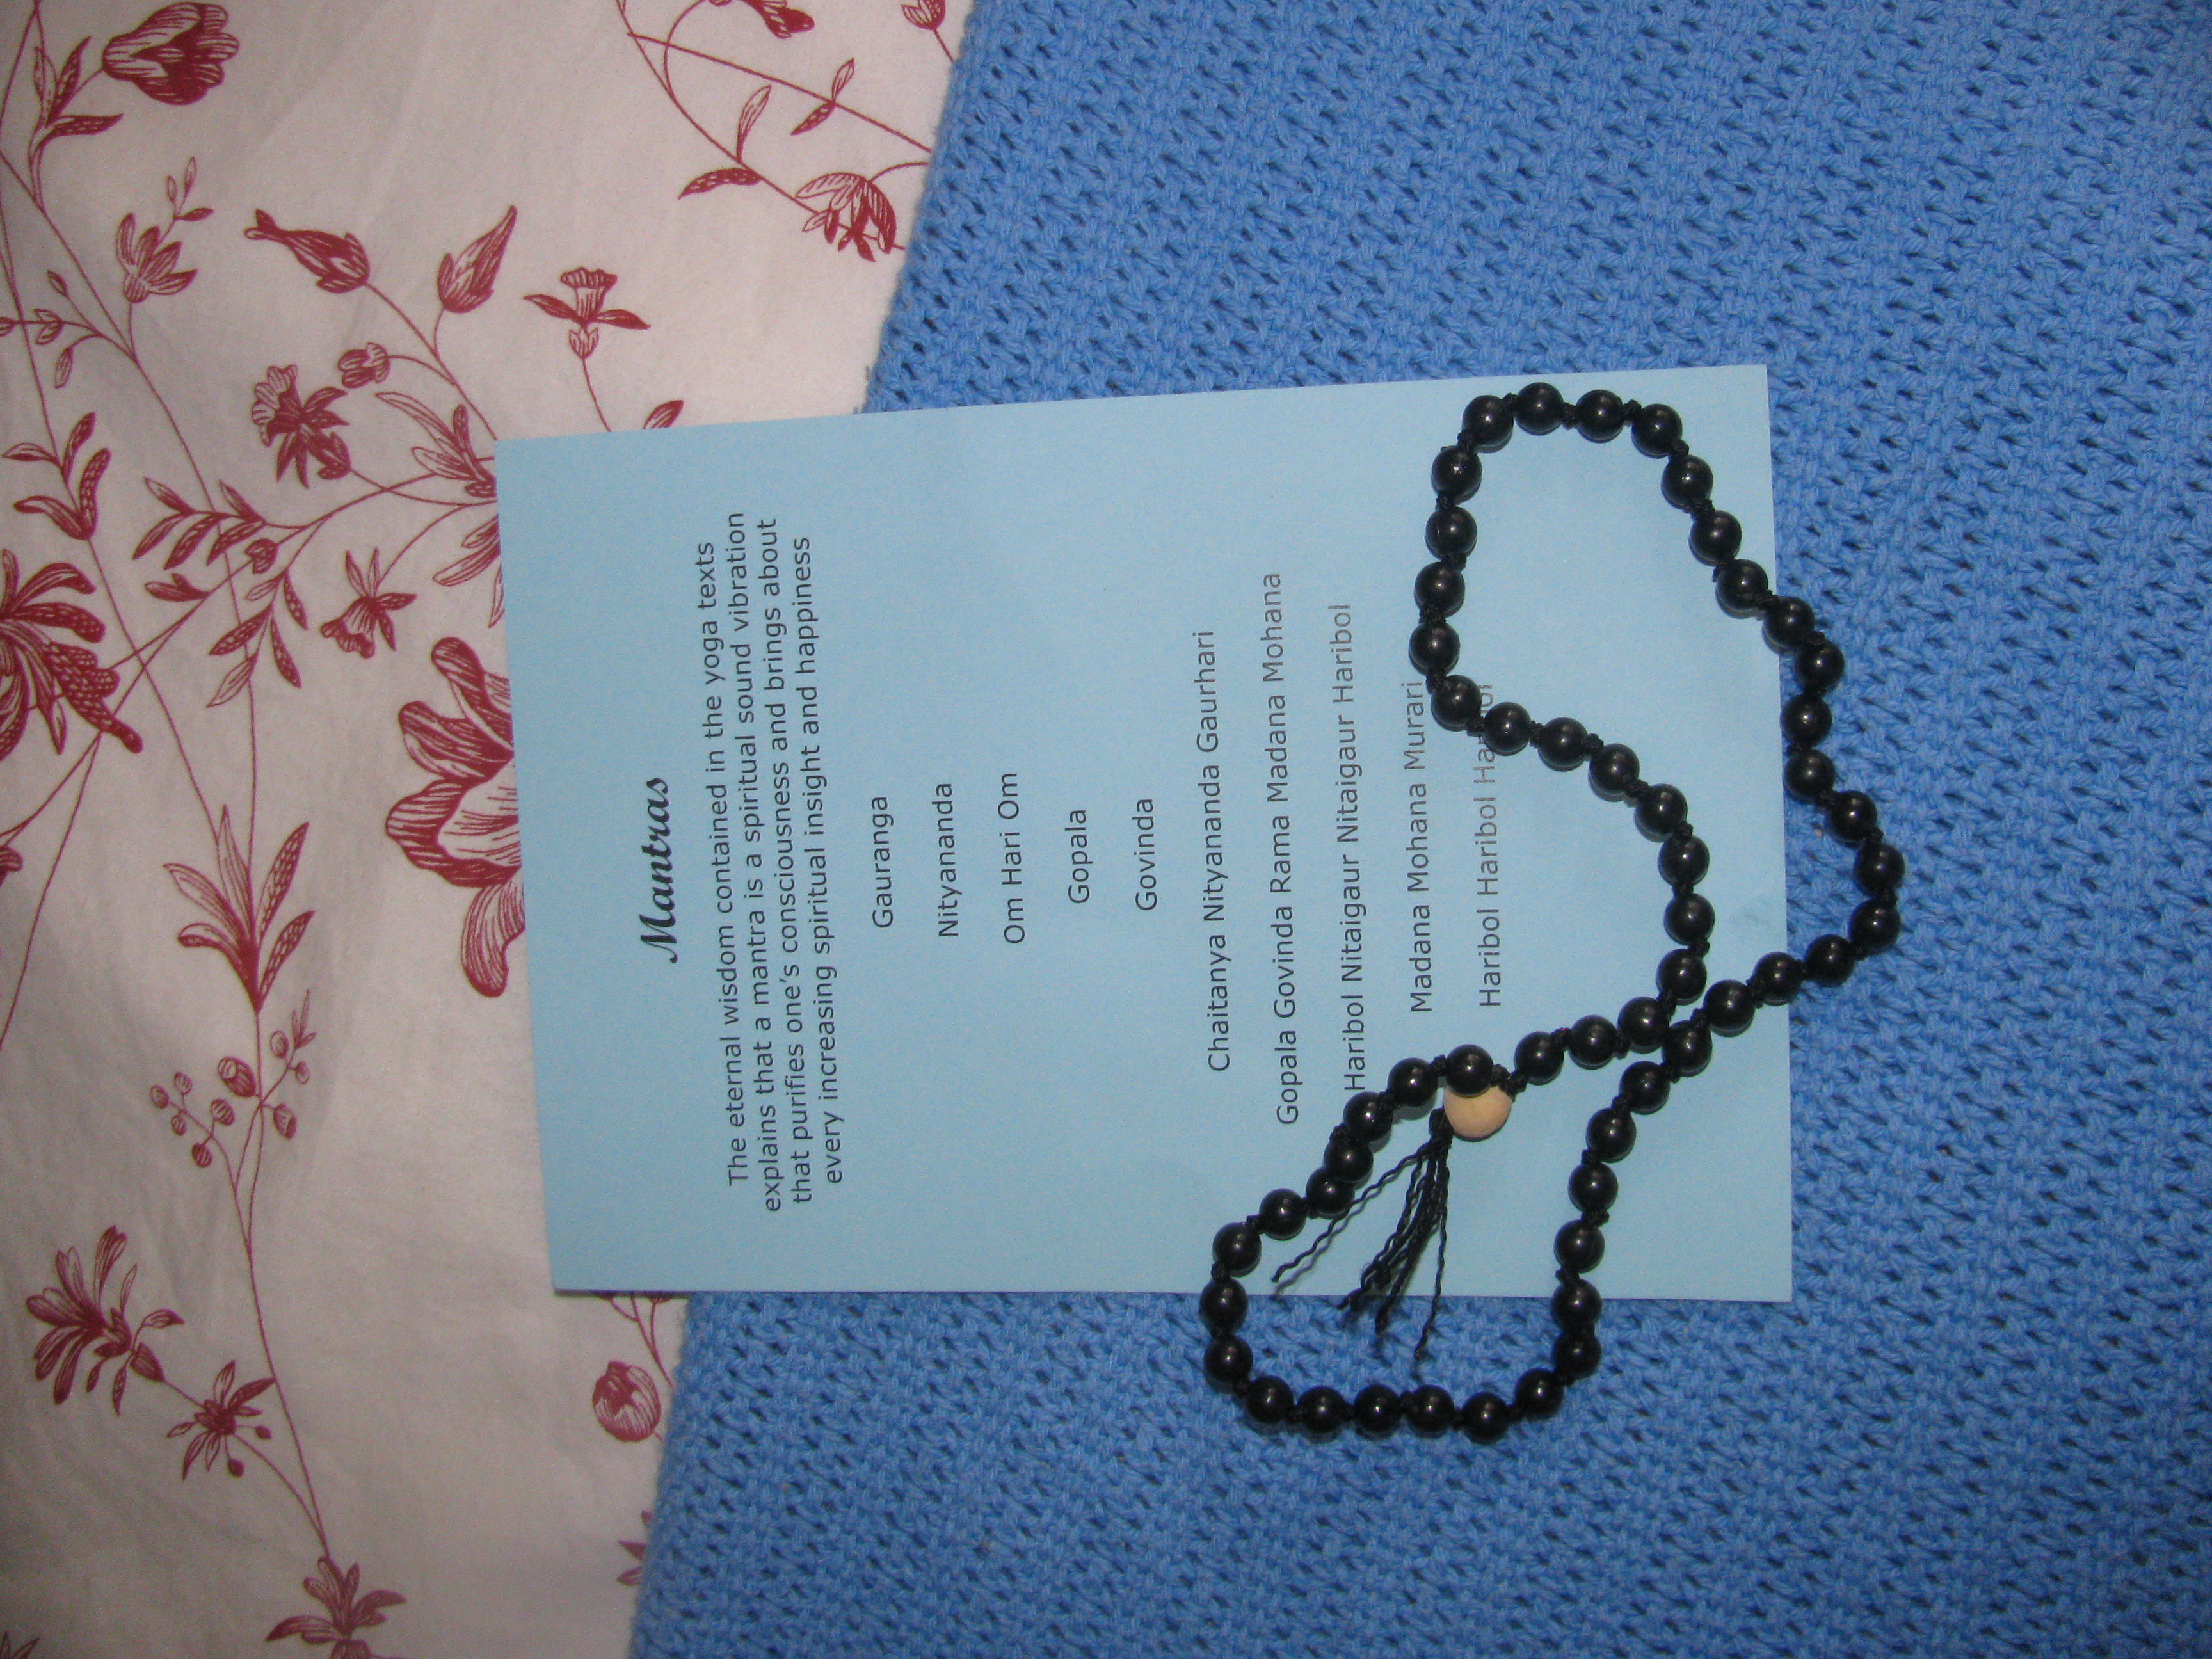
Start with the head bead ( the one that is large and different) and start chanting a mantra of choice ( samples shown below), and with each repetition, move your fingers along to the next bead, and repeat, until you are completely round the circle. If you have time, reverse and do the same back to the head bead again. This depends on how quickly or how slowly you chant the mantra. Choose a mantra that speaks to you.You only have to say the mantra loud enough for you to hear. It is not necessary to sing it, or say it loudly. Don't worry so much about your breathing technique; it is not so important in this form of meditation.
The following passage is reproduced from Wiki and illuminates the scientific basis for claiming health benefits of meditation.
http://en.wikipedia.org/wiki/Meditation
Scientific studies
Meditation has been linked to a variety of health benefits. A study of college students by Oman et al. (2008) found that meditation may produce physiological benefits by changing neurological processes. This finding was supported by an expert panel at the National Institutes of Health. The practice of meditation has also been linked with various favourable outcomes that include: “effective functioning, including academic performance, concentration, perceptual sensitivity, reaction time, memory, self-control, empathy, and self-esteem.”(Oman et al., 2008, pg. 570) In their evaluation of the effects of two meditation-based programs they were able to conclude that meditating had stress reducing effects and cogitation, and also increased forgiveness. (Oman et al., 2008)In a cross-sectional survey research design study lead by Li Chuan Chu (2009), Chu demonstrated that benefits to the psychological state of the participants in the study arose from practicing meditation. Meditation enhances overall psychological health and preserves a positive attitude towards stress. (Chu, 2009)
Mindfulness Meditation has now entered the health care domain because of evidence suggesting a positive correlation between the practice and emotional and physical health. Examples of such benefits include: reduction in stress, anxiety, depression, headaches, pain, elevated blood pressure, etc. Researchers at the University of Massachusetts found that those who meditated approximately half an hour per day during an eight week period reported that at the end of the period, they were better able to act in a state of awareness and observation. Respondents also said they felt non-judgmental. (Harvard’s Women’s Health Watch, 2011)
"Meditation as Medicine" (American Academy of Neurology) [150] cites scientific evidence from various studies which claim that meditation can increase attention span, sharpen focus, improve memory, and dull the perception of pain. The article lists as common types of meditation: Attention Meditation, Mindfulness Meditation, Passage Meditation and Benevolent Meditation.
A review of scientific studies identified relaxation, concentration, an altered state of awareness, a suspension of logical thought and the maintenance of a self-observing attitude as the behavioral components of meditation;[67] it is accompanied by a host of biochemical and physical changes in the body that alter metabolism, heart rate, respiration, blood pressure and brain activation.[46][152] Meditation has been used in clinical settings as a method of stress and pain reduction. Meditation has also been studied specifically for its effects on stress.
Mantras
The eternal wisdom contained in the yoga texts explains htat a mantra is a spiritual sound vibration that purifies one's consciousness and brings about ever increasing spiritual insight and happiness.Gauranga
Nityananda
Om Hari Om
Gopala
Govinda
Chaitanya Nityananda Gaurhari
Gopala Govinda Rama Madana Mohana
Haribol Nitagaur Nitaigaur Haribol
Madana Mohana Murari
Haribol Haribol Haribol
Some people feel this is an alien concept and take it like medicine, and other embrace it wholeheartedly. I shall ponder on what you will make of it.
Visit Book Blogs
Orange Cake Recipe - Afternoon tea Cake
10 minute Processor Orange Cake
Reminescing about my Danish Grandmother who always used to cook a fresh Orange cake for Sunday afternoon tea, I remembered how, as children,my brother and I loo
 ked forward to visiting her house as the aroma of fresh home bake would come wafting out the door, when we arrived.
It is important to anyone can abandon convenience food a.k.a. supermarket style prepared cakes, in favour of a mouth-watering freshly baked treat for afternoon tea, and know that it is not difficult nor time consuming. I think this cake took me less than 10 minutes to cook, due to speedy preparation in the processor. Then you simply wait for the oven timer to ring, and voila!
Just perfect for a lazy Sunday afternoon tea, this quick and easy recipe will have your family's mouth watering for more. Apart from the sugar content, and a small amount of necessary butter,there are no extra unhealthy ingredients; plus it has the advantage of a bit of Vitamin C and delightful orange flavour.
A cake that is good for you! Yay!
No need to add any frosting or topping, just eat it warm out of the oven.
Of course, if you wish a dusting of vanilla/icing sugar, or a cream cheese frosting would be a nice option,if you aren't counting calories.
Ingredients:
1 cup Castor or fine grain sugar
1 Cup Self Raising flour ( or 1 cup plain flour and 2 tsp baking powder)
2 tablespoon extra of plain flour

2 tsp grated orange rind
1/2 cup orange juice
60 g soft butter
2 eggs
Method:
1. Combine sugar, flours, and orange rind in processor with butter. Process till just combined.
2. Pour Orange juice through the chute with motor on.
3. Add eggs and blitz till smooth.
4. Pour into well greased bar tin ( base 12 x 22cm or 5 x 9inch) that has base lined with greaseproof paper.
5. Bake Moderate Oven 40 minutes or till top springs back when lightly pressed.
Cool 5 minutes in tin before turning out on wire rack to cool.
Visit Book Blogs
Sunday, October 21, 2012
Five Minute Appetizing Salad

Click here http://wp.me/p1KAF8-kI you could make it in just under 5 minutes.
Organic Cos Lettuce, torn roughly.
Red Oakleaf Lettuce
Capsicum ( Red )
Lebanese cucumber
Tomato, quartered
Spanish Olives
Marinated feta cubes ( or use fresh feta with accompanying herbs and olive oil)
Alfalfa sprouts to garnish
Optional extra:
Blanched asparagus
Chop fresh asparagus into 2 inch pieces and plunge into boiling water for 2-3 minutes. Refresh in chilled or cold water til cool, and then add to salad.
If you are counting calories, forget the dressing! Anyhow, the marinated feta gives it enough flavour!
A simple appetizing salad that looks impressive, but is so simple, it is a piece of cake!!! Salad like cake is something to ponder about!
Friday, October 12, 2012


Now that summer is here, I have had a yearning for salad, and for that one needs fresh vegetables, and fruits. The fresher the better. Quite frankly, the supermarkets “fresh” food section is at times a joke, with wilted lettuce, browning fruit and potatoes rotting from the inside out.
My solution: Grow my own Salad
Also a great way to save money. A packet or seeds/seedlings is around $5.00 and the produce you get from that would be multiplied by a factor of 10! This method can be used in a raised garden bed, pot or garden soil.
Step 1. In the garden: Dig a garden bed and enrich with decomposed compost if you have it, otherwise buy some manure from the garden shop and let sit for a few days. Turn over once a day to encourage nutrient release into the soil. If using a pot, choose a good quality potting mix. Raised bed can be made with newspapers and straw.
Step 2. Purchase some seeds of the salad ingredients. I chose beans, capsicum ( peppers ), Cos lettuce and tomatoes and parsley/basil/mint. These are the easiest to grow and are reasonably insect resistant. I also bought some whole green onions or shallots, with root intact. They can be planted straight in the garden and can be harvested within a few days to one week! Instant food, and renewable as one just cuts the tops off and leave them to keep growing.
Step 3. Drill a row into the soil about 5- 10 cm deep depending whether you have a seedling or a seed to plant. I like order in my garden, so that I can distinguish between week and newly erupted seedling, so I put all the same type of plants together. I do consider companion planting to help keep the pests at bay. Basil is great with tomatoes and nasturtiums can add colour, nutrients to the soil and deter pests. Place seedlings, or 2 -3 seeds in each hole/allocated spot allowing for a gap of about 20 cm between each.
Step 4. Cover roots with soil and press gently around the stem of the seedlings. Lightly mist with hose, or water moderately well. Don’t soak with water at this stage. Watering in the cool of the evening or early morning is preferable. Watering in the heat of the day sometimes results in burnt foliage (not a good look in the salad).
Step 5. With a good watering on a daily basis, you should start to see growth within days, and perhaps the eruption of the bean seeds. It is amazingly quick! You may have the odd death, but this is the reason why you put 2 or 3 seeds in each hole, so you can weed out the sickly plants and keep the stronger ones ( survival of the fittest!)
Step 6. Three weeks later, the Cos lettuce seedling will be thriving and can be harvested taking leaves from the outside first – then they will continue to grow from the centre and replenish themselves quickly after harvest.


It takes but a minute to harvest the cos lettuce (and tomatoes when they ripen) from the garden to make a simple side salad, add some parsley / basil / beans and you have a light lunch.
Tabouli is another salad I will look forward to making with mint ( which grows itself it is so hardy!) * tomatoes, parsley and onions.
* It is a good idea to put the mint in a separate large pot or garden as it has invasive roots and does tend to take over if you let it!
I will ponder about other potential plants to grow and eat whilst watering the garden tonight.
Monday, October 8, 2012
Travel Diary - Part 8 - Salzburg to Innsbruck
A sunny but cool day, ( perfect weather for me) greeted us as we set off from Salzburg, along the Salach River, travelling for the most part, along roads fringing the Bavarian Alps. 'Ach' means water from the glacier, so you can imagine the colour of this particular river. It was an ice blue, from the particles of small rock washed down from the glacier. Just beautiful. Austria, on the whole, is such a delightful country, so pretty and not well known in my part of the world. I guess it struggles a little economically, particularly with the spectre of the current GFC breathing down its neck, and thus I often saw the sign “zimmerfrei” for rent on the village houses. Much prefer this to a hotel style accomodation don’t you? These houses are full of character.
Our guide and bus driver had colluded together to see if they could find us some snow to look at, along the way to Innsbruck, as we were all looking forward to a winter wonderland, which had not as yet, arrived as yet. So they took us along a back road through Bad Reichenhall and the Lofer Mountains, magnificient Tirolean scenery, along ski road and lodges, dotted here and there with artificial snow, made from machines. Well, I guess that they had to have something for the early winter guests to do?!!! I was happy to see any white stuff, frankly....
The Castle Fratzholz ?sp is found here, in the Tirolean region. It was the where the Nazi's stored much of the famous paintings/works of art stolen from Europe during Hitler’s reign. I noticed the Tirolean churches here are mainly comprising a Baroque form, with a round chancel (is this called the chancel or the nave?) comprising the altar area. Really like out of a Grimm's Fairy tale.
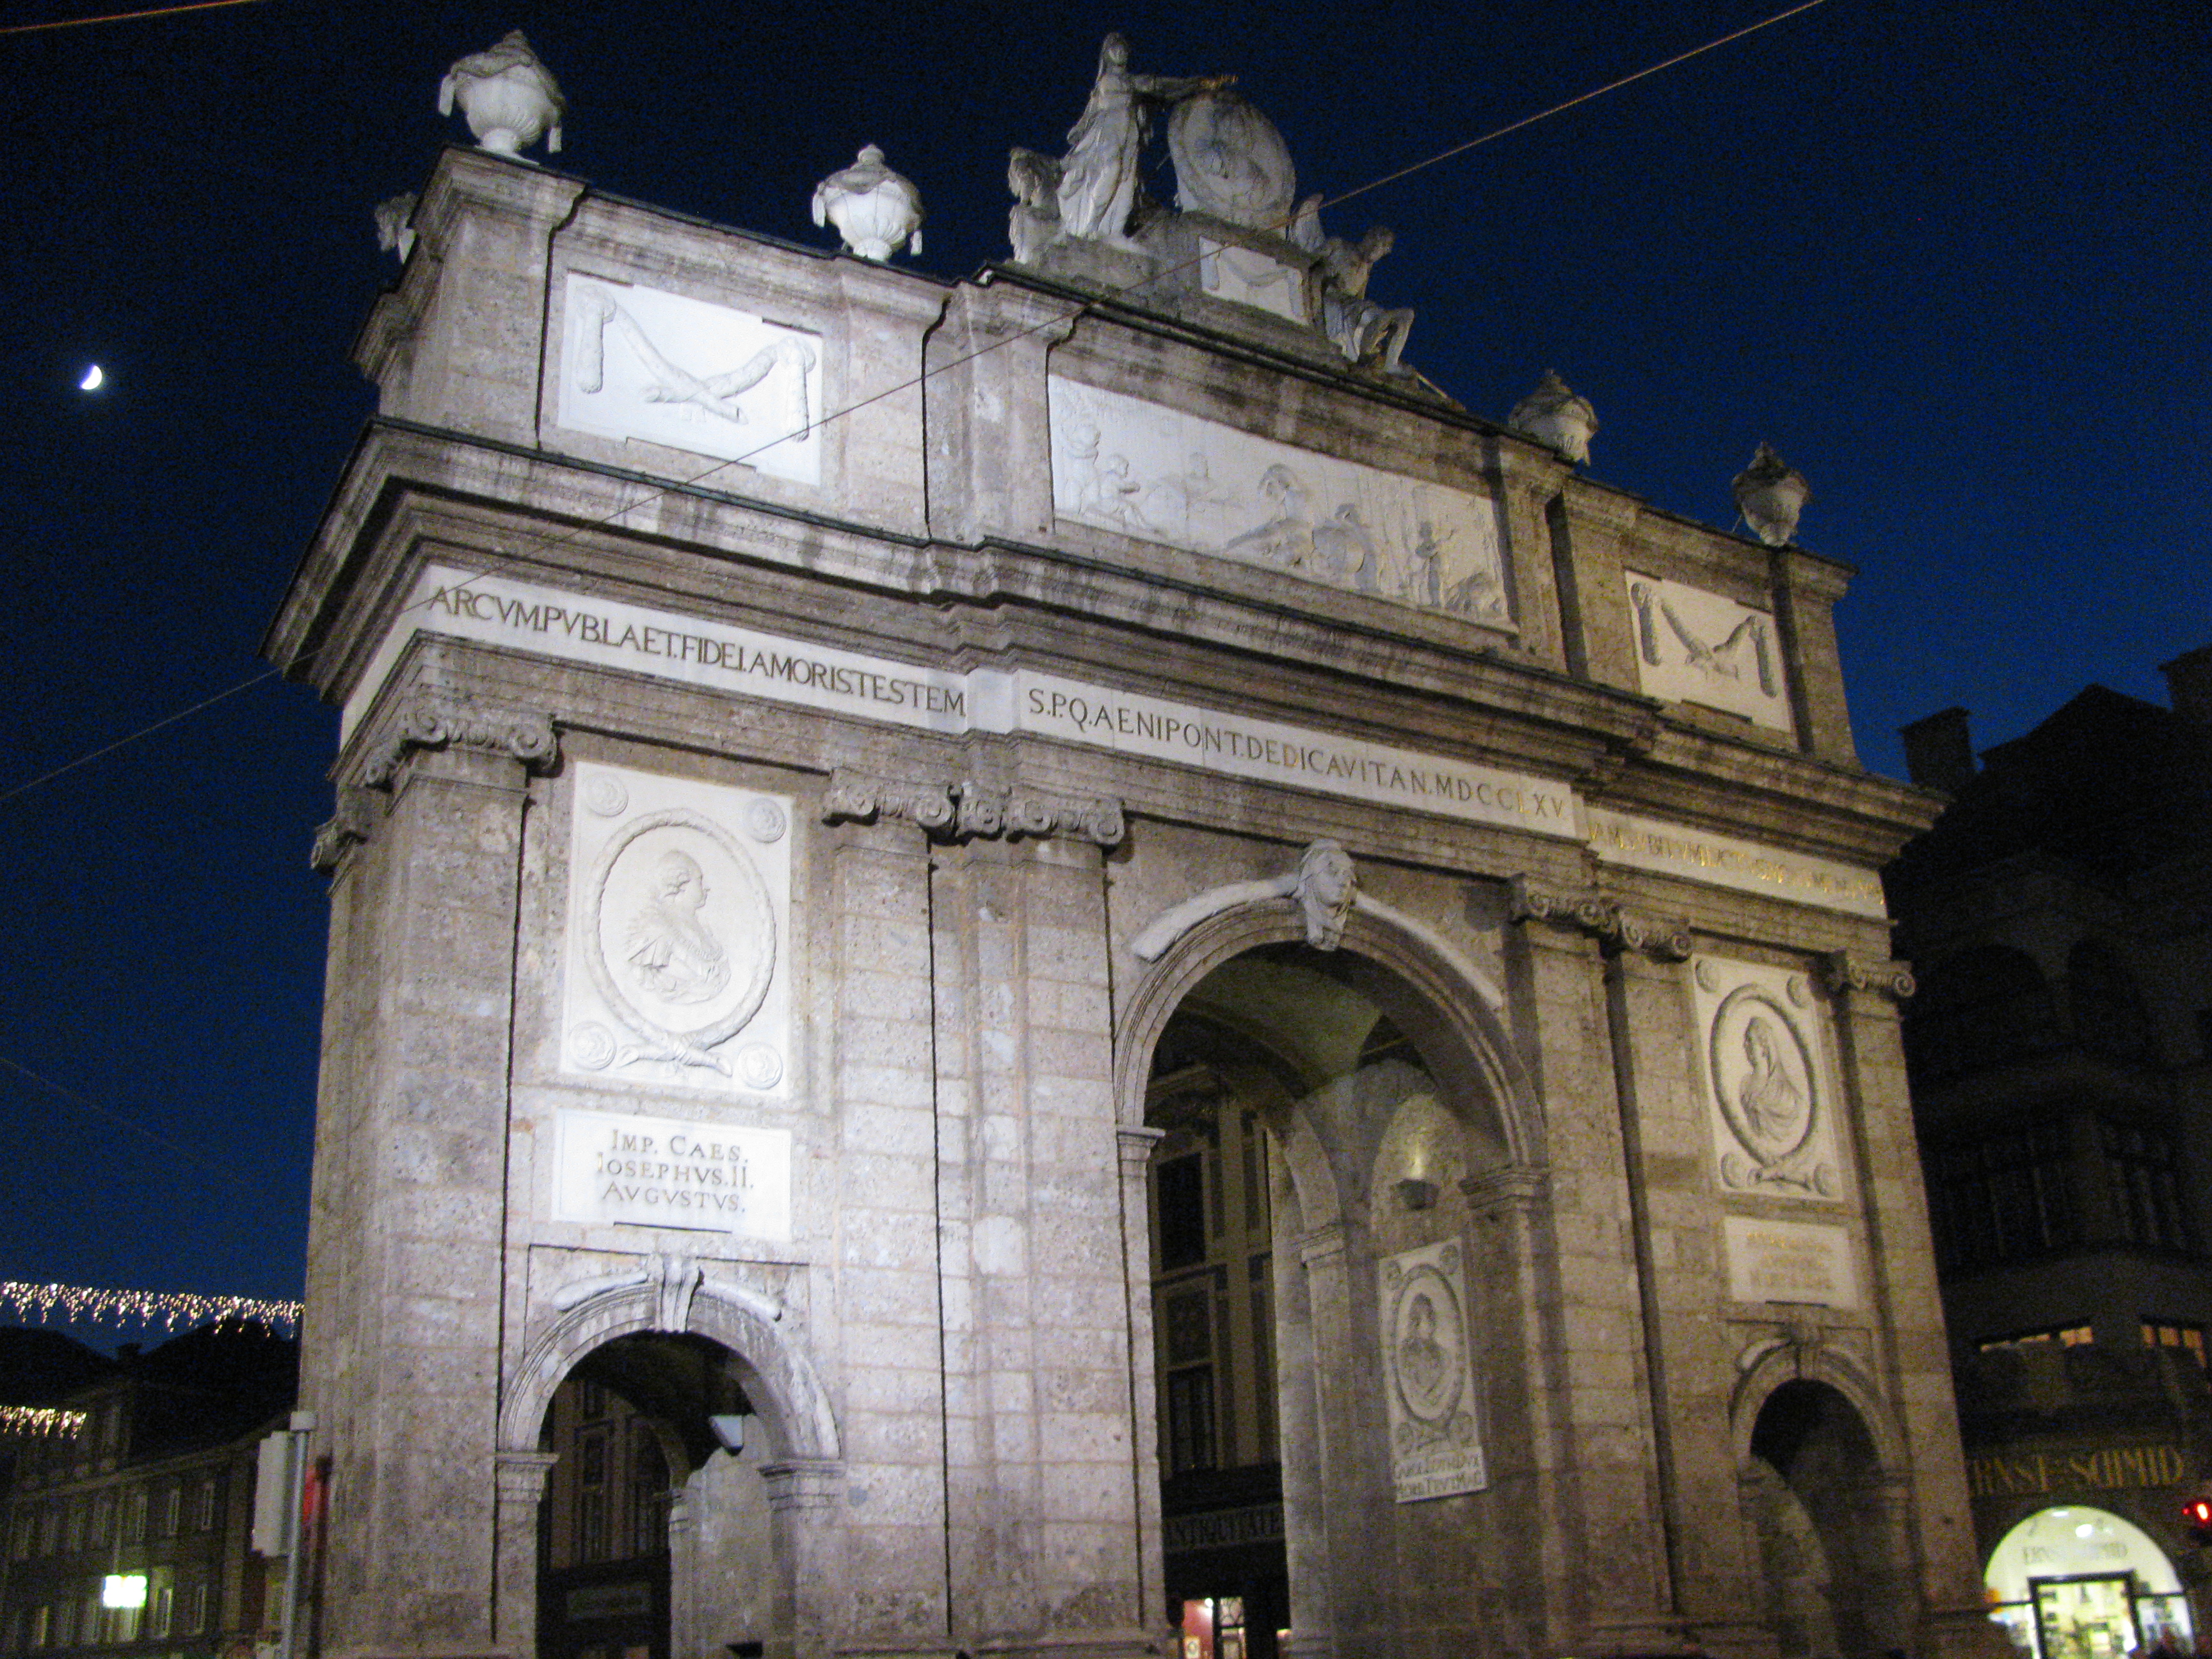
Historically, the Hapsburgs ruled Austria and Innsbruck in the 1200′s right up to the 1500/1600′s. This was a time of Roman Empress Maria Teresa, and the triumphal arch situated at the south end of Maria-Theresien Straße, which was modeled after roman archetypes, was built by the Empress on occasion of the marriage of her son, the Duke of Tuscany, later Emperor Leopold II, to Maria Ludovica from Spain. The marble reliefs were created by Balthasar Moll in 1744. The ones on the south side show Leopold and his bride Ludovika, the ones on the north show Empress Maria Theresia and her beloved husband, Francis I Stephen of Lothringen, who sadly died during the celebrations. Times have not always been so rosy since, however. Despite losing almost all its territory and empire during WWI, there are still some success stories in Austrian business. Red Bull, Geiger, and Swarovski are all Austrian companies.
Innsbruck has a population of 118.000 and is at 1,985 ft /605 m above sea level. Entering Innsbruck, you can't help escape seeing the enormous Ski Jump and the Patscherkofel Mountain which we guessed, most of the skiing takes place. This is 7,381 ft or 2250 m, and I imagine there would be heaps of black runs or skiing off piste!!!
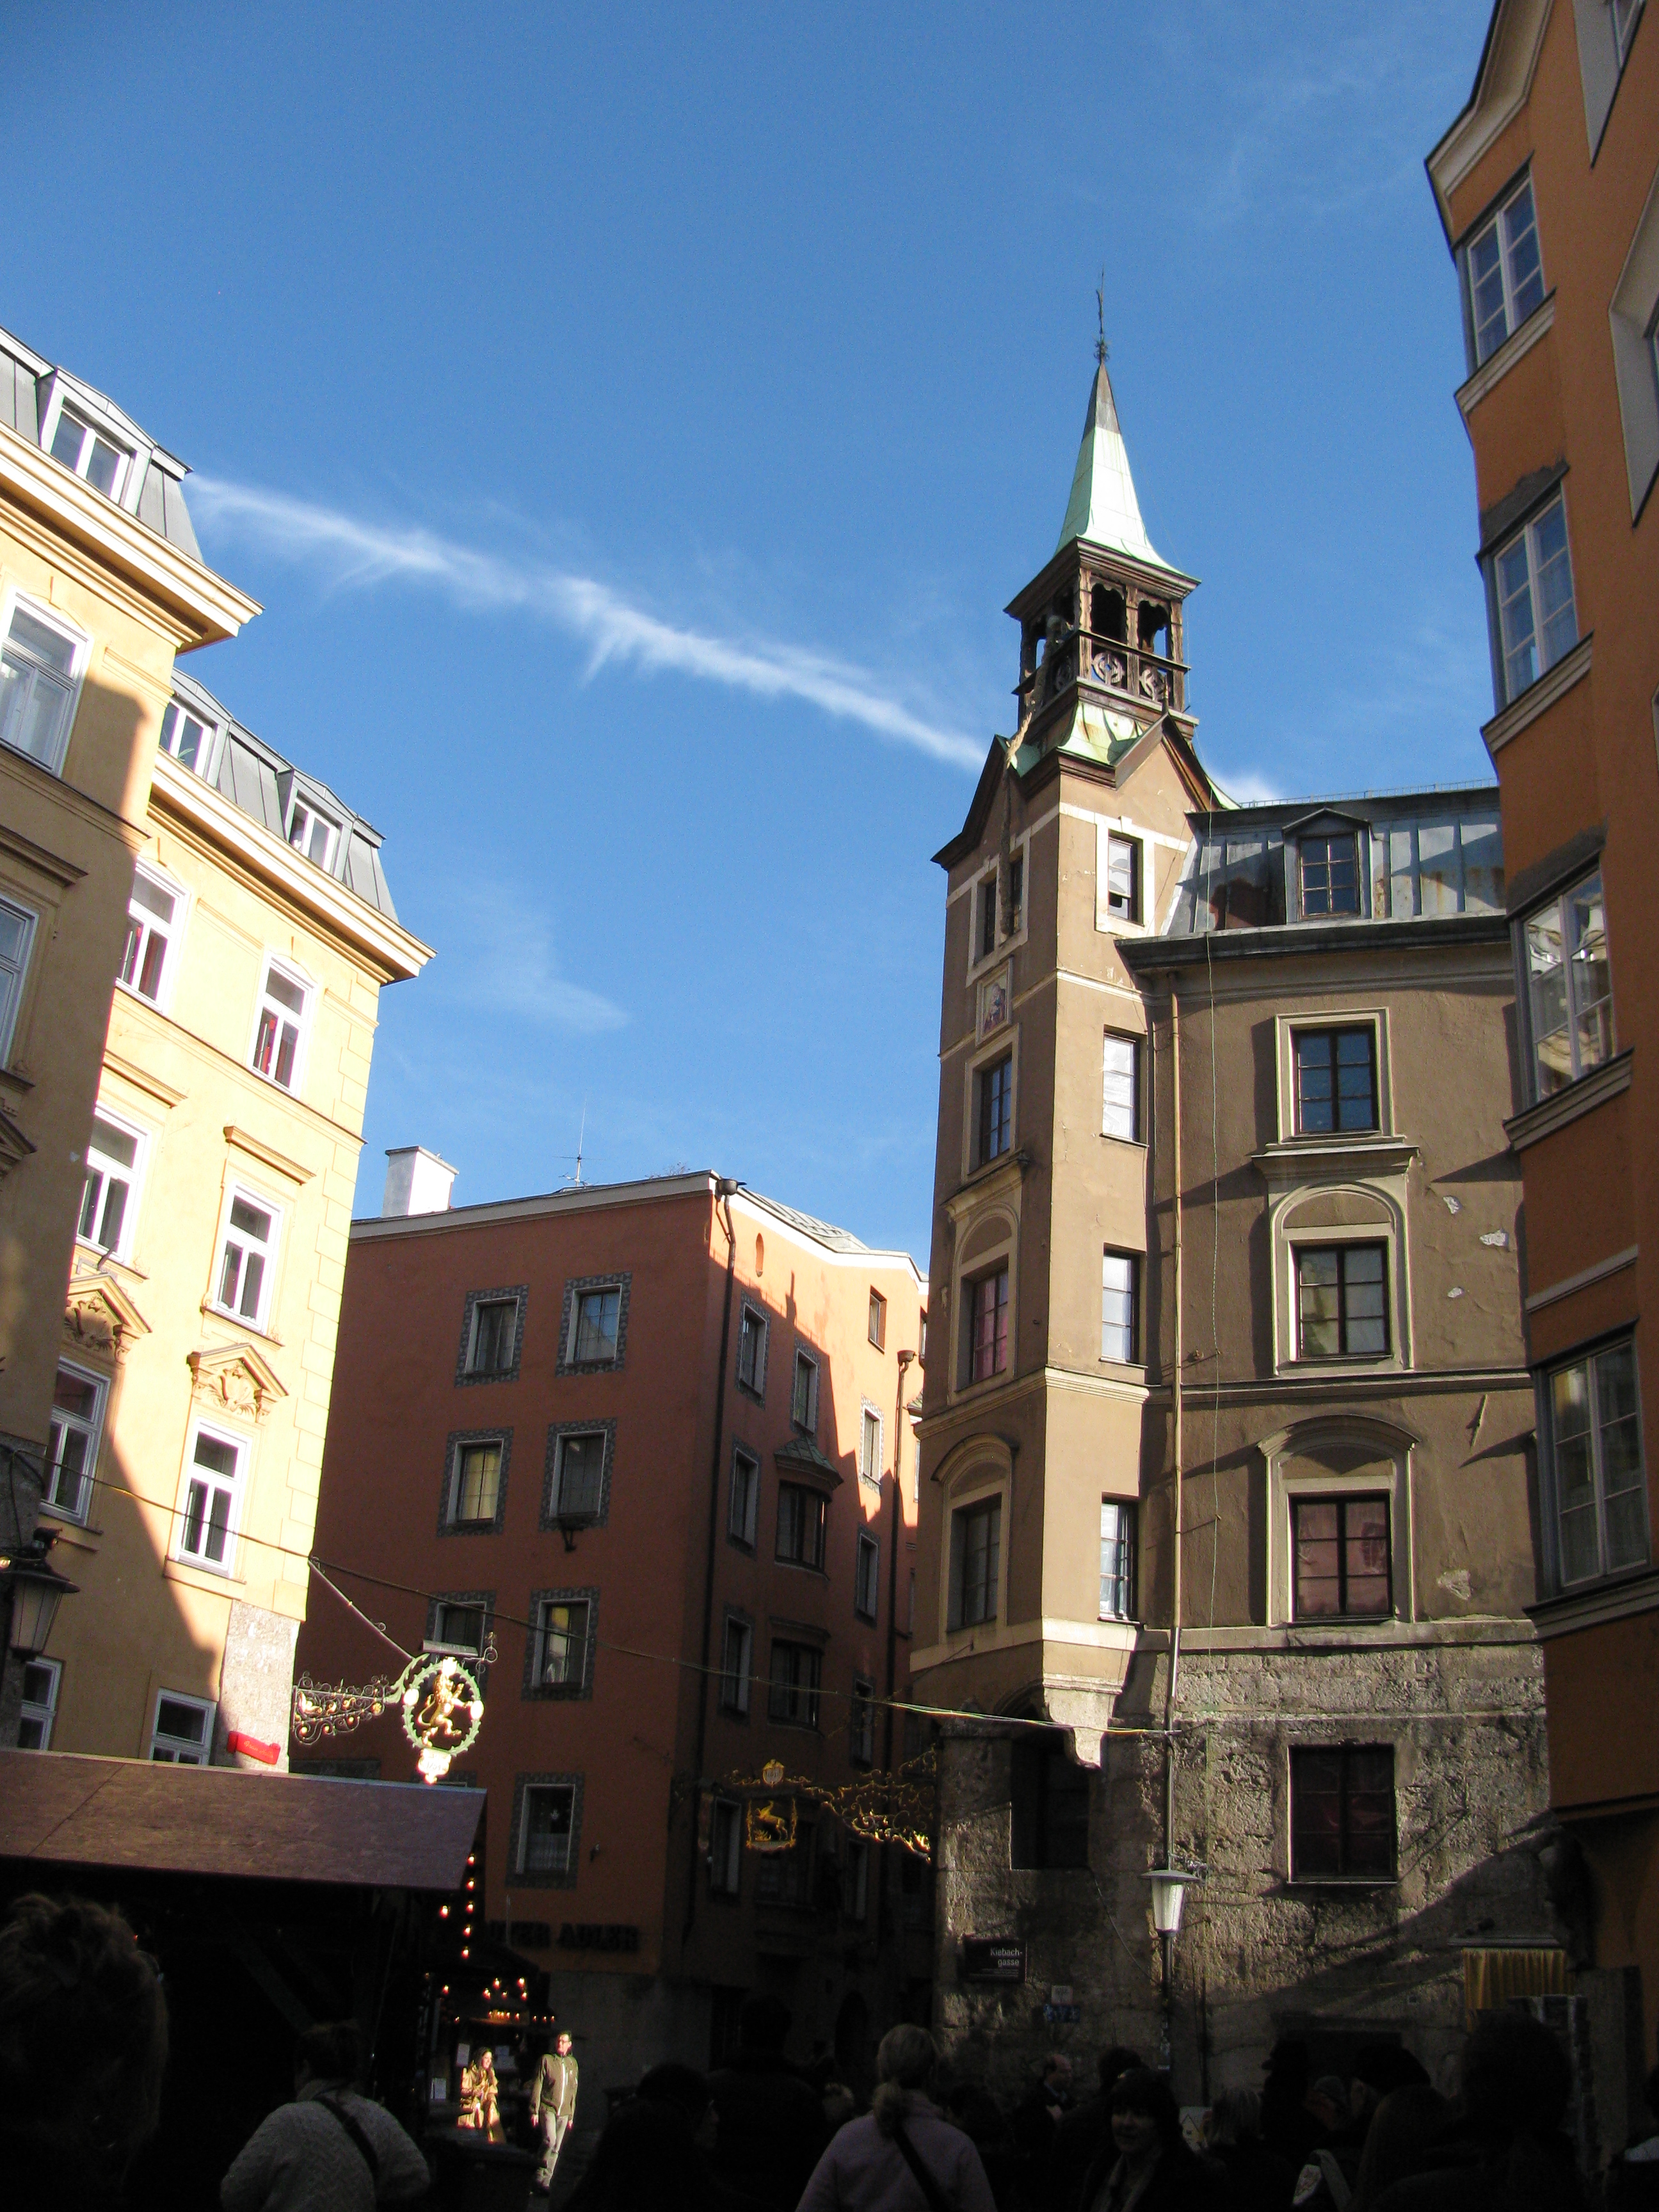
Arriving in Innsbruck there was loads of free time in the old town doing the mandatory tour of the old pedestrian streets and arcades, seeing the famous Golden Roof, made from 2657 golden plated tiles and all those fabulous Rococco buildings. . The areas around Innsbruck were, for many years, mined for metals, and this was the source of the economic base for the development of the Austrian empire. No doubt some of the gold from the Innsbruck hills, made its way into those 2657 golden tiles). Our hotel was centrally located right next to the Triumphal Arch an architectural remnant of Maria Therese’s reign.

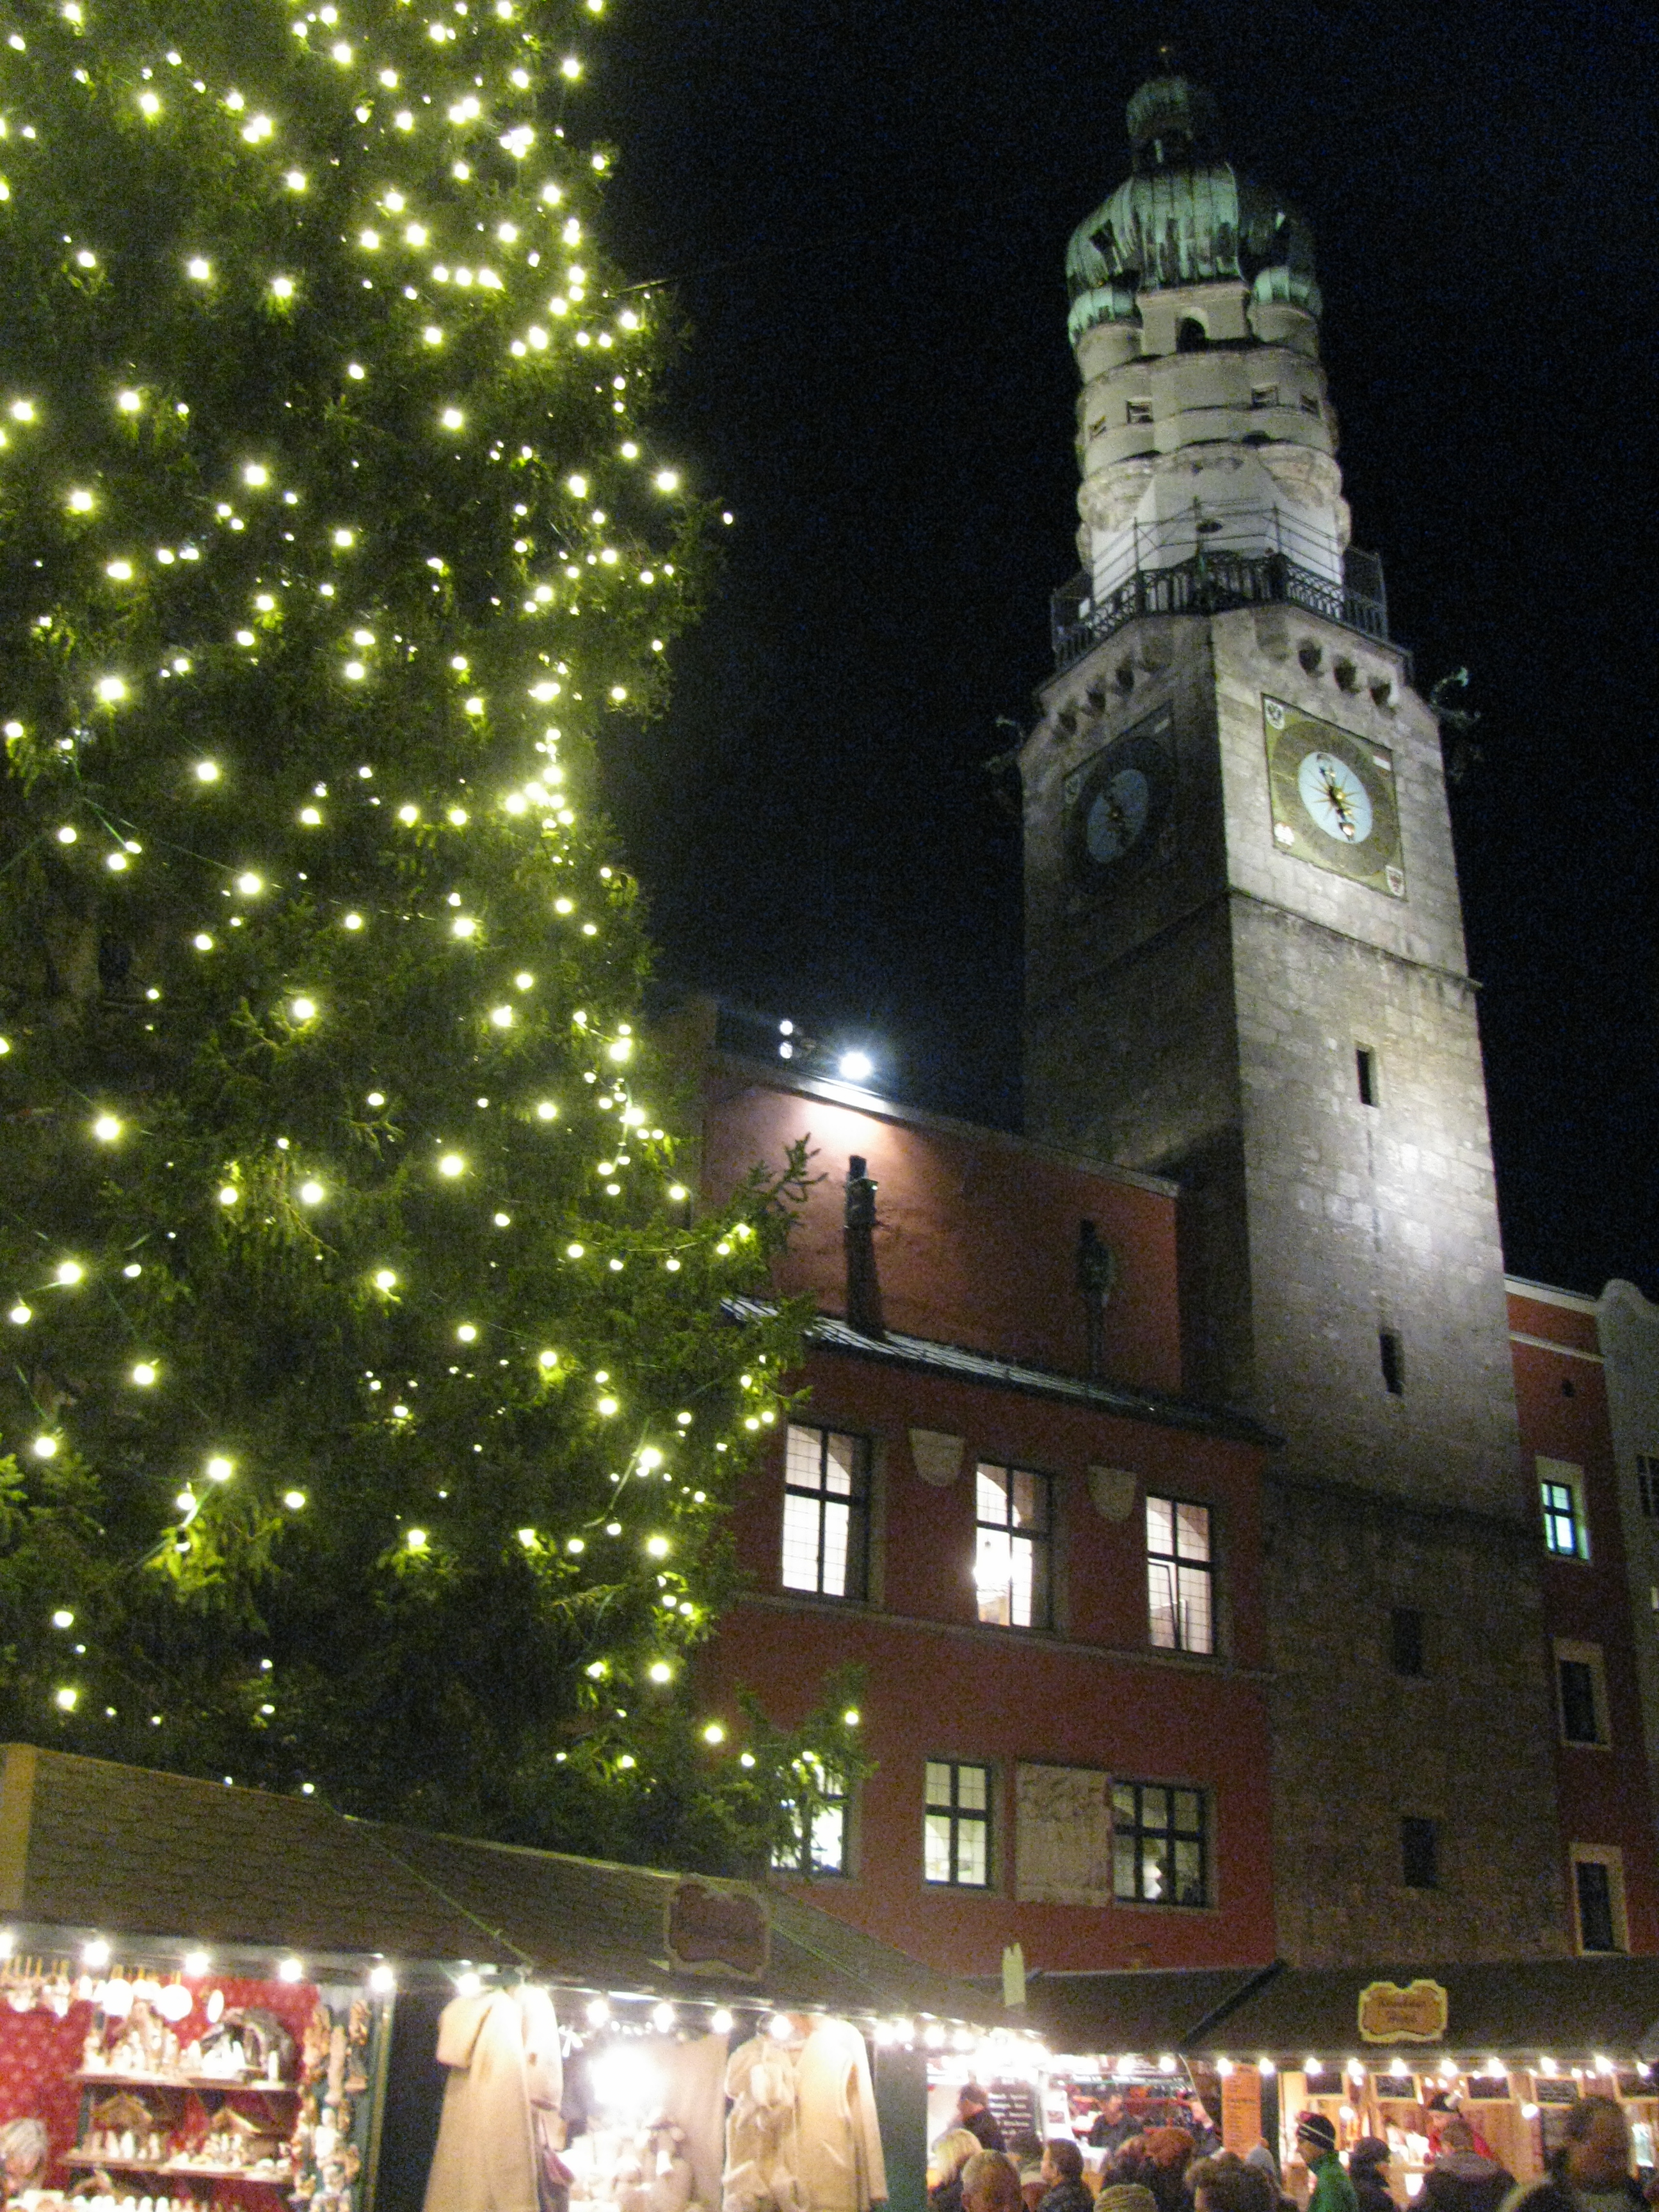
There was a lovely atmosphere to be found in these streets, as the Christmas markets predominated already in early November. I found a great soft leather wallet, with just the right amount of compartments at one store, for a fraction of the price I would pay at home at a street stall in the Xmas market. On the whole, the shops were expensive by home standards, but in the pedestrian street, you will find some department stores with bargains on certain items. I found a fabulous Kugelhof cake tin for a mere pitance. Some beautiful fabric too: elegantly patterned monochromatic Christmas tablecloth fabric, of the likes completely unobtainable in Australia.
There are often street entertainers too, some are a little strange, like two guys dressed as a Madonna and child and ?feminine male partner?? Still a bit confusing for me....

When searching for a replacement piece of luggage (damaged by porters!) in an Innsbruck retailer, we found the most amazing folk art painted cupboards and dresser, painted in 'Alpbachtal' style. The shopkeeper told me that she had already had one dresser restored, but she was not happy with the results of that restoration, as she felt it did not do the art justice, so even though her other cupboard is dark and has been antiqued by age, she will not have it restored, as it will still retains the special beauty of the original brushstrokes. I think I agreed with her.

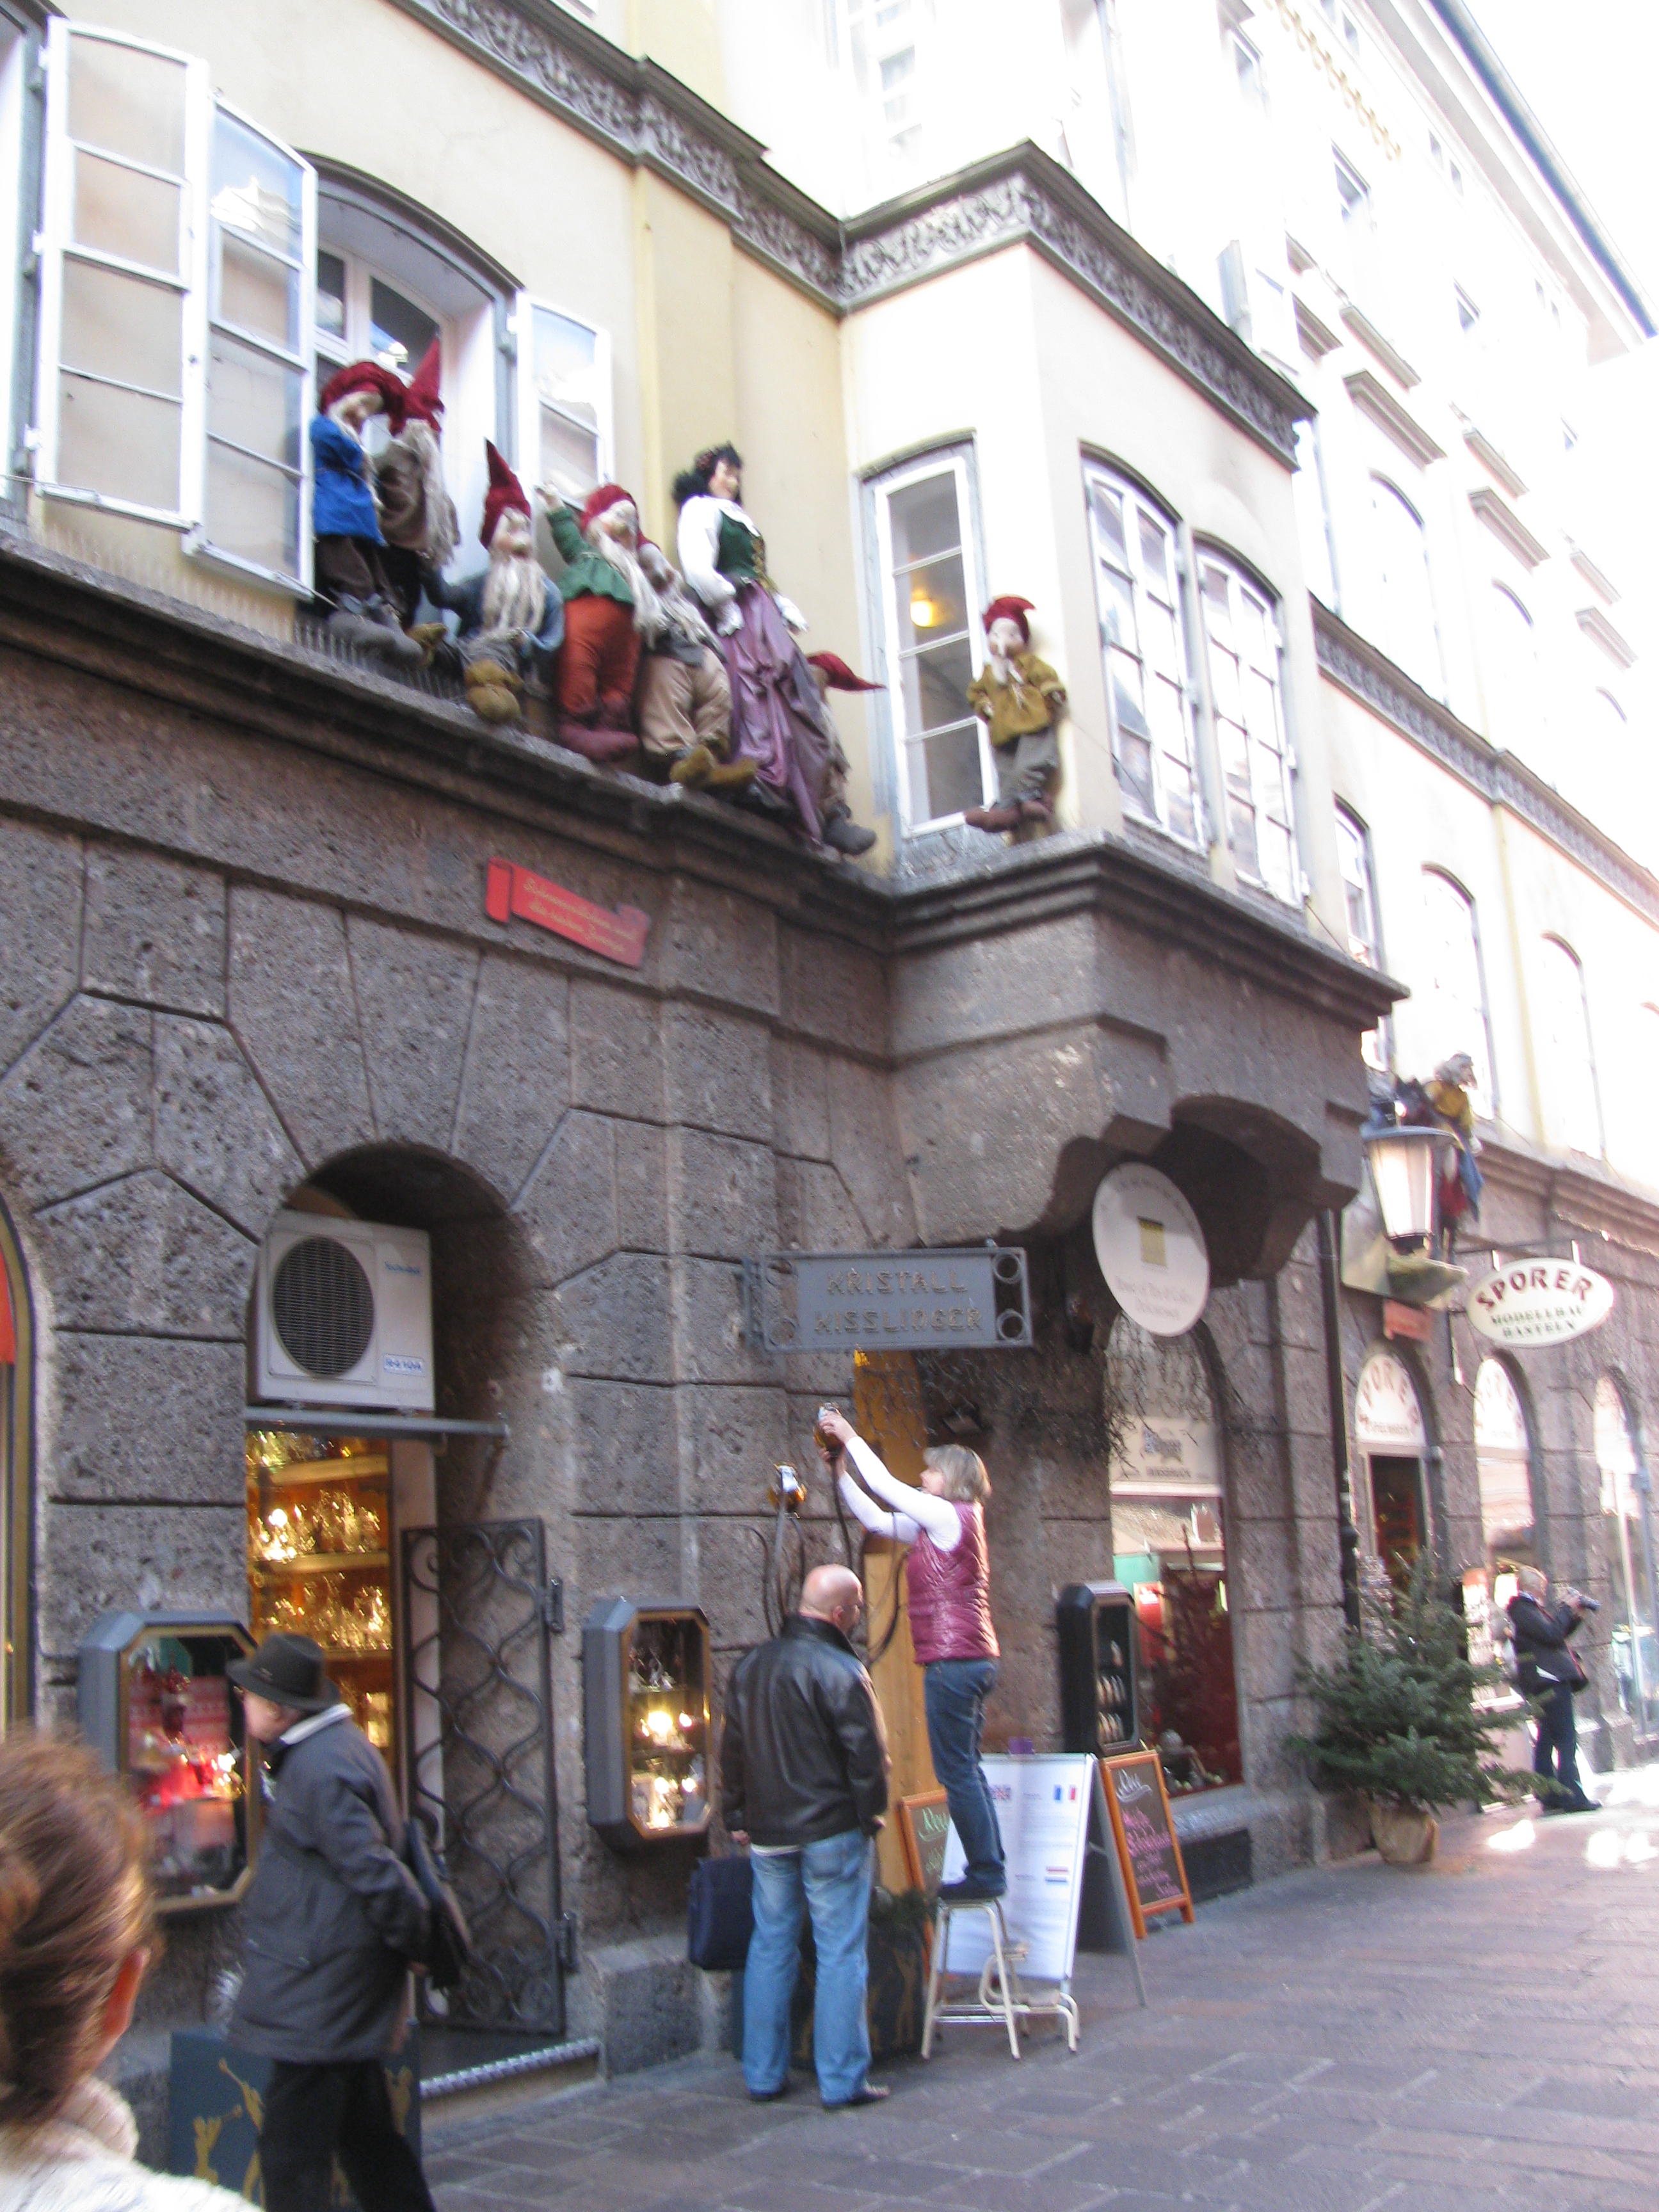
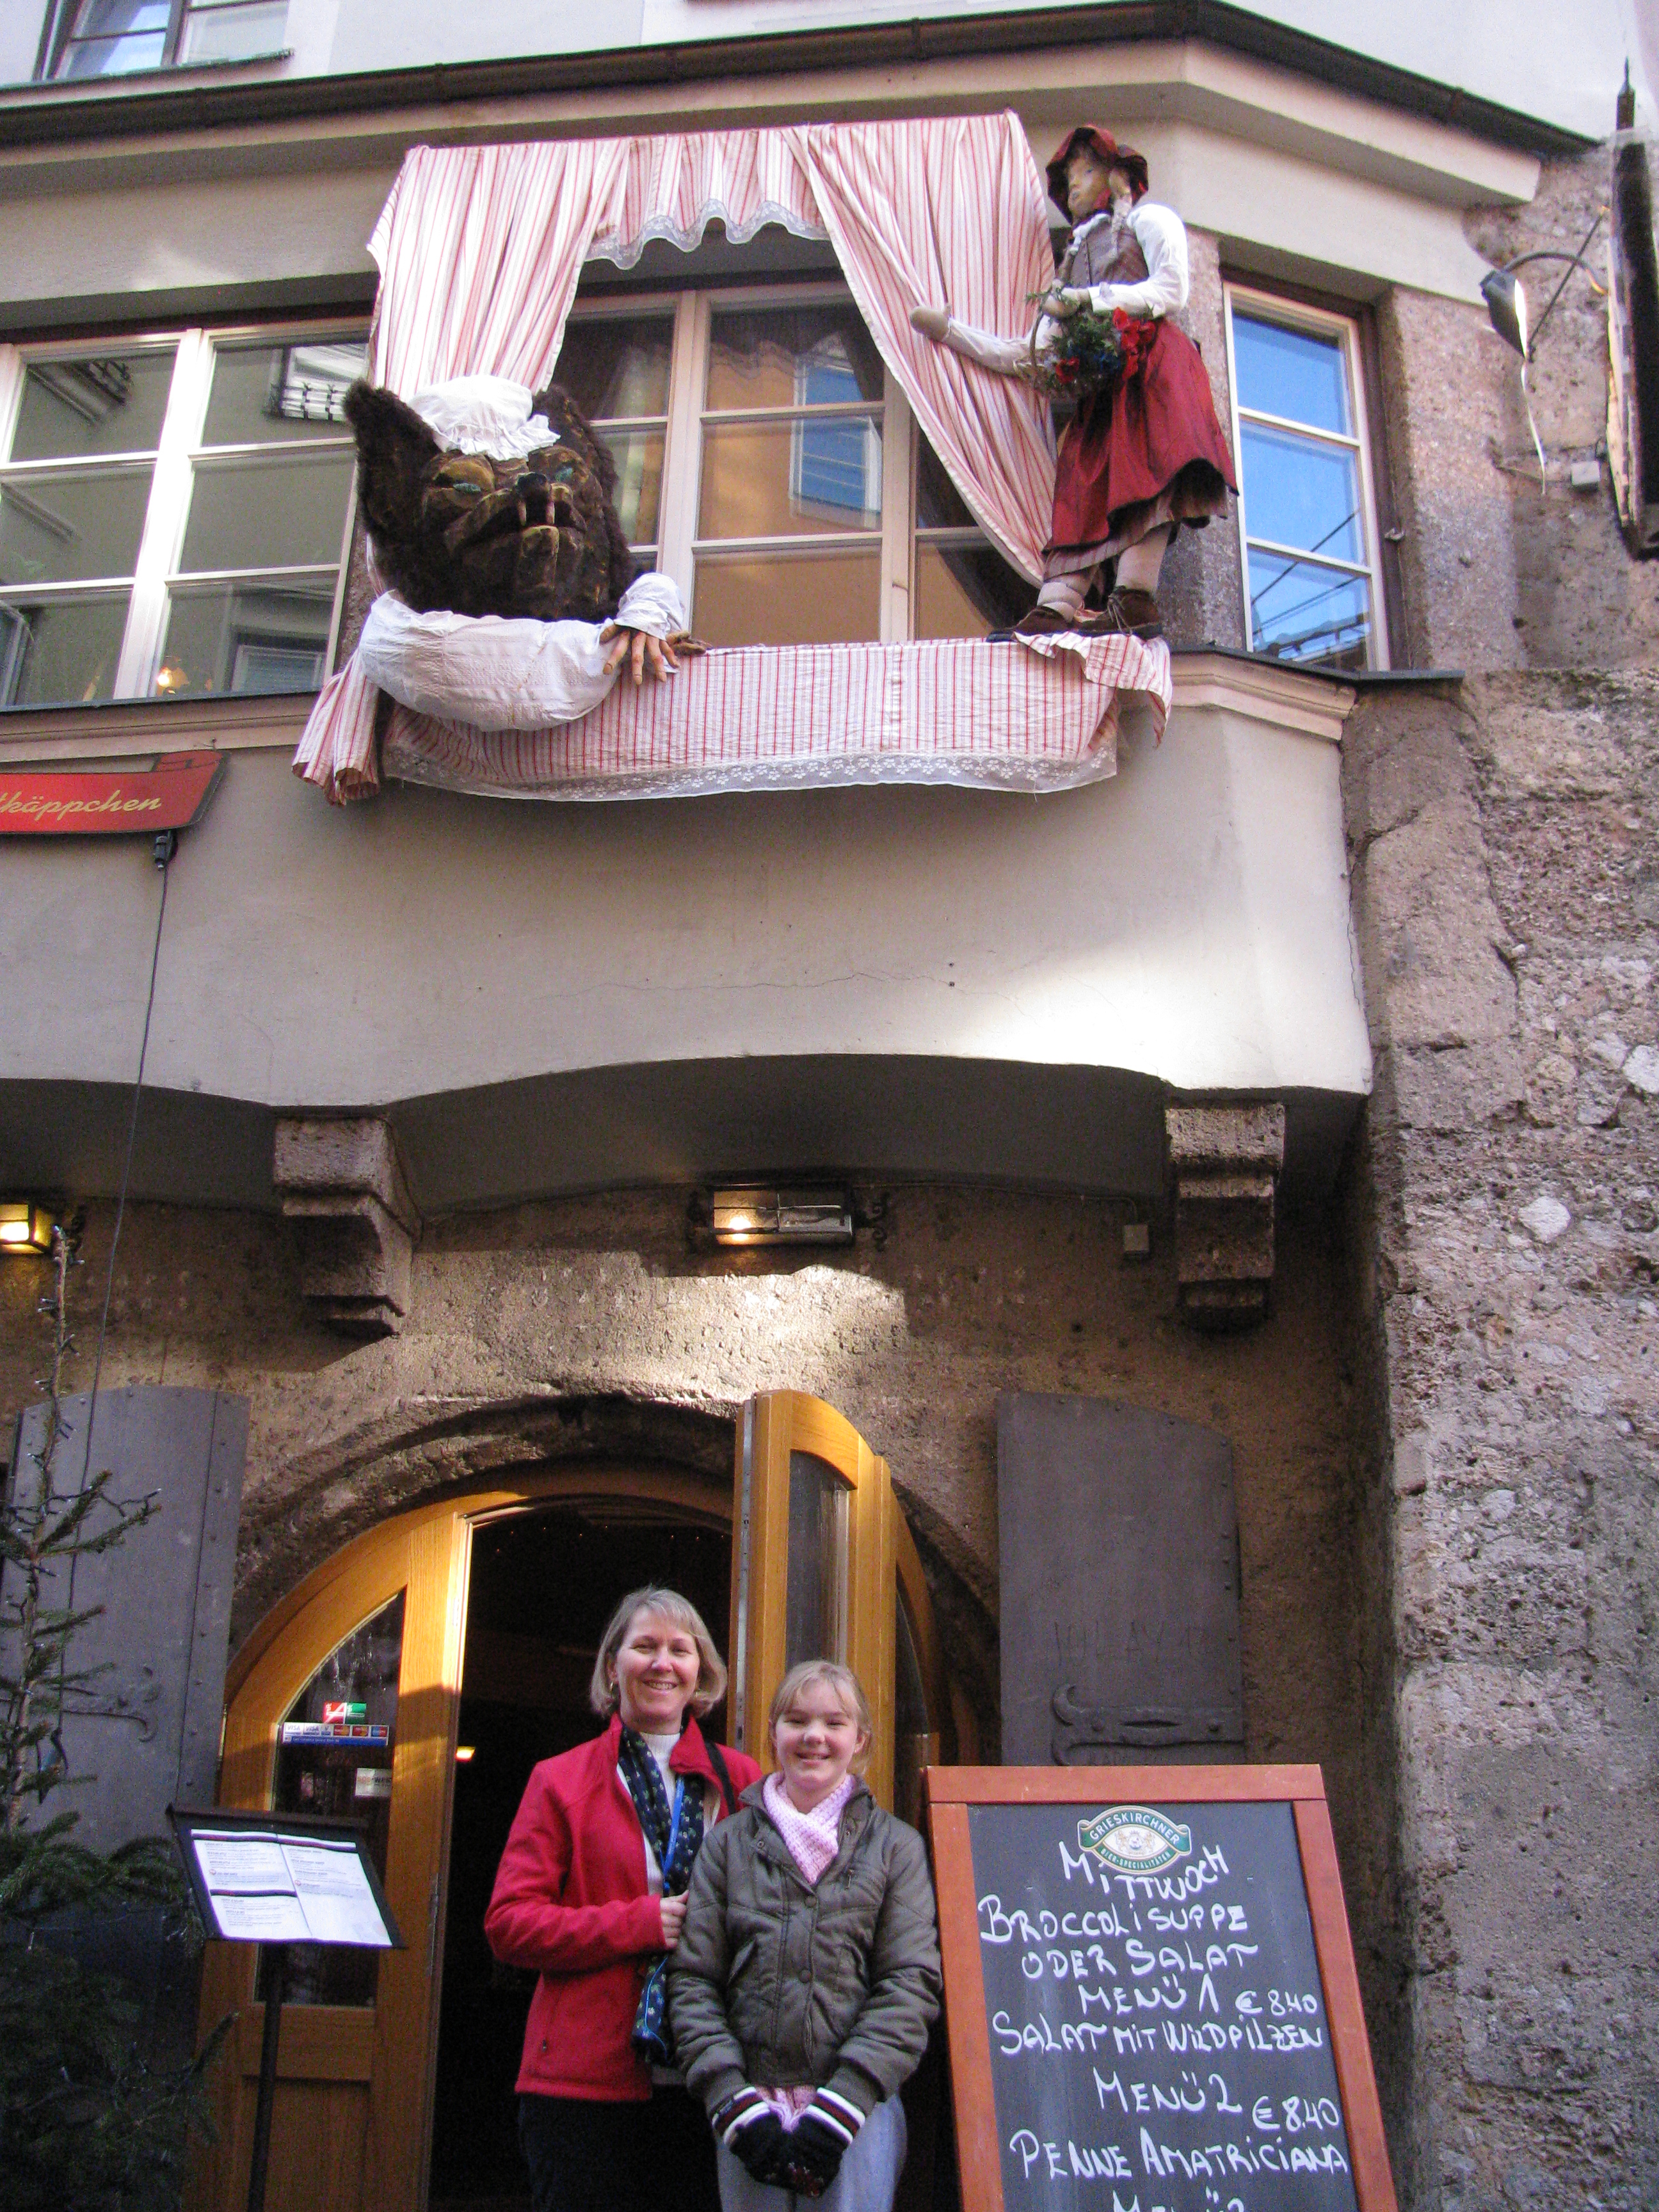
The fairy tale becomes real in Innsbruck at Xmas time as the towns people decorate windows and walls with characters from the German fairy tales such as Snow Queen, Hansel and Gretel and the Golden Goose.

he females of the species practically ran to Swarovski to grab some jewellery bargains. Having a bit of Norwegian silver, I opted to go on the afternoon optional excursion to an authentic Austrian farm on the hills outside Innsbruck, called Axams. Another wonderful example of an unique Austrian village where they appreciate decorative and traditional art.
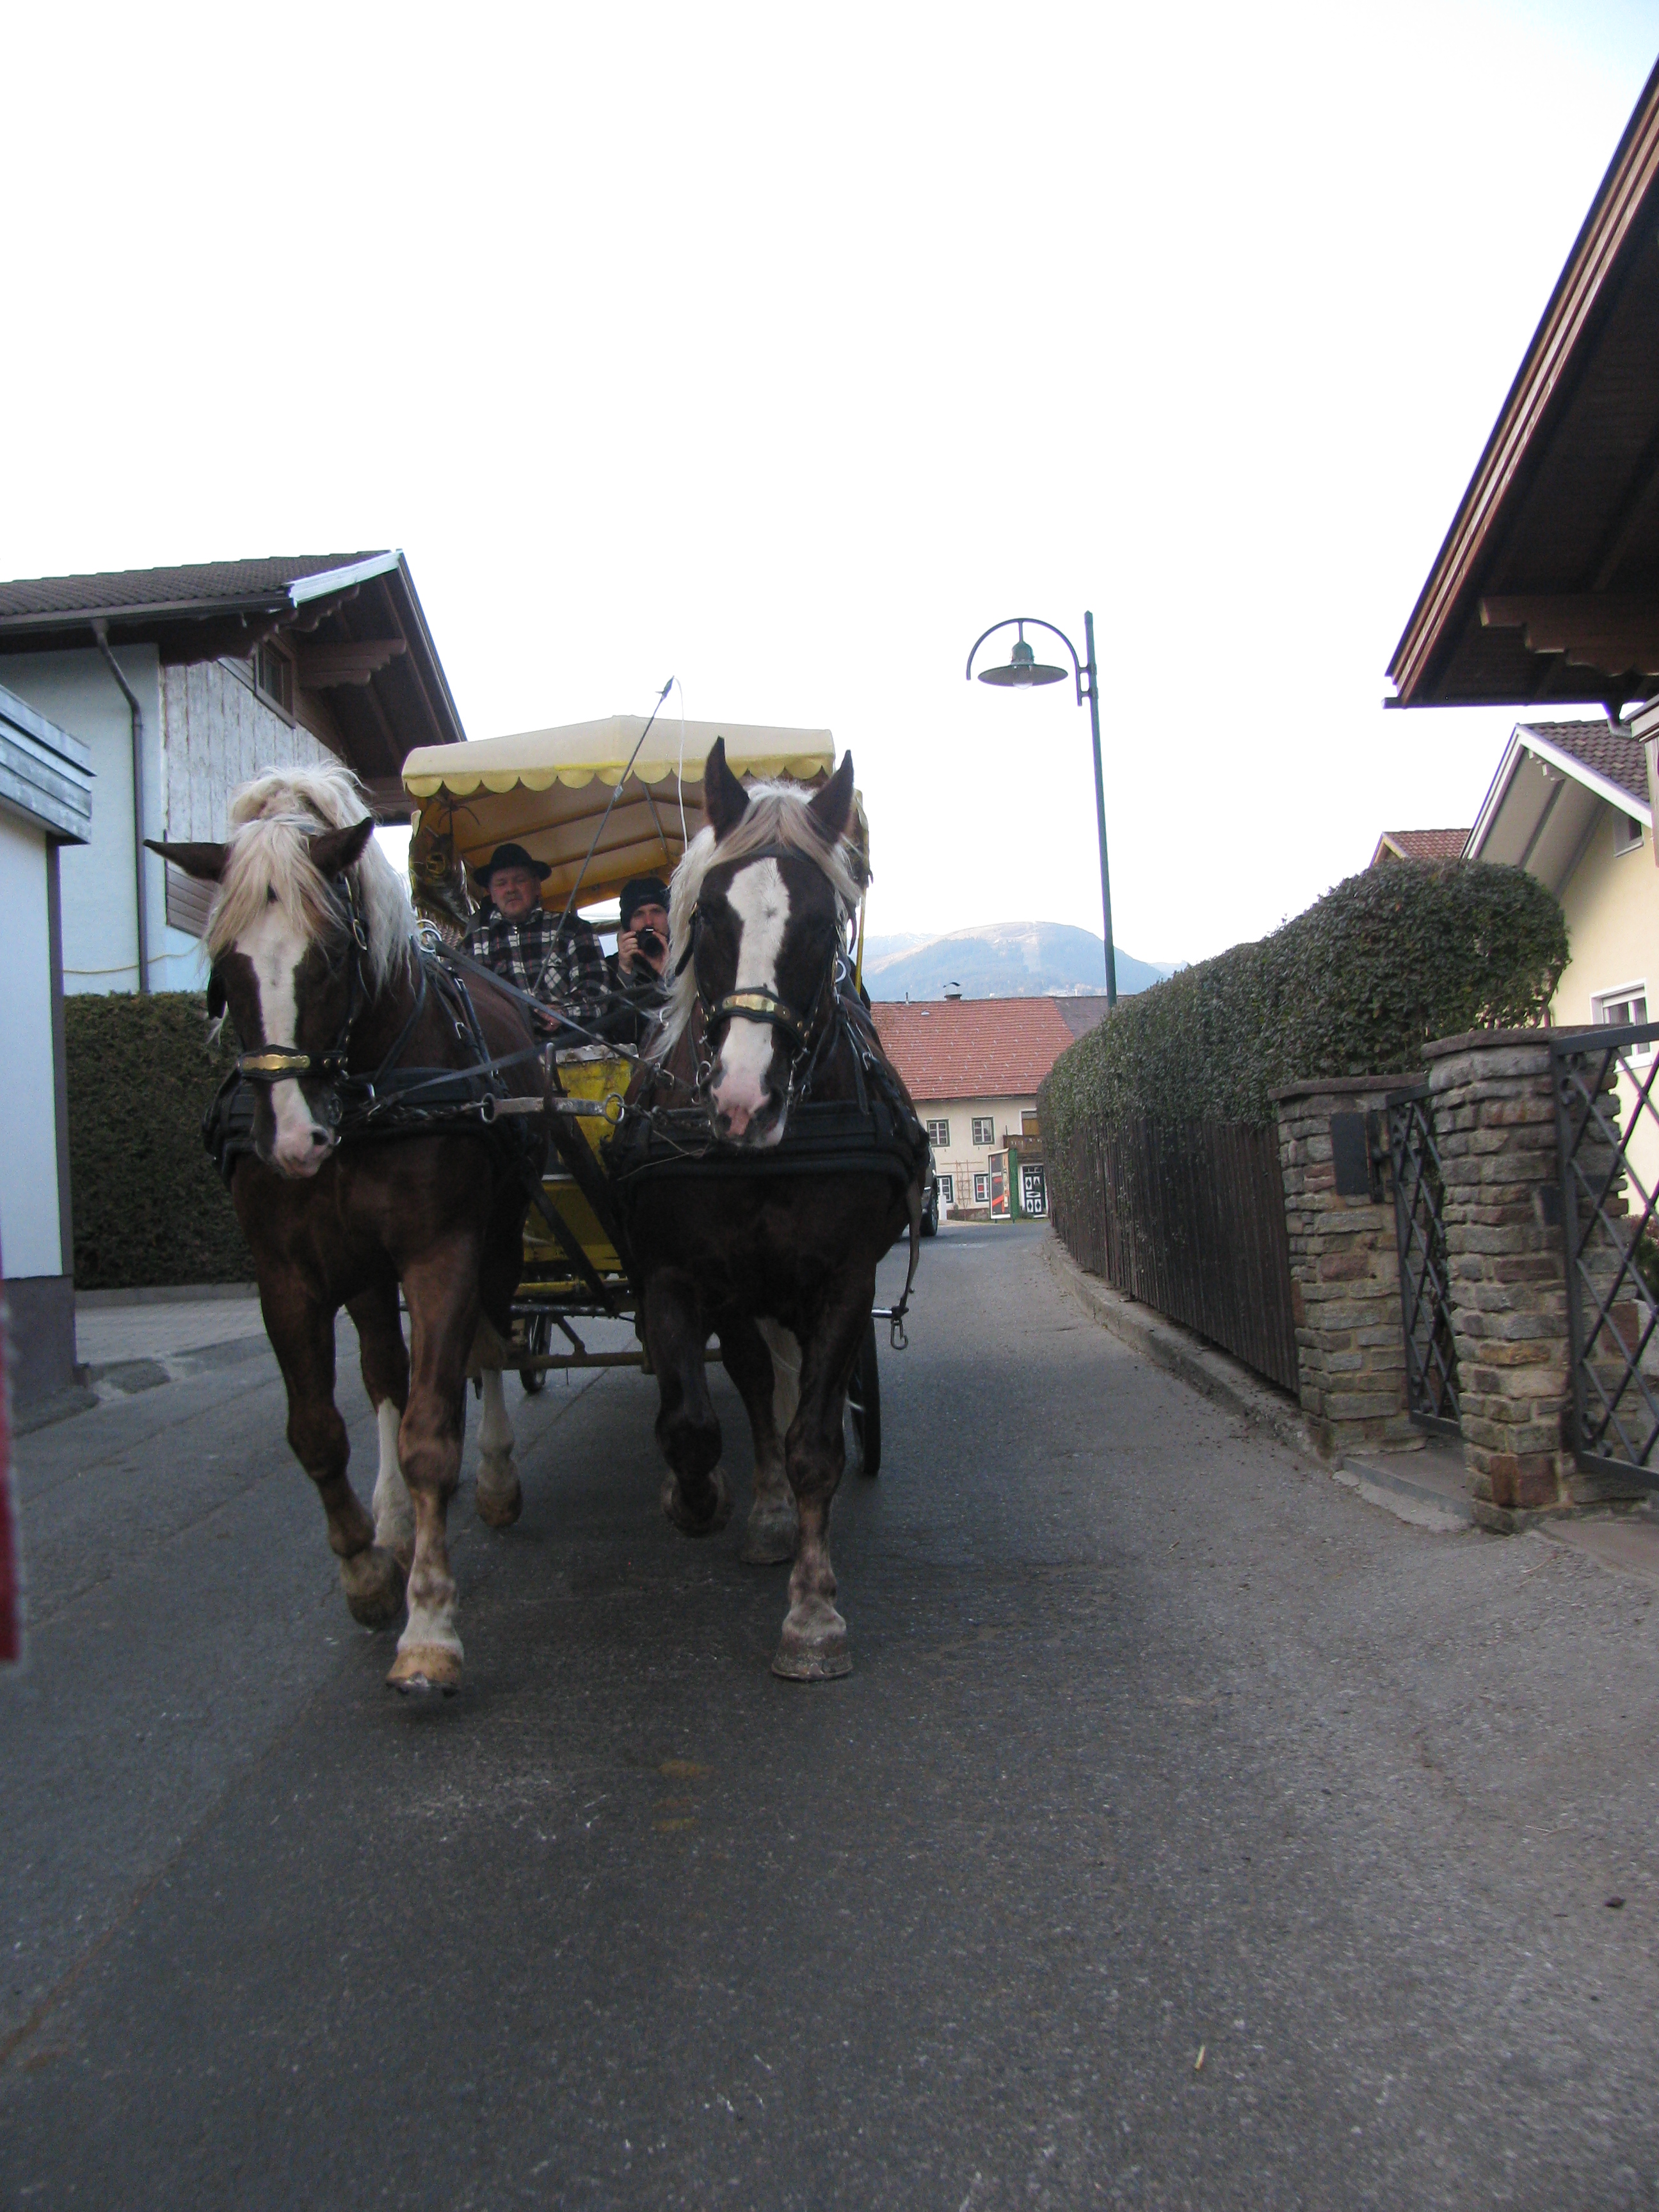
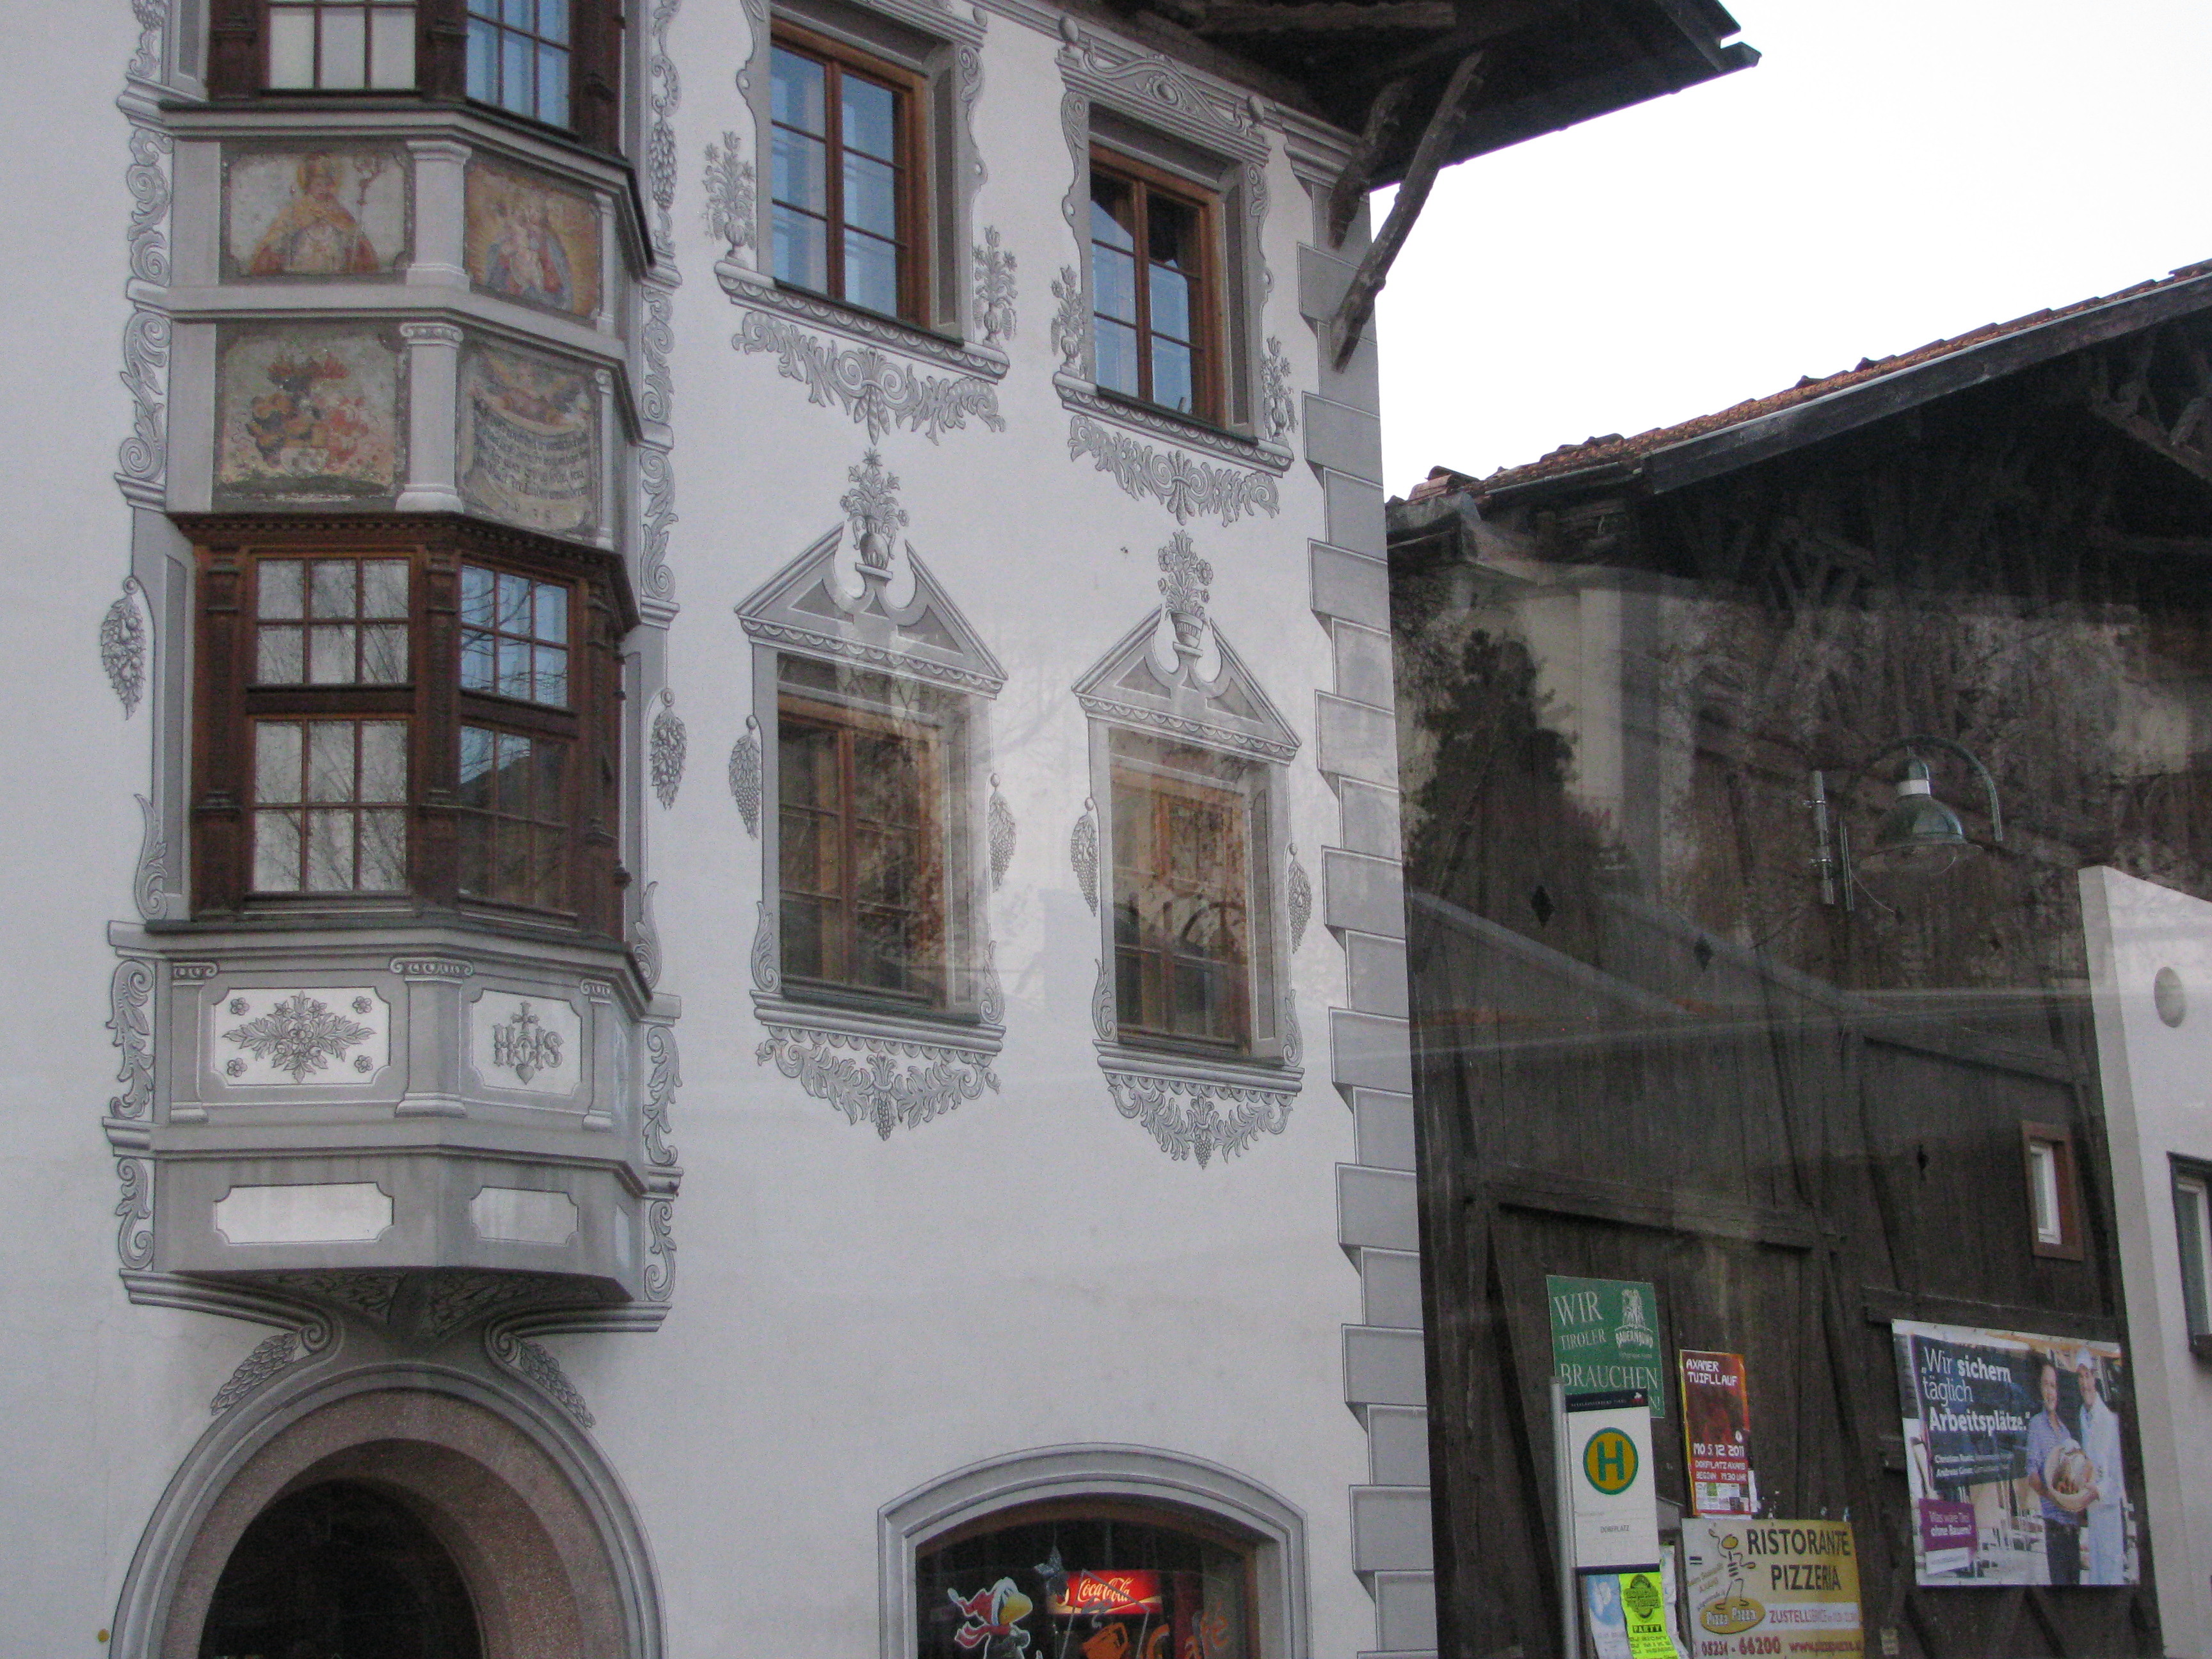
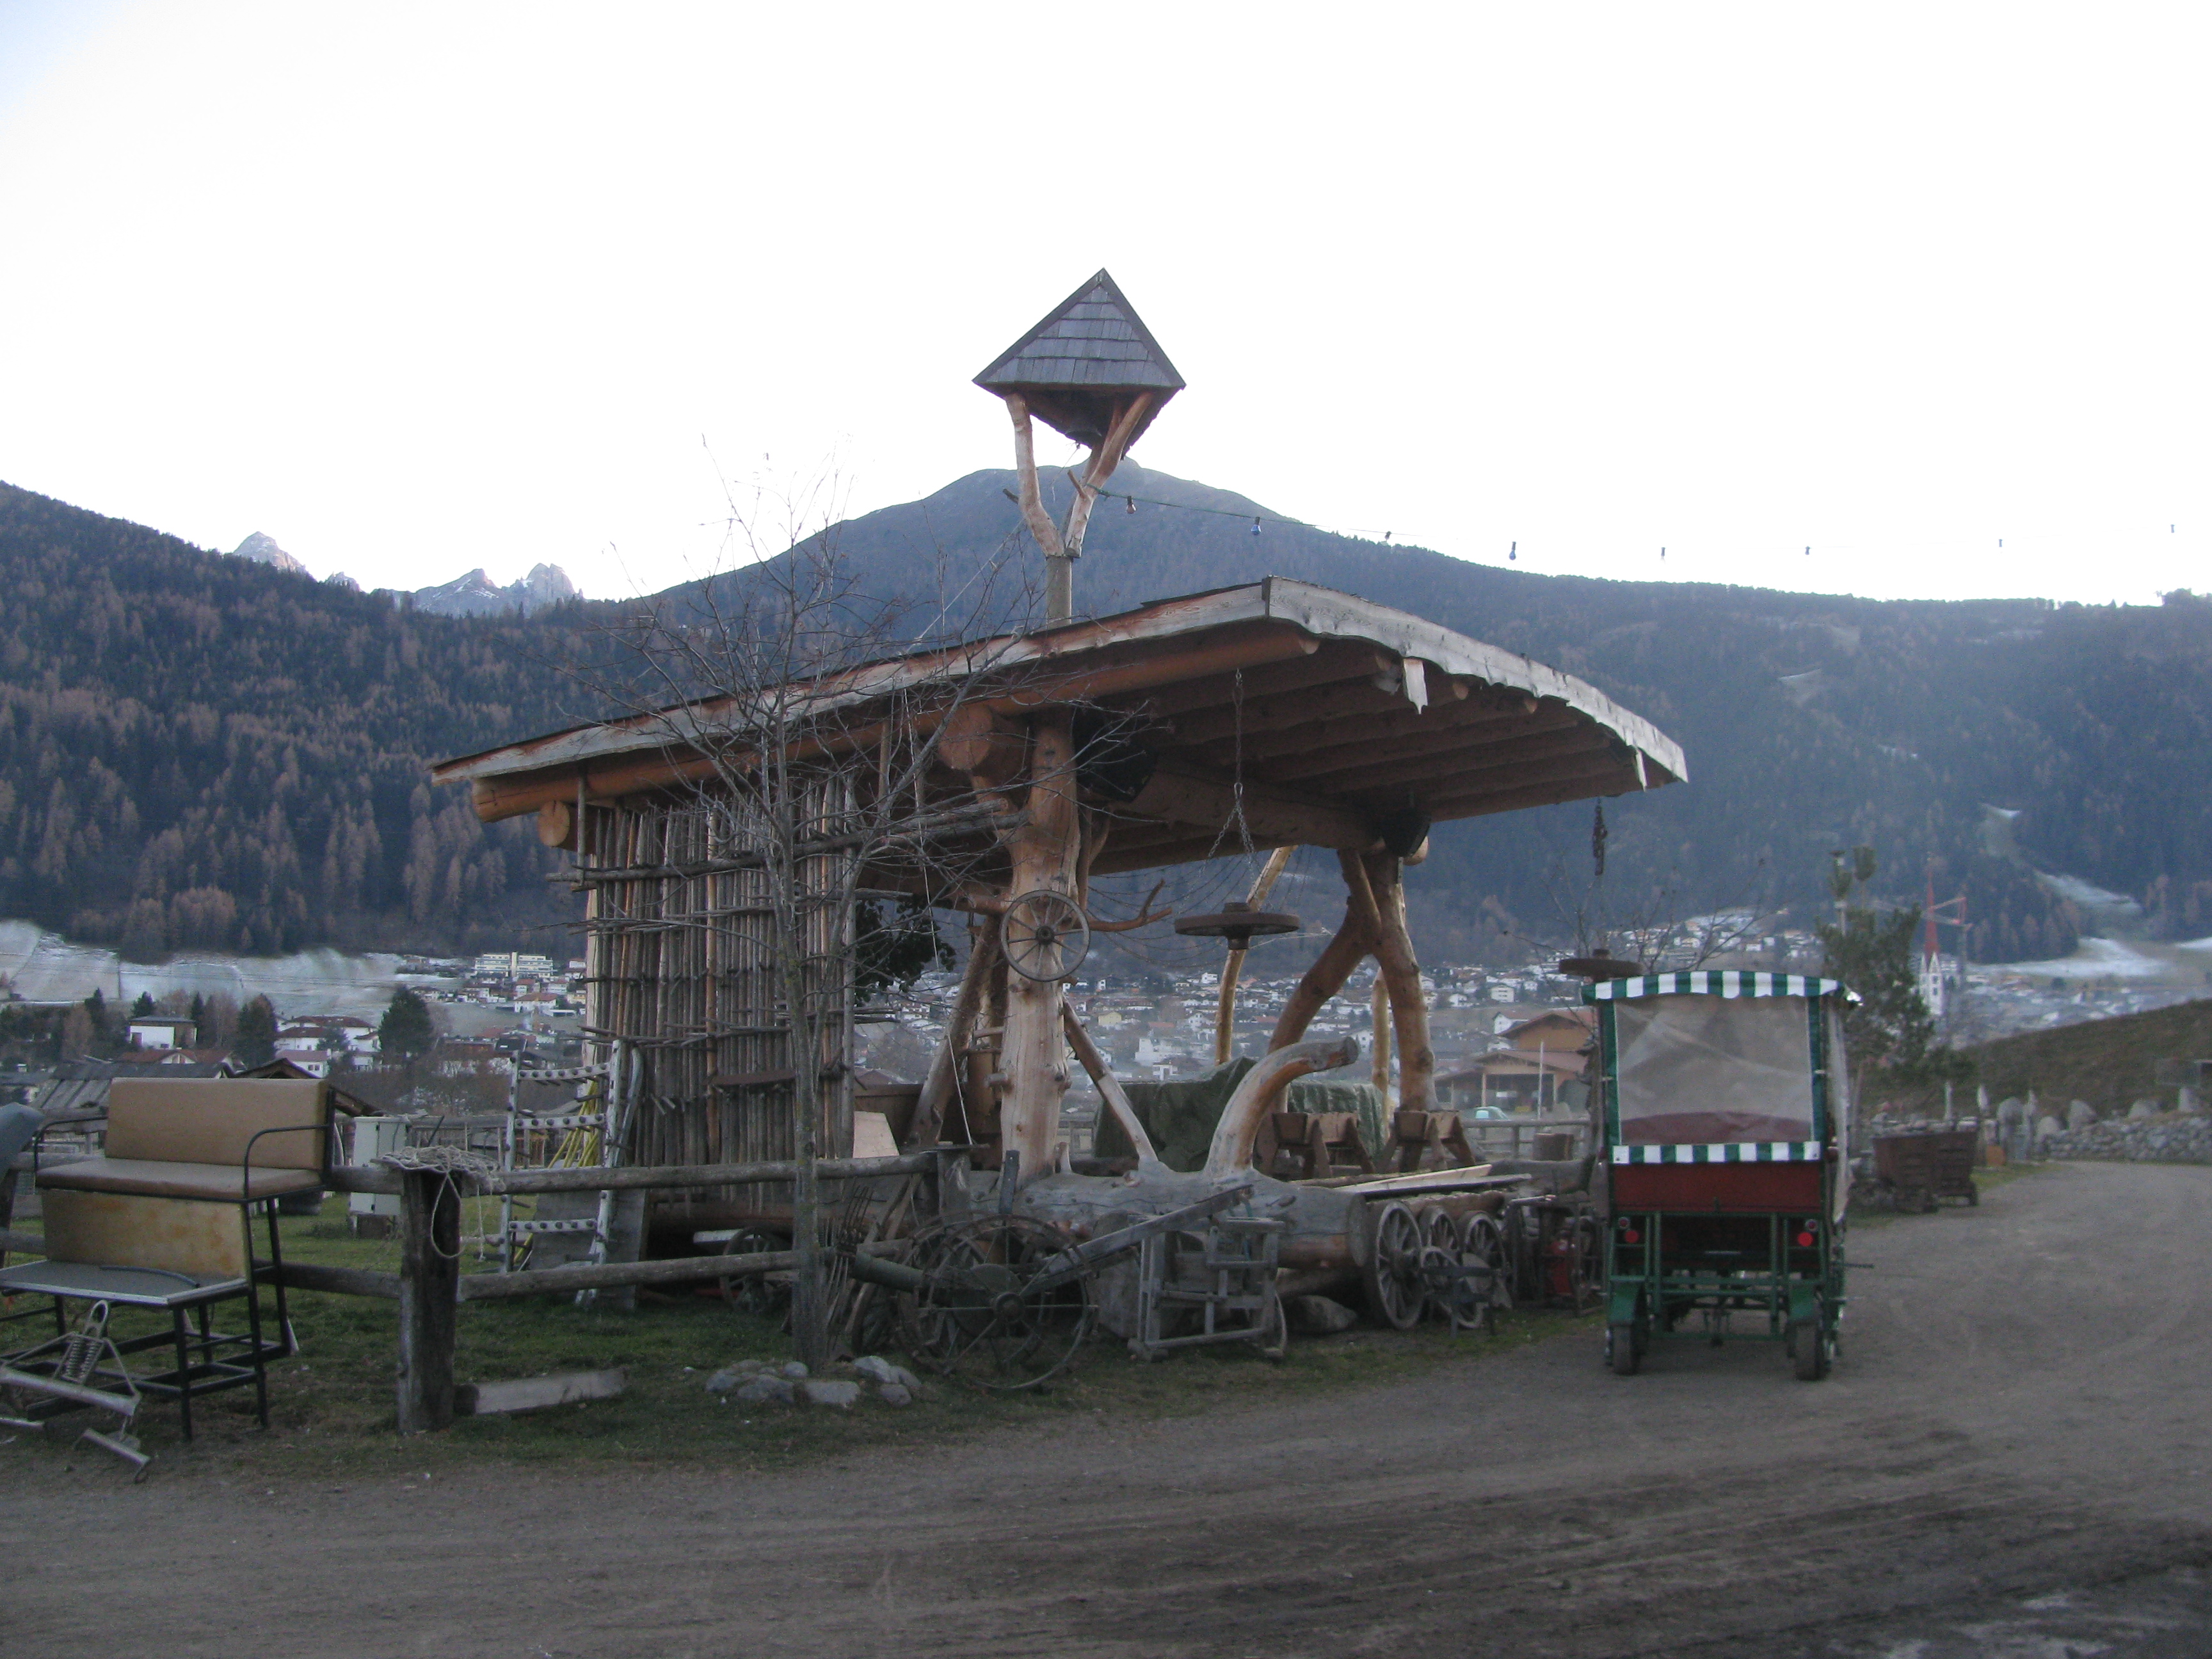
We ditched the bus for an old fashioned carriage ride, complete with horse drawn poop bags, which got to serve the purpose for which they had been made. I began to think about times gone by when horse drawn vehicles predominated the streets. How the streets would have had the sweet sick aroma of horse dung. What a stink it must have been. The carriage ride took us to the Goetzens Church, am amazing edifice to the devotion of the Austrians to the catholic faith.
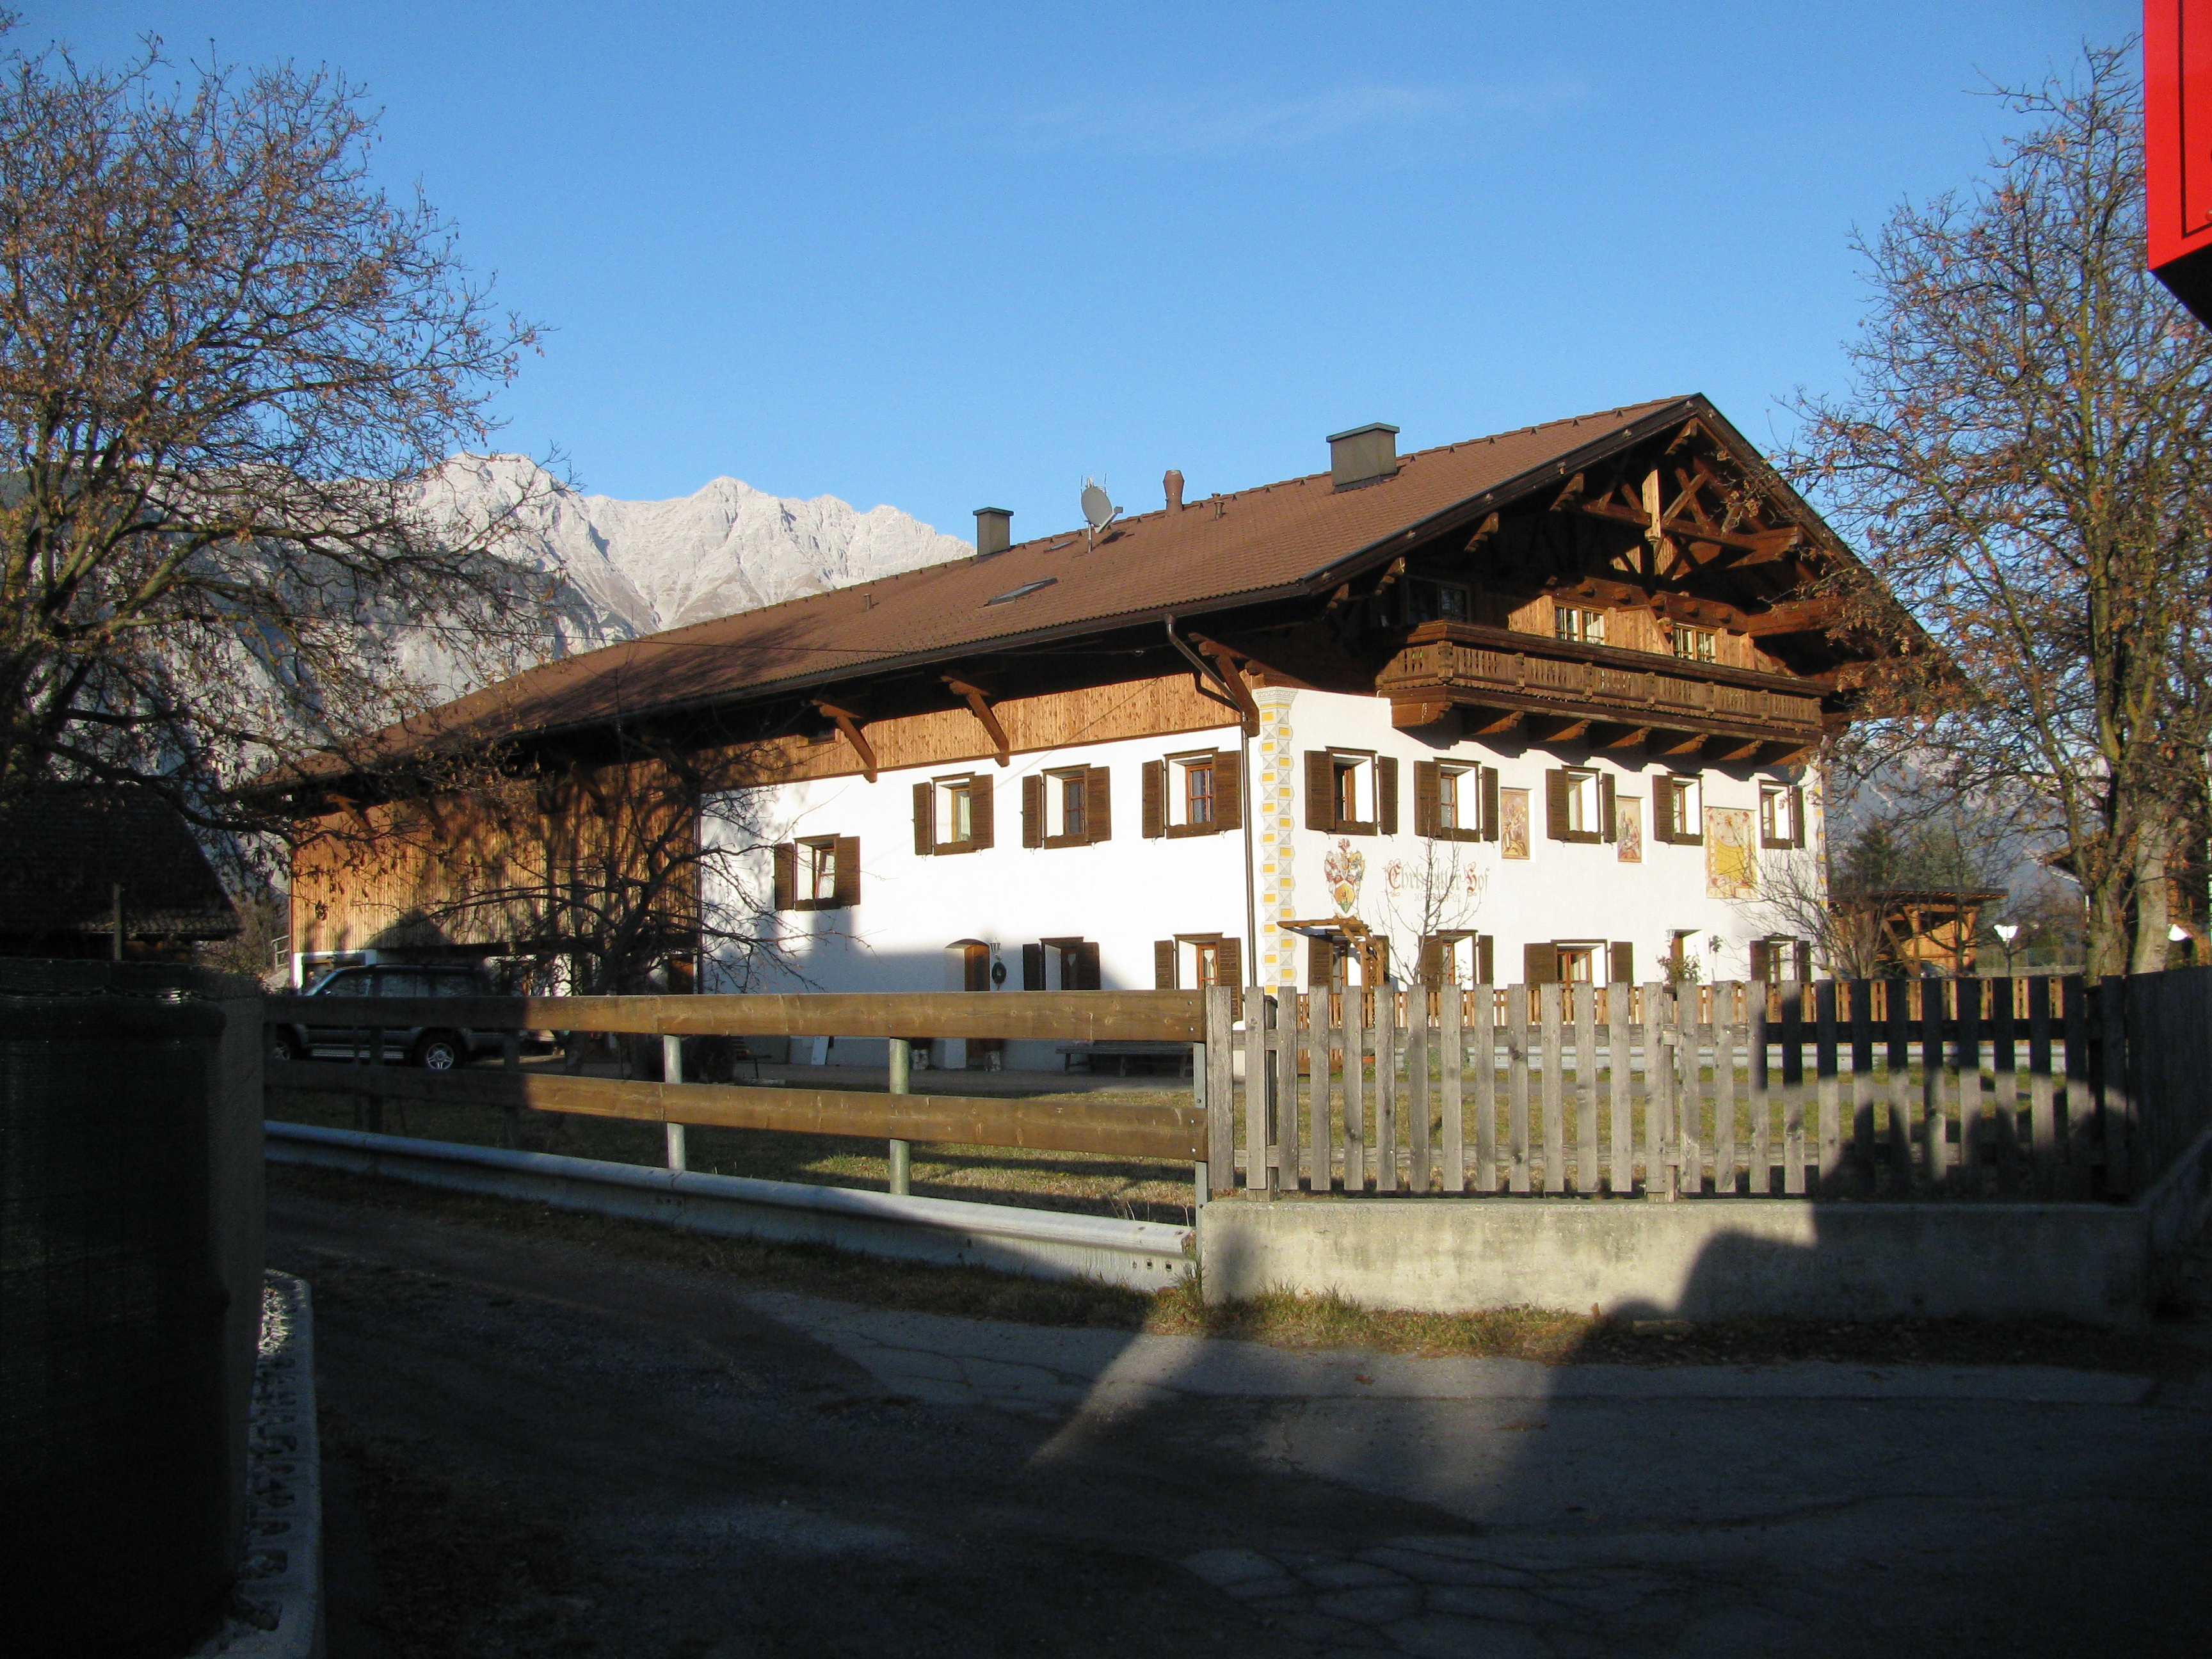
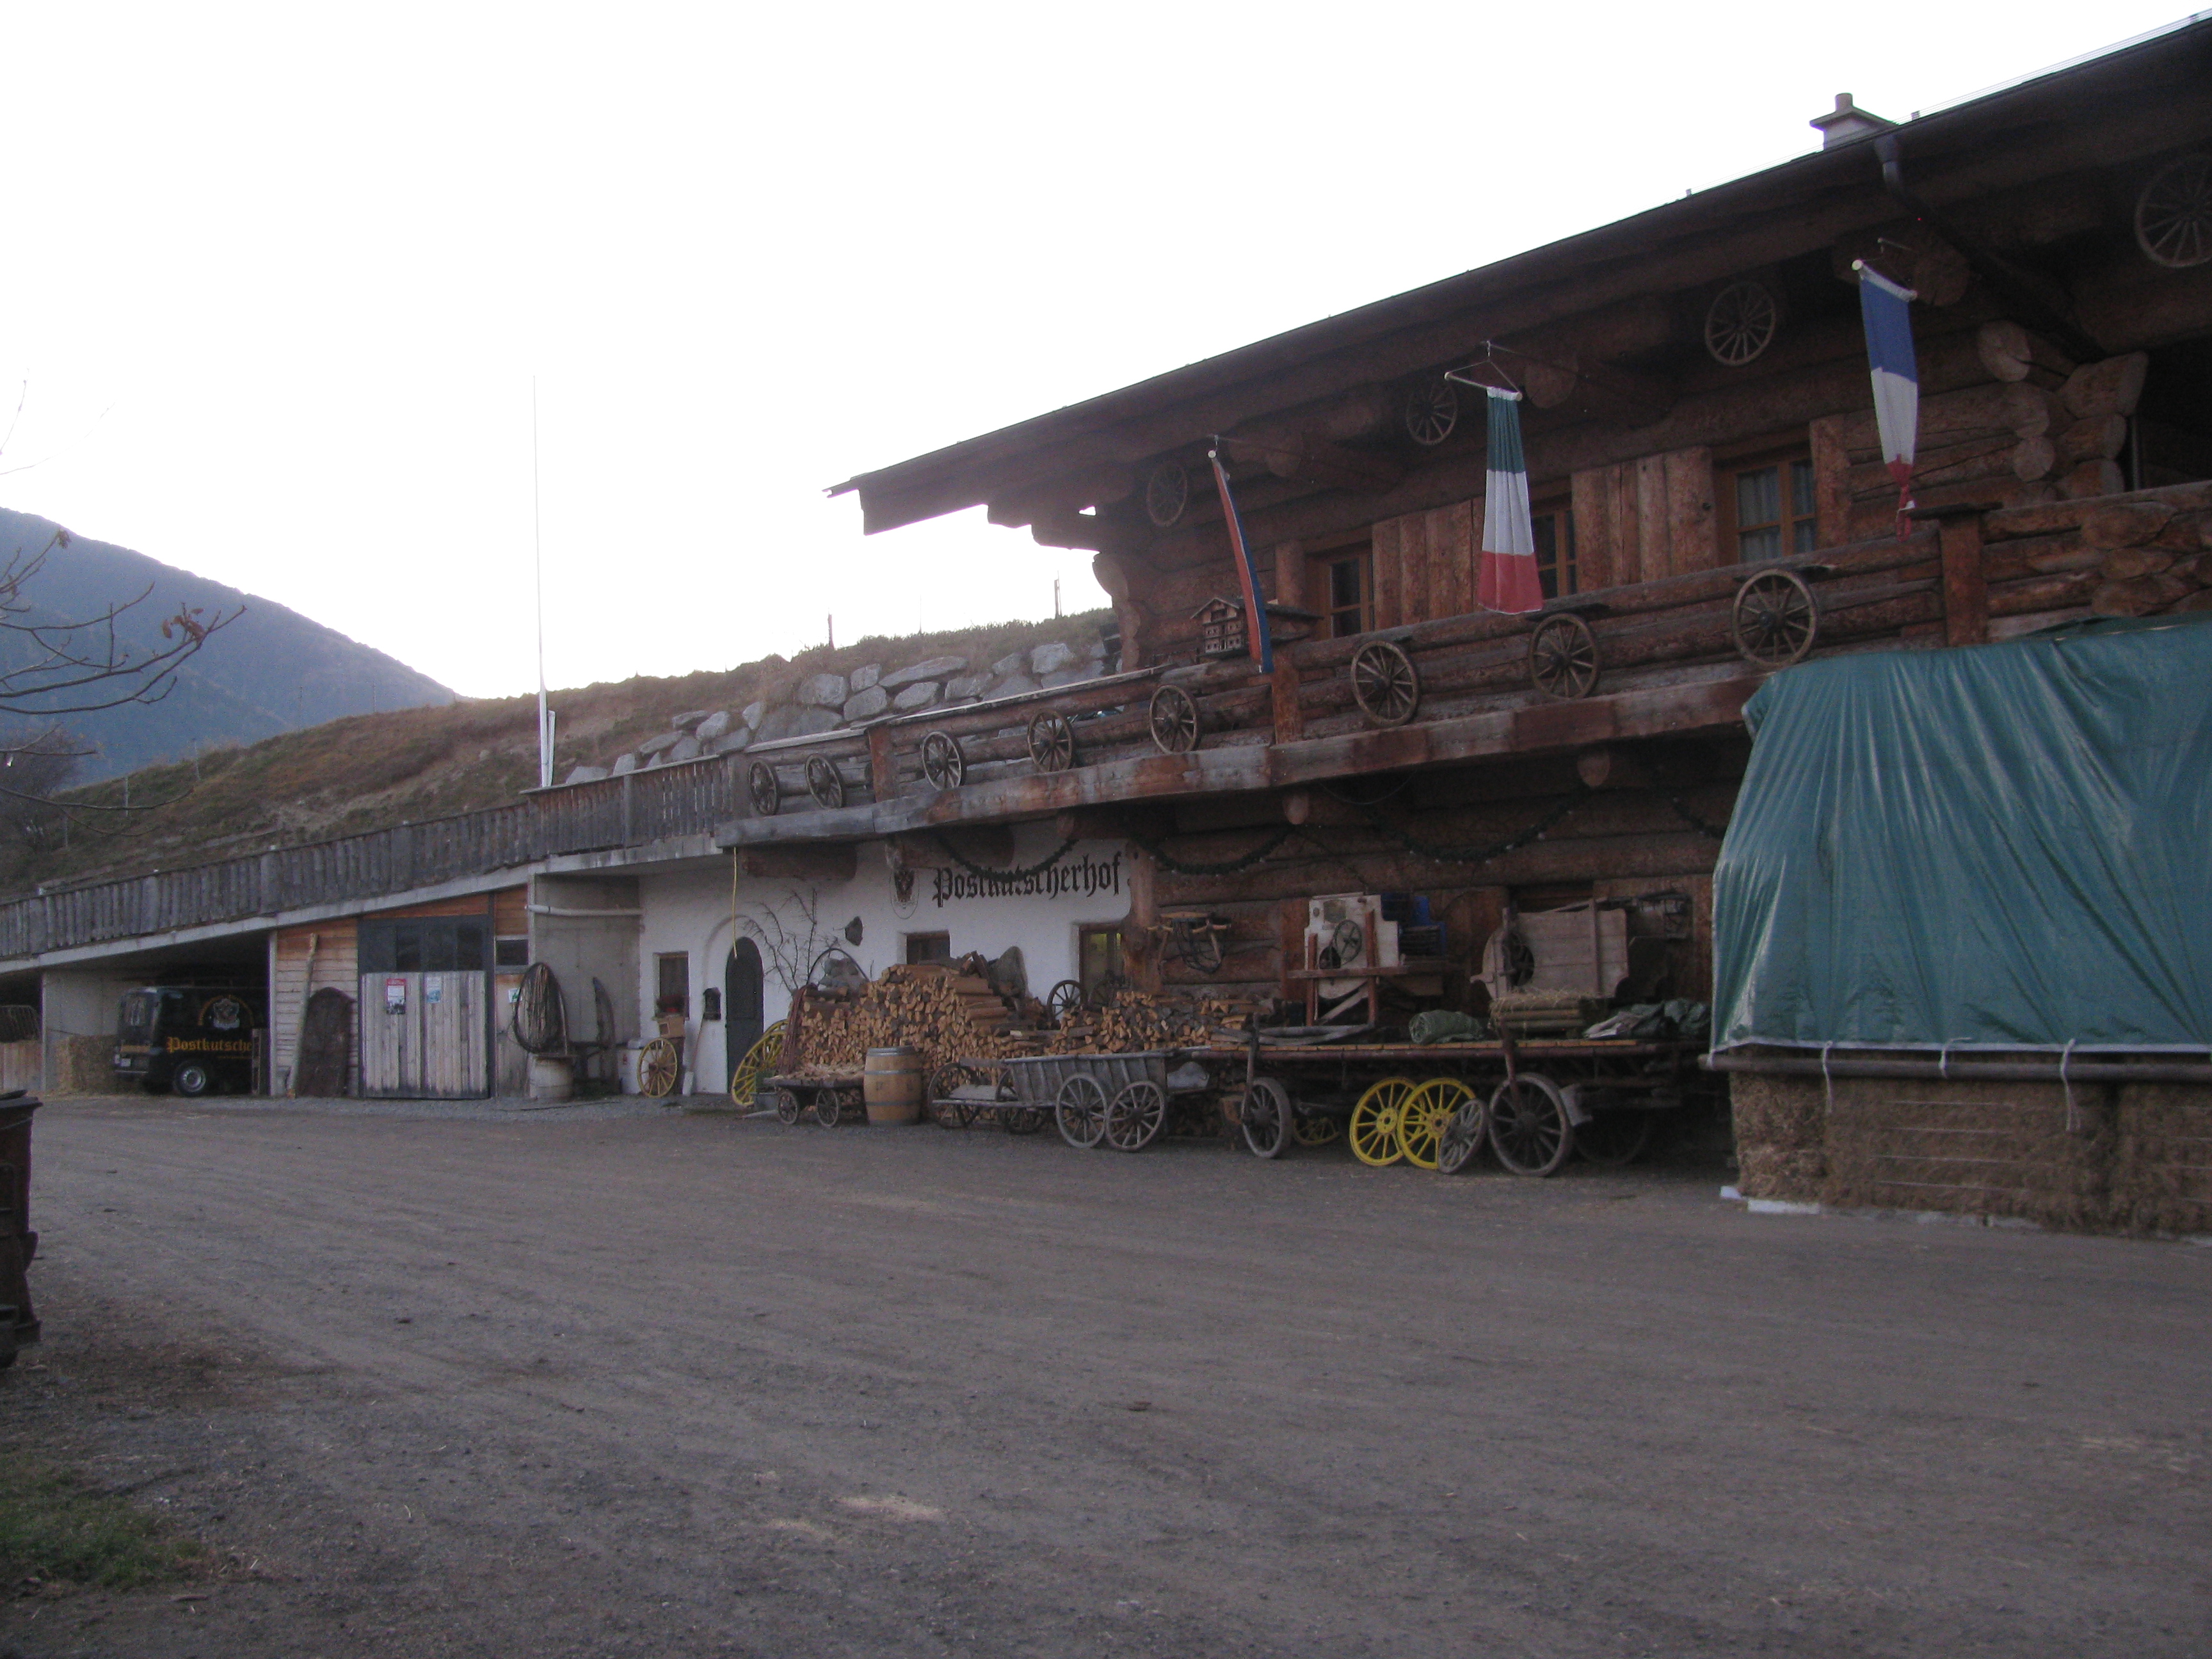
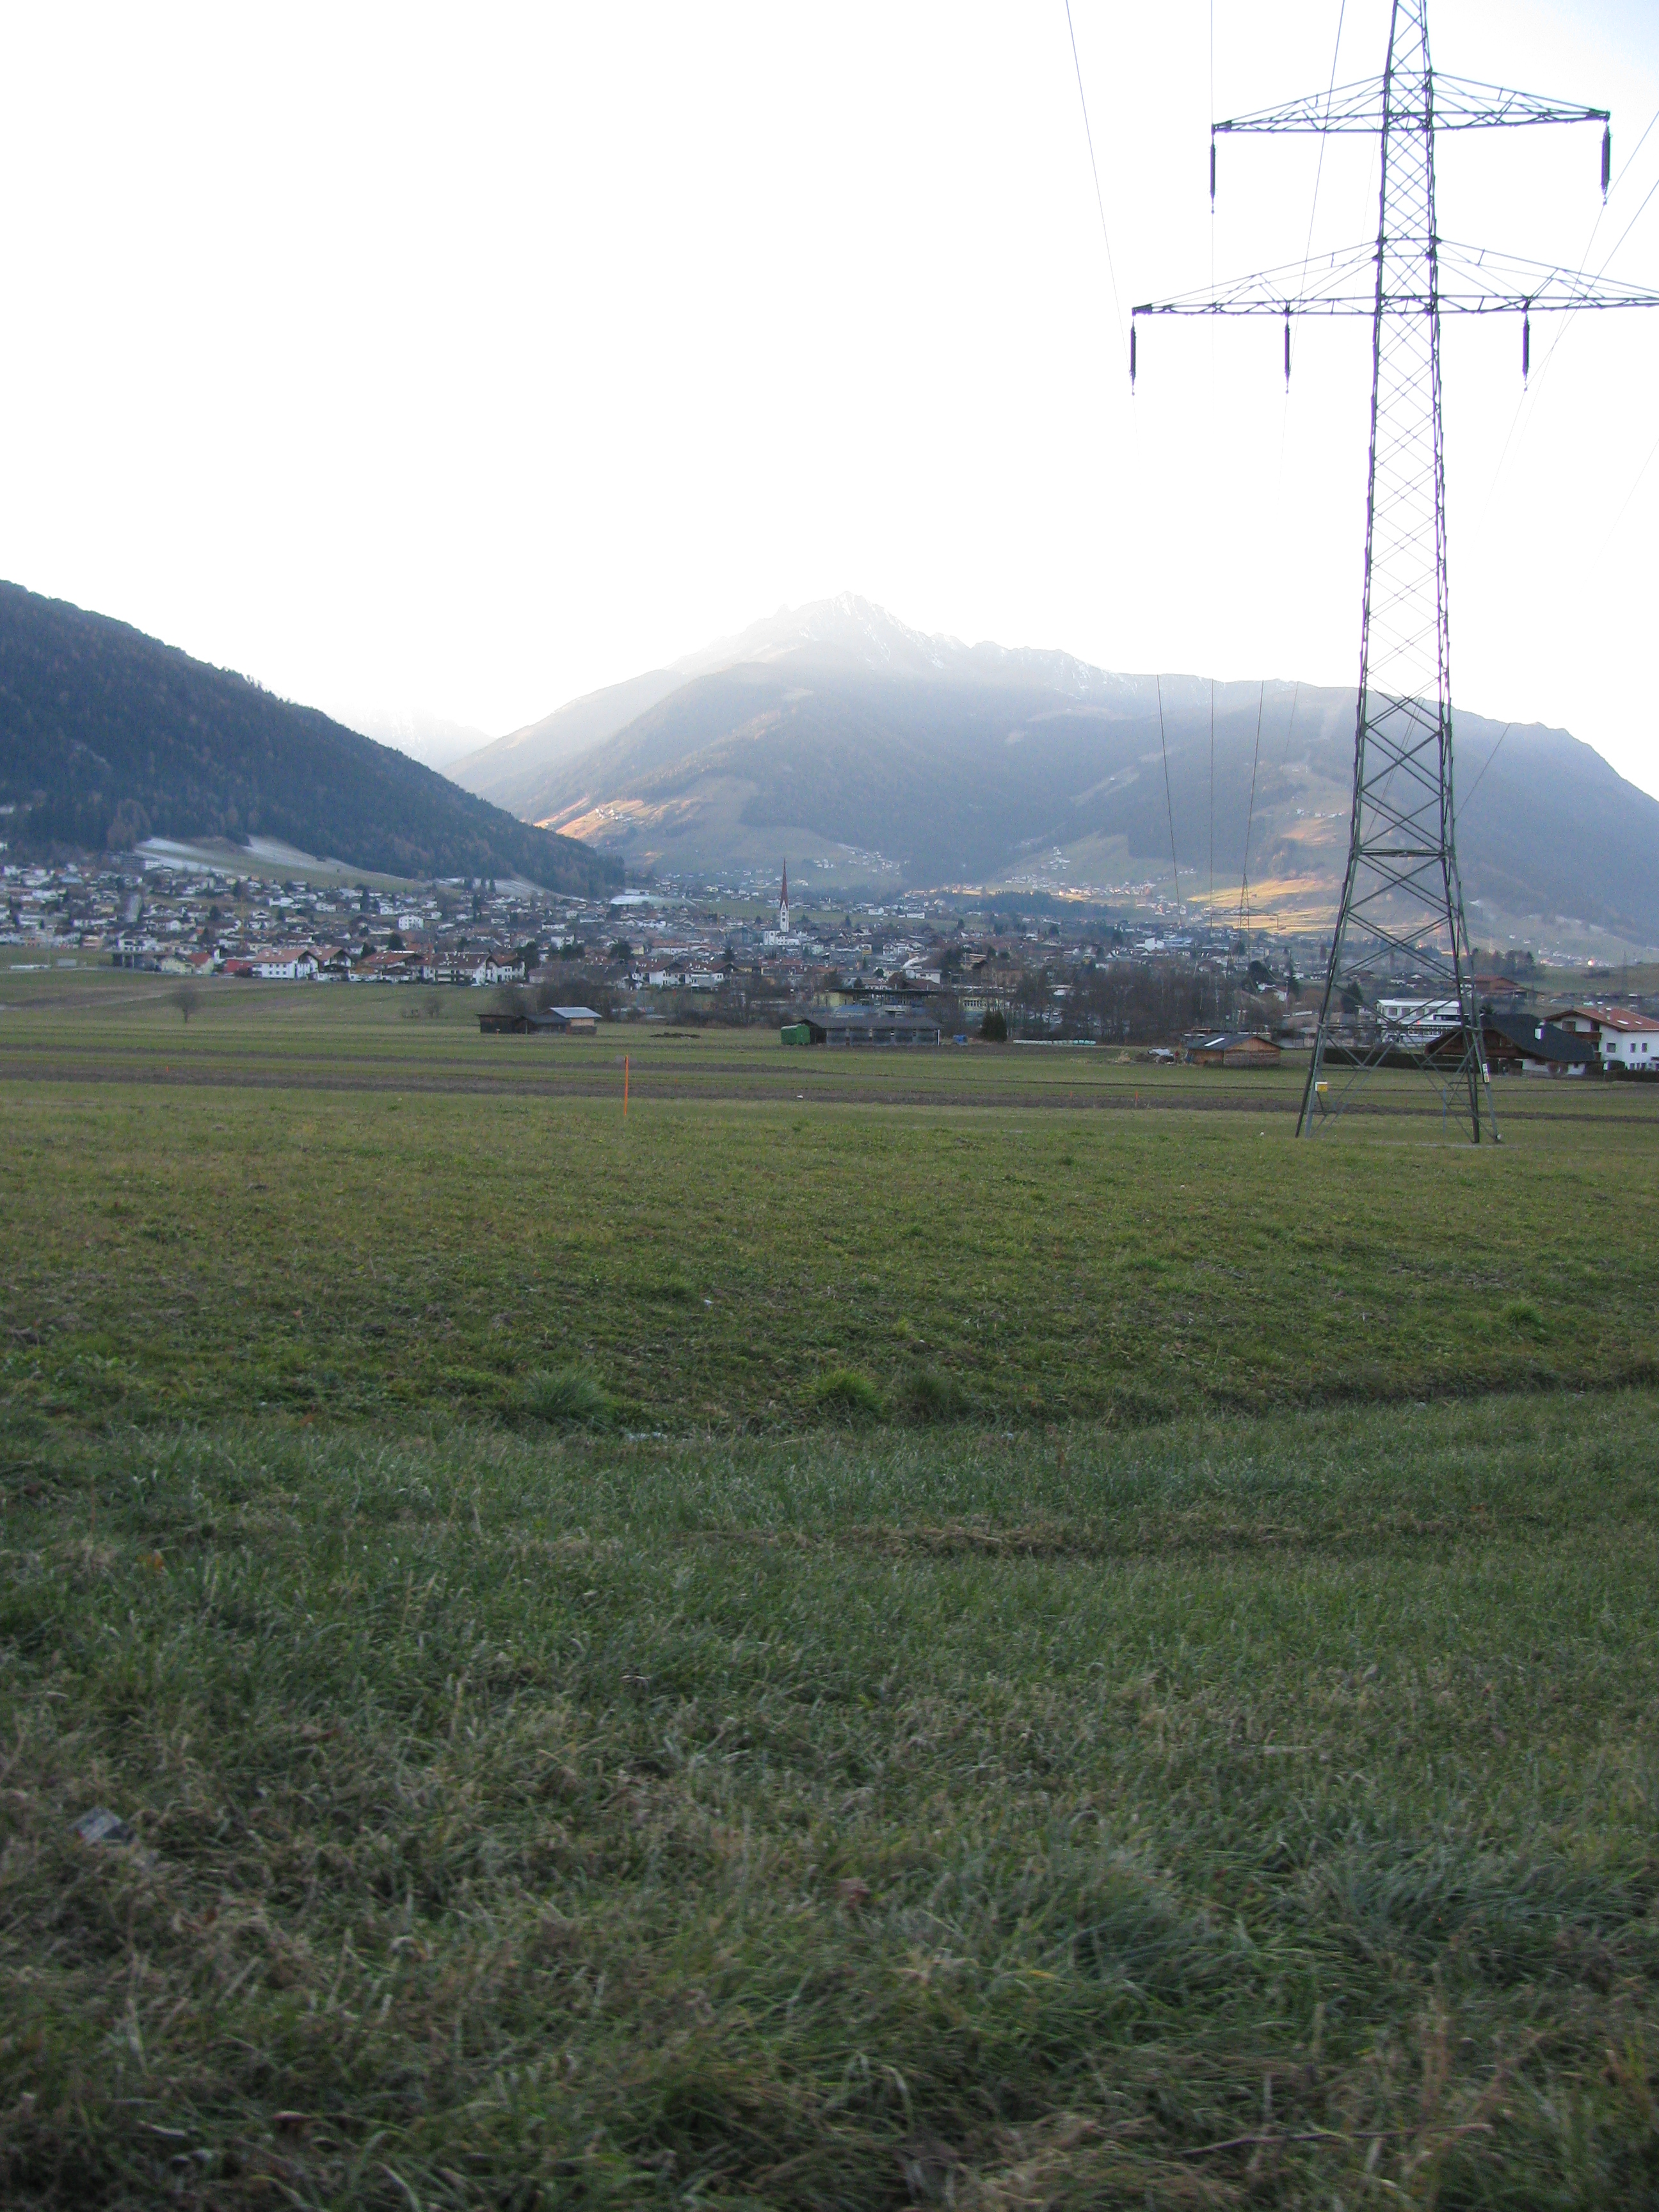
'Fritz' (- was that really his name: how appropriate!) then entertained the passengers at his farm stud, where we saw beautiful throughbreds, tasted snapps and listened to Fritz yodelling and entertaining us. It was a shame that the snow did not allow for a sled ride, as what would normally be found in Austria in wintertime, but I quickly learnt the Austrian countryside is just as delightful with a green carpet. Except for those darn power lines, and the odd Austrian getting in the way of a good landscape shot!!!
Back to Innsbruck, we scoured the Xmas markets whilst the young men of the group checked out the casino, part of our hotel complex. The more refined guests partook of dinner at the Sandwirt on the River Inn. Something I won’t be pondering on is how they felt after the casino visit……
Sunday, September 23, 2012
Book Review - Smilla's Feeling for Snow
Visit Book Blogs
Were you aware that the Eskimos or Inuit people of Greenland have many different words to describe snow? Just as English uses a variety of terms for water eg: (liquid, lake, river, brook, rain, etc), so Eskimo uses the aput 'snow on the ground', gana 'falling snow', piqsirpoq 'drifting snow', and qimuqsuq 'a snow drift to name just a few. The intimate connection or “feeling” for the characteristics of the harsh arctic landscape is central to the story of crime, intrigue, and romance in “Miss Smilla’s feeling for Snow”.
Like Greenland, the central character Miss Smillais cool, distant and reserved and gives off this feeling of loneliness. Growing up in the Arctic environment means that Smilla is a strong woman who struggles with trusting anyone, but who has also developed certain skills that enable her to solve a murder Police are convinced was as ‘accident’. A young boy falls from the roof of an apartment building in central Copenhagen. Did Isaiah jump or was he pushed? Secondary to the intriguing plot is the relationship between Danes and Greenlanders and it is an area that Høeg considers in this novel. The reasons for Smilla’s reserved nature slowly develop throughout the book by revealing pieces of her childhood in Greenland amidst the Inuits and the different social backgrounds from which each of her parents come.
“This novel is more of a feeling than anything else. Feeling of coldness, blinding whiteness and some fantastic warmness in between the two. It’s like a journey to far North where nothing but your senses remain. It’s as if you are sitting on Smilla’s coach wearing warm woollen socks and drinking hot cup of tea while contemplating the snowflakes whirling outside the window and feeling the intense cold of the winter.” (review)
Saturday, September 22, 2012
Telemark Rosemaling Tutorial
This weekend marks the 140th anniversary of a Scandinavian
Association or club in this state. To mark the occasion, there is a
street festival tomorrow and I have been given charge of a craft stall.
Being primarily a painter, I have been busy preparing some items for
sale. I decided to share the development of a Telemark Rosemaling
project with you.
Telemark Rosemaling is the traditional painting of Norway. It reached its zenith in the early 20th Century after Norwegian independence, when a revival movement popularised everything that was Norwegian. It origins date back to religious art forms and the acanthus leaf. In the isolation of the Norwegian countryside, these new fart forms slowly developed into an individual style that differed according to the valley or regions from whence they came. Examples include: Telemark, Rogaland, Hallingdal and others.
Telemark is characterised by free flowing, dynamic scrollwork, and asymmetrical designs. A good introduction to Rosemaling is found in Aarseth's Rosemaling Designs, by Sigmund Aarseth. You will also find a free pattern and project on my website: www.forestwood.webs.com
I painted a wooden Rubbish bin and I will include a small tutorial on painting and designing freehand.
Telemark Rosemaling Tutorial
You will need:
Acrylic paint
Prussian Blue
Smoked Pearl,
Warm White
Filbert or flat brush, about 1/4- 1/2"
Good liner brush, say size 1 or a Quill liner
Sandpaper #400 - #600
Wooden piece
Palette: I make mine disposable for acrylics, by wetting some ordinary kitchen paper towel and squeezing it so it is damp, and wrapping greaseproof paper over the top.
Step 1. Basepaint piece chosen colour scheme. I picked Jo Sonja's Prussian blue and lightened it down with a creamy colour ( JSonja acrylics Smoked Pearl) Two coats. Allow to dry.
Step 2. With non powdery chalk or chalk pencil, chalk in some guiding points, like the root of the design and outside border. If you don't want to paint freehand, you could chalk in the main scroll lines and use a outline for the flowers. Once you get the hang of the shape of the flowers, and what your brush can do, then you can simply mark an x for where the flower will go and its orientation.
You will find a short video here:
Design:
N.B.When designing, keep in mind Balance of shape, size and element. If you divide the design in quarters, there should be a part of the major elements in each. Each quarter should have an equal measure of postive and negative space. Look at the design upside down to distract your left brain from interpreting, giving you a fresh eyes to see any design faults.
Step 3. Load a filbert ( flat with rounded tip) or flat brush in size appropriate to the width you want the scroll to be in darkest value, on ONE EDGE ONLY. In this case: Prussian blue. On the opposite edge, load Warm white or your lightest value. Flatten the brush on the palette so that the colours mix. Repeat.
Step 4. Begin painting the scroll from the top down, applying pressure as you go, so the brush widens, and releasing pressure as you near the end of the scroll, as this will narrow the stroke at the design root.
 Step
5. Repeat the stroke if needed, and add extra shade ( the darkest
value) on the outside of the scroll, to enhance the contrast. Be
careful: Acrylics dry quickly and you may need to use a retarder medium
to slow the drying time, giving you more time to play with the design.
Step
5. Repeat the stroke if needed, and add extra shade ( the darkest
value) on the outside of the scroll, to enhance the contrast. Be
careful: Acrylics dry quickly and you may need to use a retarder medium
to slow the drying time, giving you more time to play with the design.

 Step 6. Paint remaining scrolls in same manner. Try to have them all merging towards the root point.
Step 7. Begin to block in the flowers using shape following strokes, comma, or leaf shape ( S and C strokes) as appropriate. These can be quite casual and double load your brush again with light value on one side and dark value on the other to give your project a natural blended look. Don't worry too much about shaggy edges here, as the liner work will tidy that up.
This is also a free style of painting, it is not Fine Art, and the peasants that originally painted these pieces had little or no training in artistic techniques. So don't stress trying to make it perfect when it is not meant to be so.
Try to achieve a balance of colour as you go. If the brush has blended really well and the light value is lost, add some extra warm white to your cirty brush (ie. don't rinse it clean in water, just wipe on paper towel to remove excess colour.)

Once you have blocked in the flowers, and are happy with the distribution of colour, you can begin the liner work.
Warning: Liner work is very addictive, and it is easy to get carried away with the embellishments and make the design too busy. Beware! You can always add an extra stroke, later, but rubbing out can ruin a design.
You may also like to try adding something like flow medium to your paint to do some liner work. This will help a beginner. Practise a little on scraps of wood or paper first to get the hang of the brush.
Step 8. Scroll Details
Begin by adding enough water to your paint puddle to ensure a inky consistency. Load the brush in the paint and pull it through twisting it gently a little before you lift it from your palette. Place tip on project and gradually increase the pressure allowing the brush to widen the stroke, then release the pressure as you direct the brush tip towards you.
N.B. For best results, liner work should vary in thickness. The last thing you want is for all the outlines to be the same thickness. Variation creates interest in the design.
Outline all the scrolls in a casual manner. Try to move your arm as opposed to just your hand. This helps to create a sense of movement. Be confident. You can clean up any errors, carefully with a cotton bud or Q-tip.


Step 10. Flower details
Outline flowers in same technique with your liner brush. Be individual and don't follow the same outline each time.
Step 11. Embellishments
Add some small detail strokes with a quill or liner brush. They are completed similar to a reverse comma. Starting off with very light pressure and pressing fully down on the completion of the stroke. I double loaded this brush in the picture here, first loading in blue and then dipping the tip of the brush in white. This gives a white stroke with a blue tip. This stroke is very typical of what you see in traditional rosemaling works. Know when to stop. Overdoing it can make a design look too busy!!
 Step 11.Borders
Now you have it! Almost all Rosemaling works have a border design, which can be as individual as you like. I used s strokes around the edges of my box.
All you need to do is allow time for the paint to dry - which can be anything from 2 days to a week depending on weather conditions, oils can take up to 6 weeks to fully dry.
Then a coat of varnish will seal the deal! If you are wondering what type of varnish to use, that is a can of worms to ponder about. Experiment with a few brands and types to see what works. I like to use a matte or a gloss spray varnish for speed. But equally good are the brush on varieties, or even final coat, which is a wipe on polymer. Oil based paints require oil based ( non yellowing ) varnishes.
Telemark Rosemaling is the traditional painting of Norway. It reached its zenith in the early 20th Century after Norwegian independence, when a revival movement popularised everything that was Norwegian. It origins date back to religious art forms and the acanthus leaf. In the isolation of the Norwegian countryside, these new fart forms slowly developed into an individual style that differed according to the valley or regions from whence they came. Examples include: Telemark, Rogaland, Hallingdal and others.
Telemark is characterised by free flowing, dynamic scrollwork, and asymmetrical designs. A good introduction to Rosemaling is found in Aarseth's Rosemaling Designs, by Sigmund Aarseth. You will also find a free pattern and project on my website: www.forestwood.webs.com
I painted a wooden Rubbish bin and I will include a small tutorial on painting and designing freehand.
Telemark Rosemaling Tutorial
You will need:
Acrylic paint
Prussian Blue
Smoked Pearl,
Warm White
Filbert or flat brush, about 1/4- 1/2"
Good liner brush, say size 1 or a Quill liner
Sandpaper #400 - #600
Wooden piece
Palette: I make mine disposable for acrylics, by wetting some ordinary kitchen paper towel and squeezing it so it is damp, and wrapping greaseproof paper over the top.
Step 1. Basepaint piece chosen colour scheme. I picked Jo Sonja's Prussian blue and lightened it down with a creamy colour ( JSonja acrylics Smoked Pearl) Two coats. Allow to dry.
Step 2. With non powdery chalk or chalk pencil, chalk in some guiding points, like the root of the design and outside border. If you don't want to paint freehand, you could chalk in the main scroll lines and use a outline for the flowers. Once you get the hang of the shape of the flowers, and what your brush can do, then you can simply mark an x for where the flower will go and its orientation.
You will find a short video here:
Design:
N.B.When designing, keep in mind Balance of shape, size and element. If you divide the design in quarters, there should be a part of the major elements in each. Each quarter should have an equal measure of postive and negative space. Look at the design upside down to distract your left brain from interpreting, giving you a fresh eyes to see any design faults.
Step 3. Load a filbert ( flat with rounded tip) or flat brush in size appropriate to the width you want the scroll to be in darkest value, on ONE EDGE ONLY. In this case: Prussian blue. On the opposite edge, load Warm white or your lightest value. Flatten the brush on the palette so that the colours mix. Repeat.
Step 4. Begin painting the scroll from the top down, applying pressure as you go, so the brush widens, and releasing pressure as you near the end of the scroll, as this will narrow the stroke at the design root.
 Step
5. Repeat the stroke if needed, and add extra shade ( the darkest
value) on the outside of the scroll, to enhance the contrast. Be
careful: Acrylics dry quickly and you may need to use a retarder medium
to slow the drying time, giving you more time to play with the design.
Step
5. Repeat the stroke if needed, and add extra shade ( the darkest
value) on the outside of the scroll, to enhance the contrast. Be
careful: Acrylics dry quickly and you may need to use a retarder medium
to slow the drying time, giving you more time to play with the design.
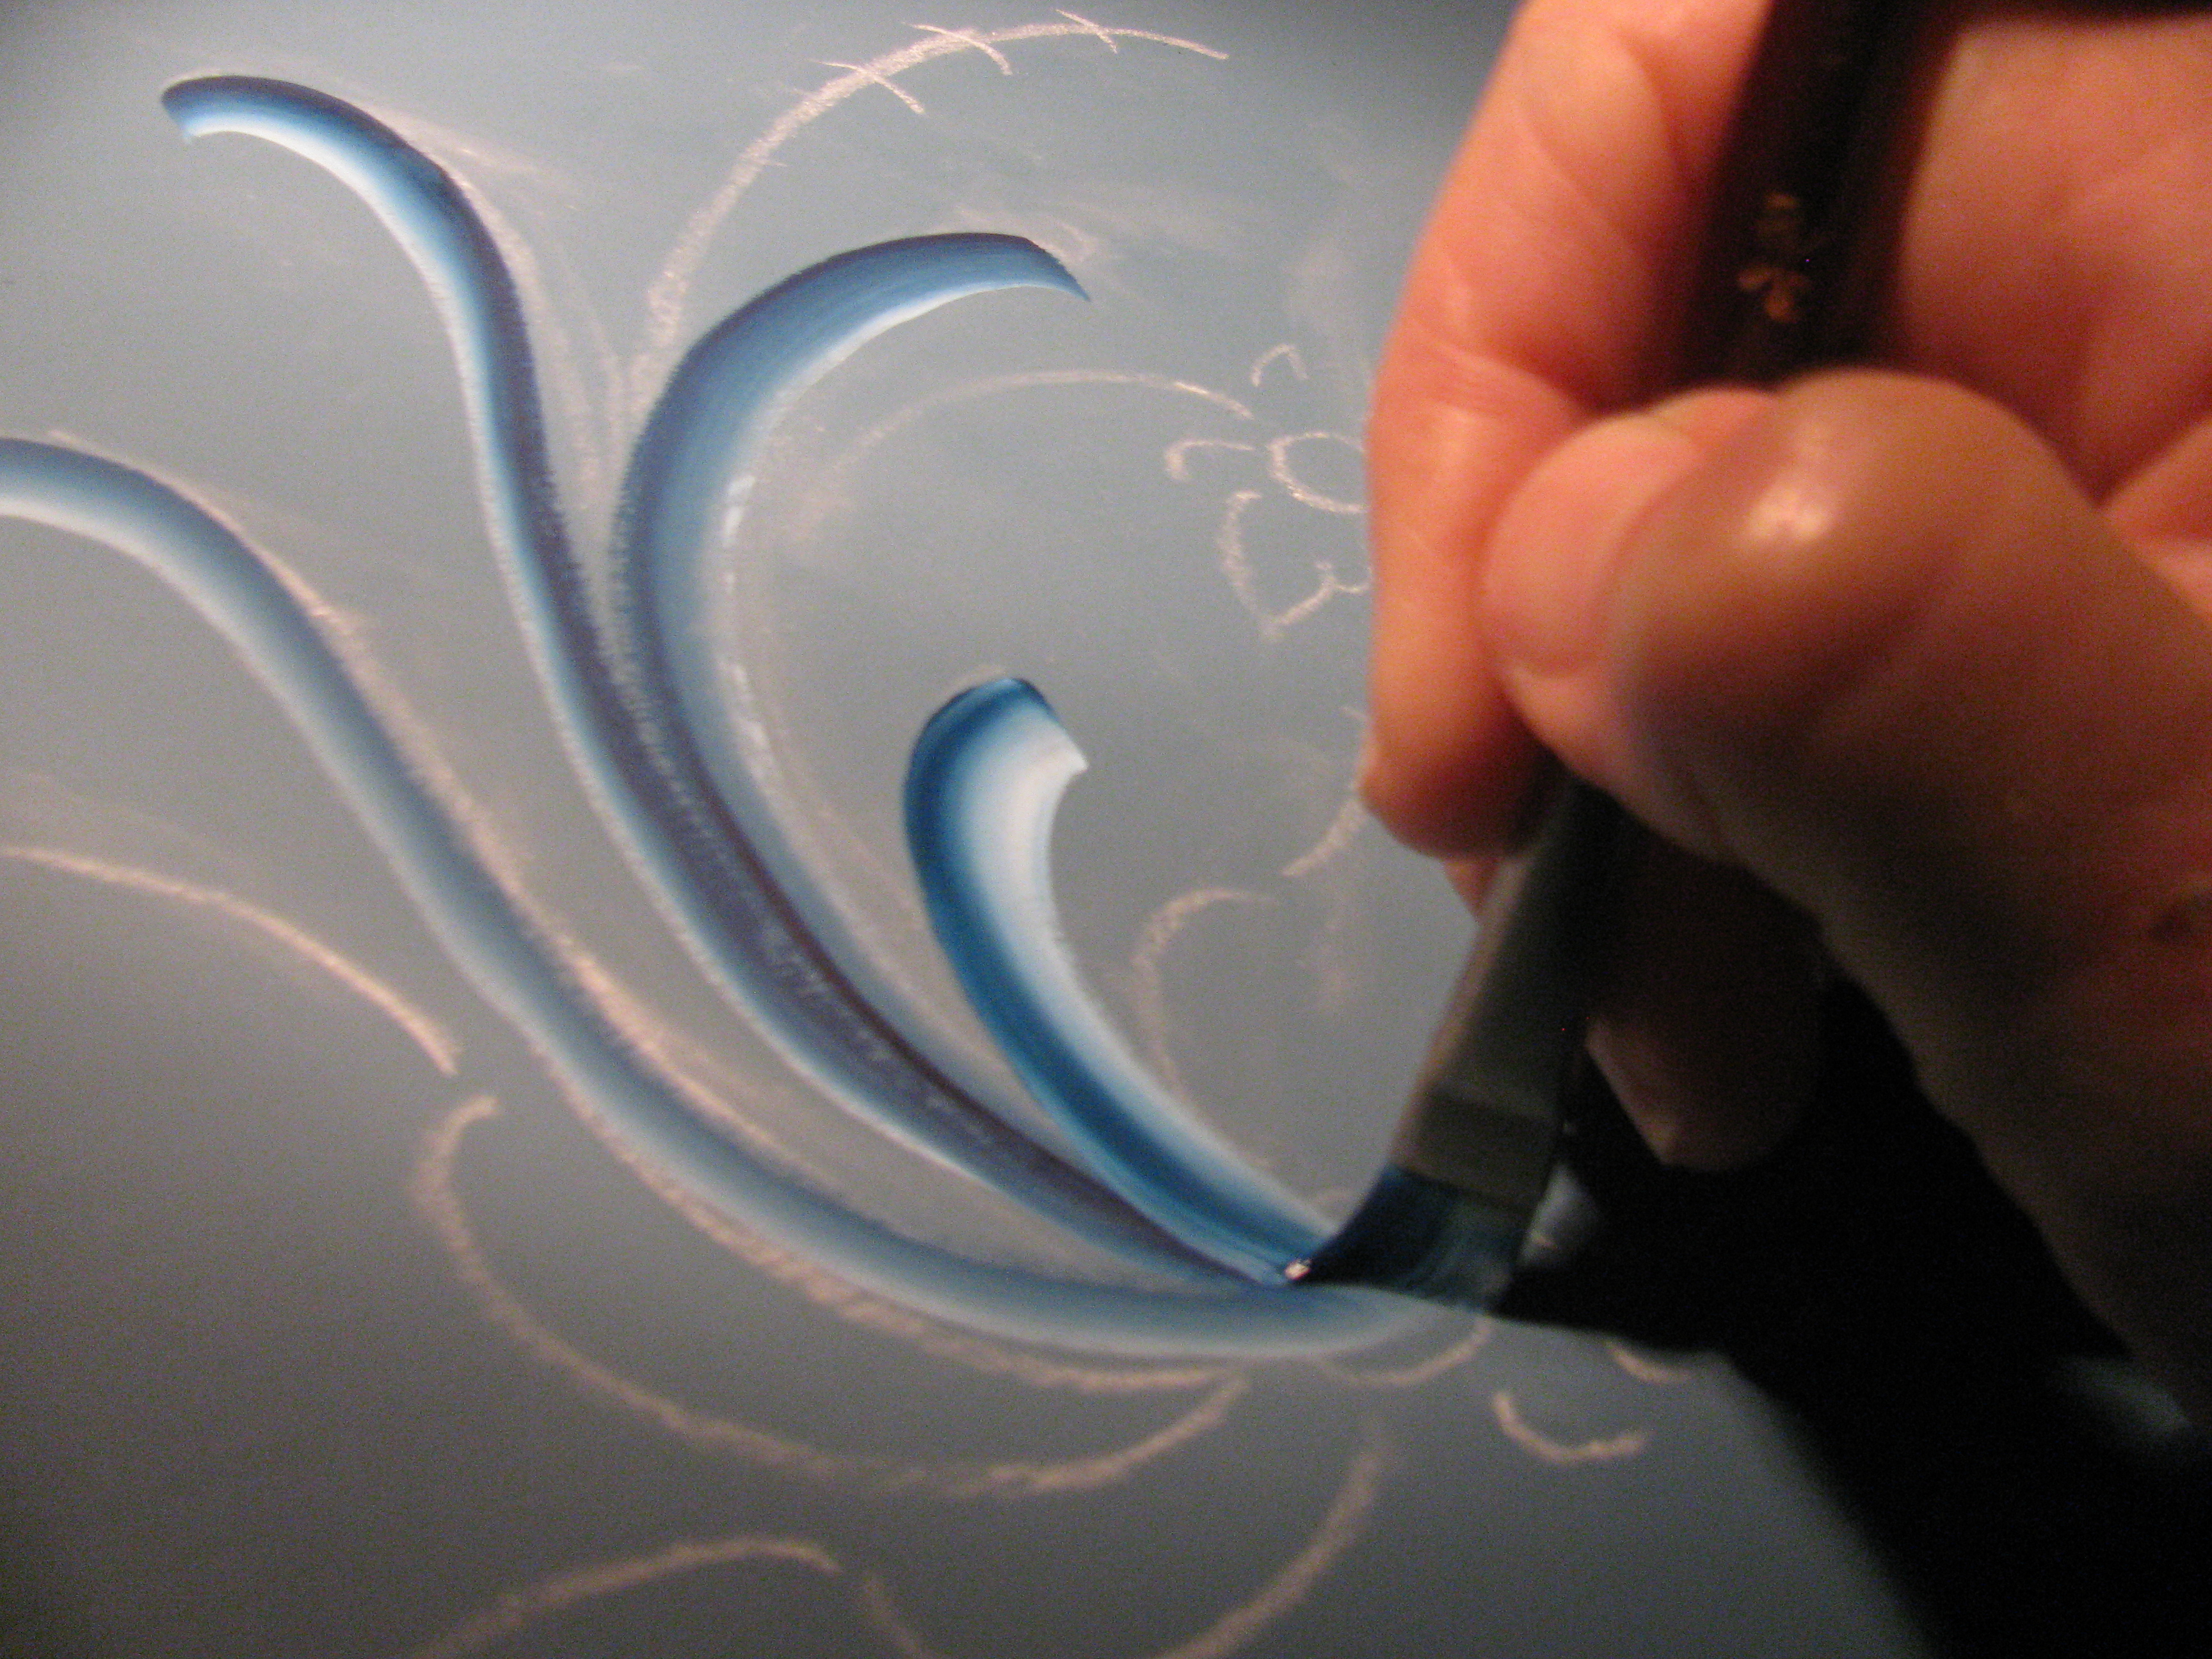
Step 7. Begin to block in the flowers using shape following strokes, comma, or leaf shape ( S and C strokes) as appropriate. These can be quite casual and double load your brush again with light value on one side and dark value on the other to give your project a natural blended look. Don't worry too much about shaggy edges here, as the liner work will tidy that up.
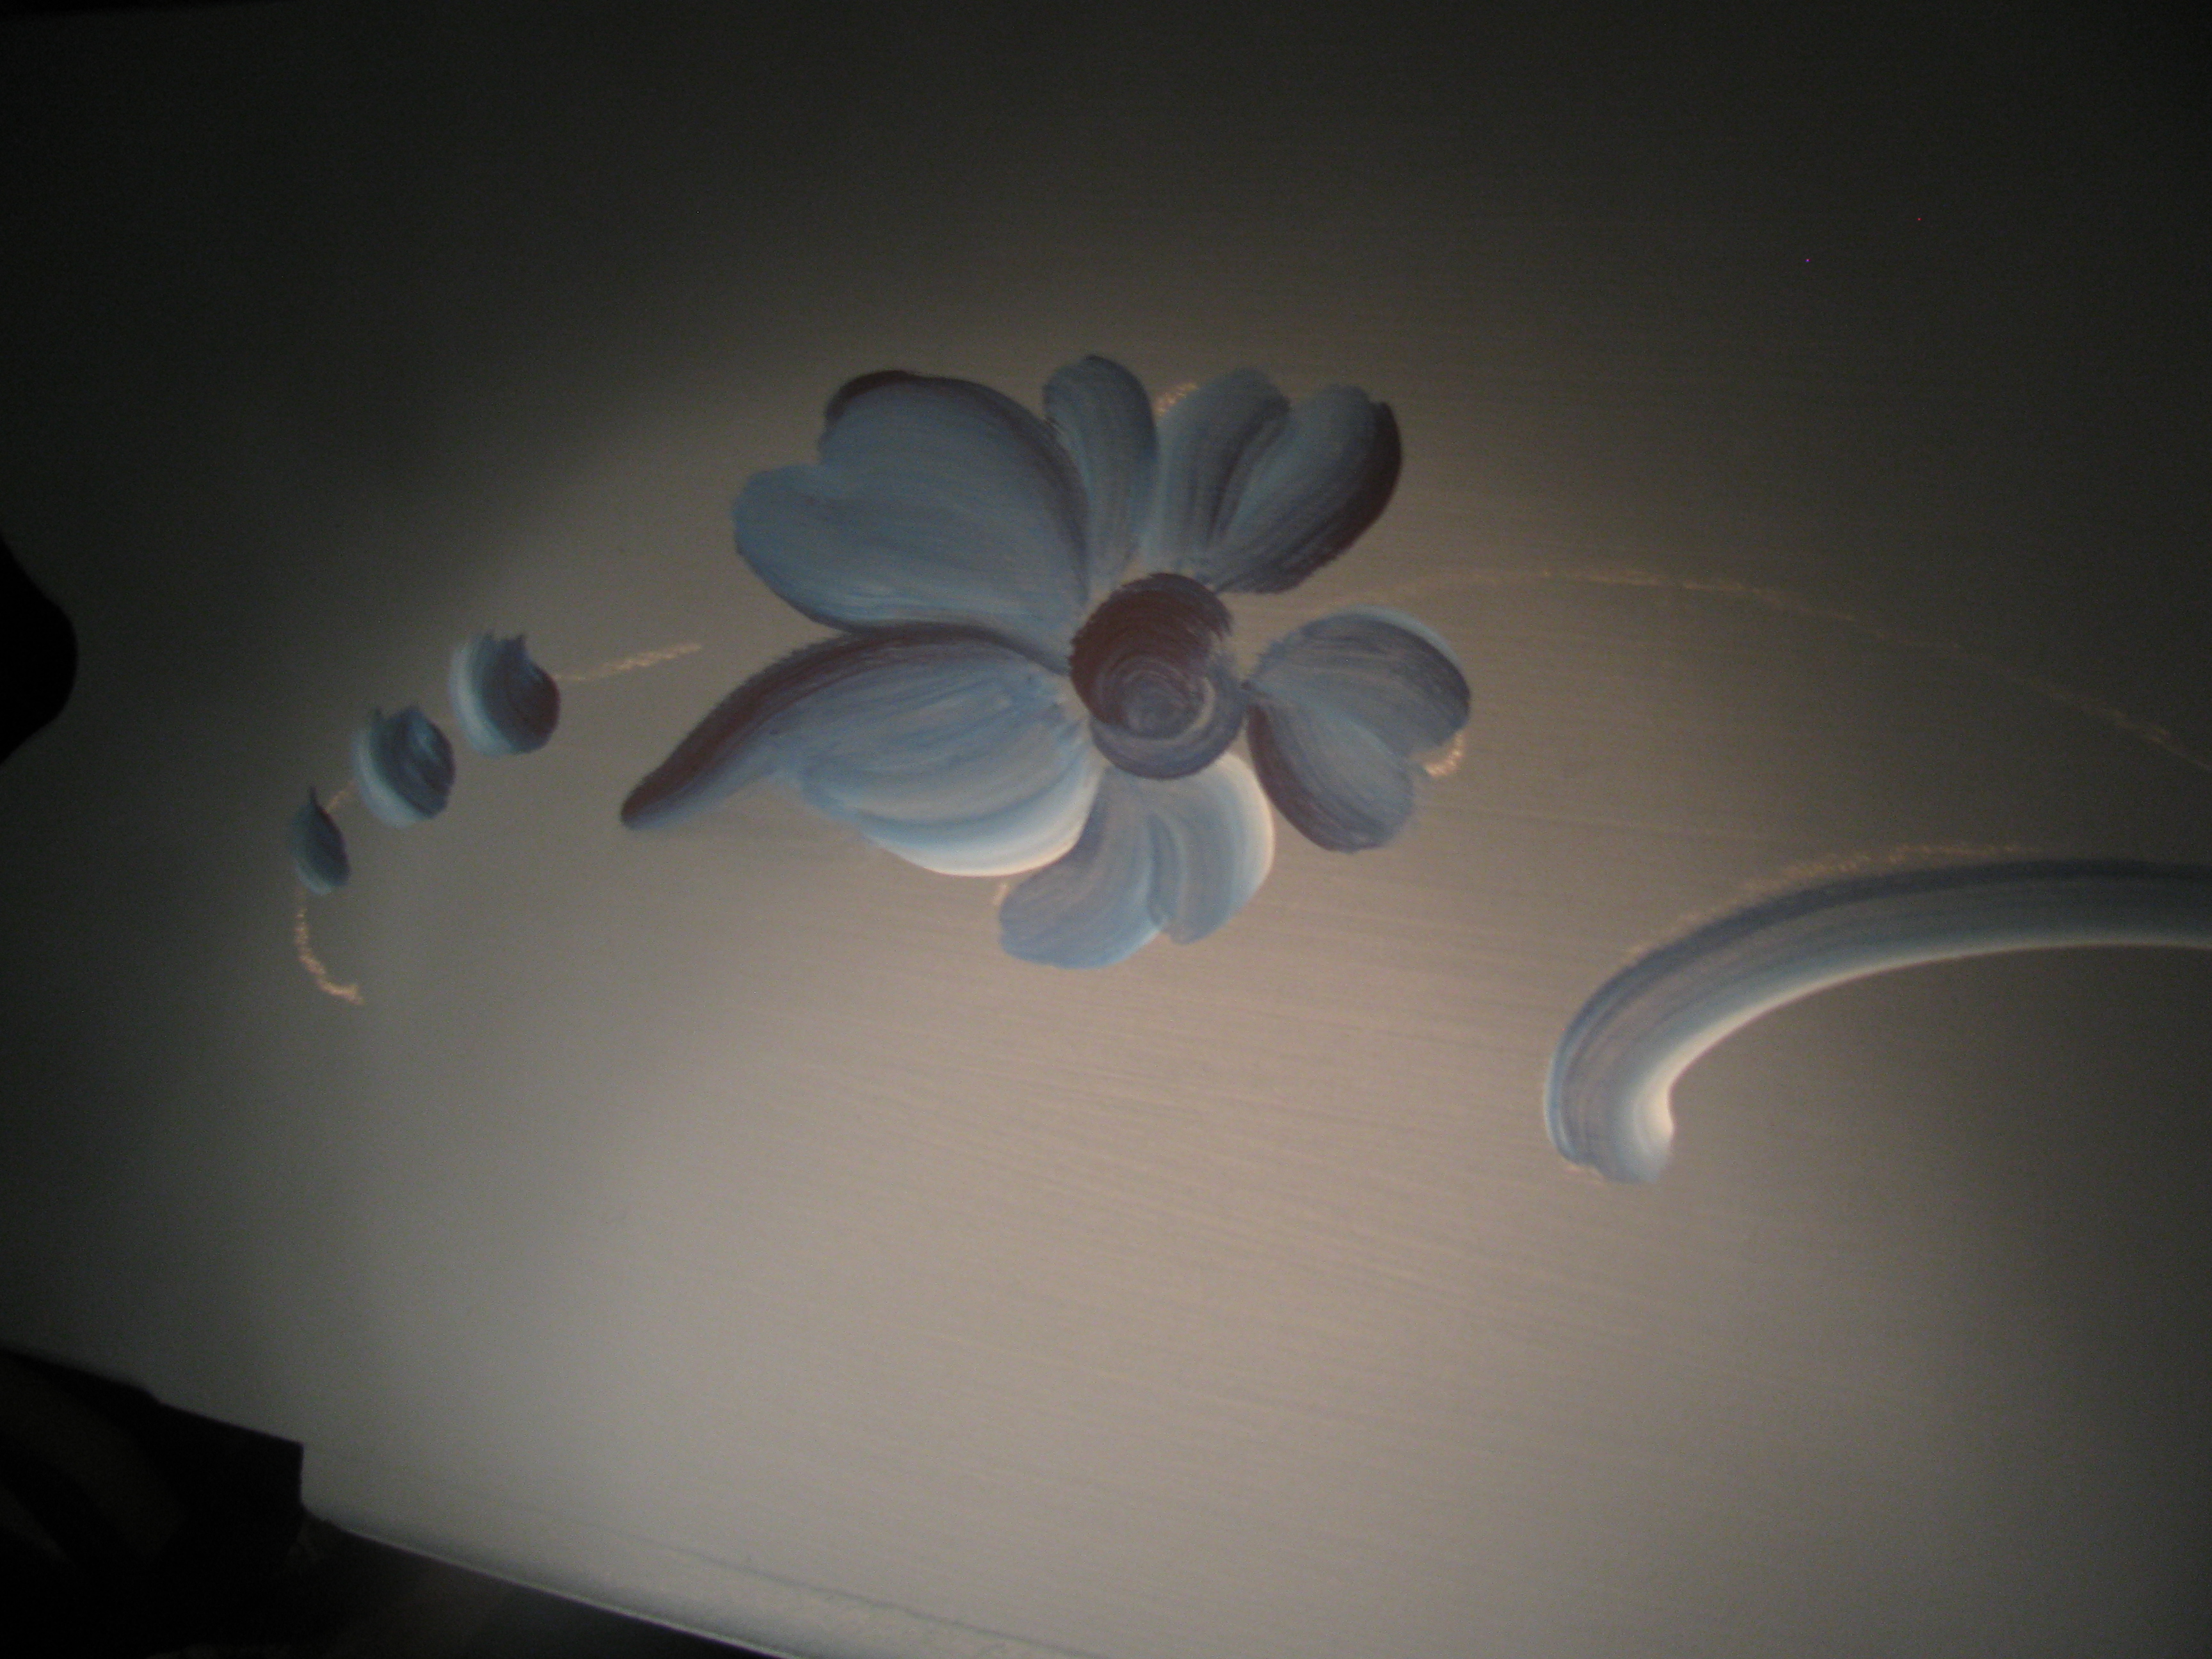
This is also a free style of painting, it is not Fine Art, and the peasants that originally painted these pieces had little or no training in artistic techniques. So don't stress trying to make it perfect when it is not meant to be so.
Try to achieve a balance of colour as you go. If the brush has blended really well and the light value is lost, add some extra warm white to your cirty brush (ie. don't rinse it clean in water, just wipe on paper towel to remove excess colour.)
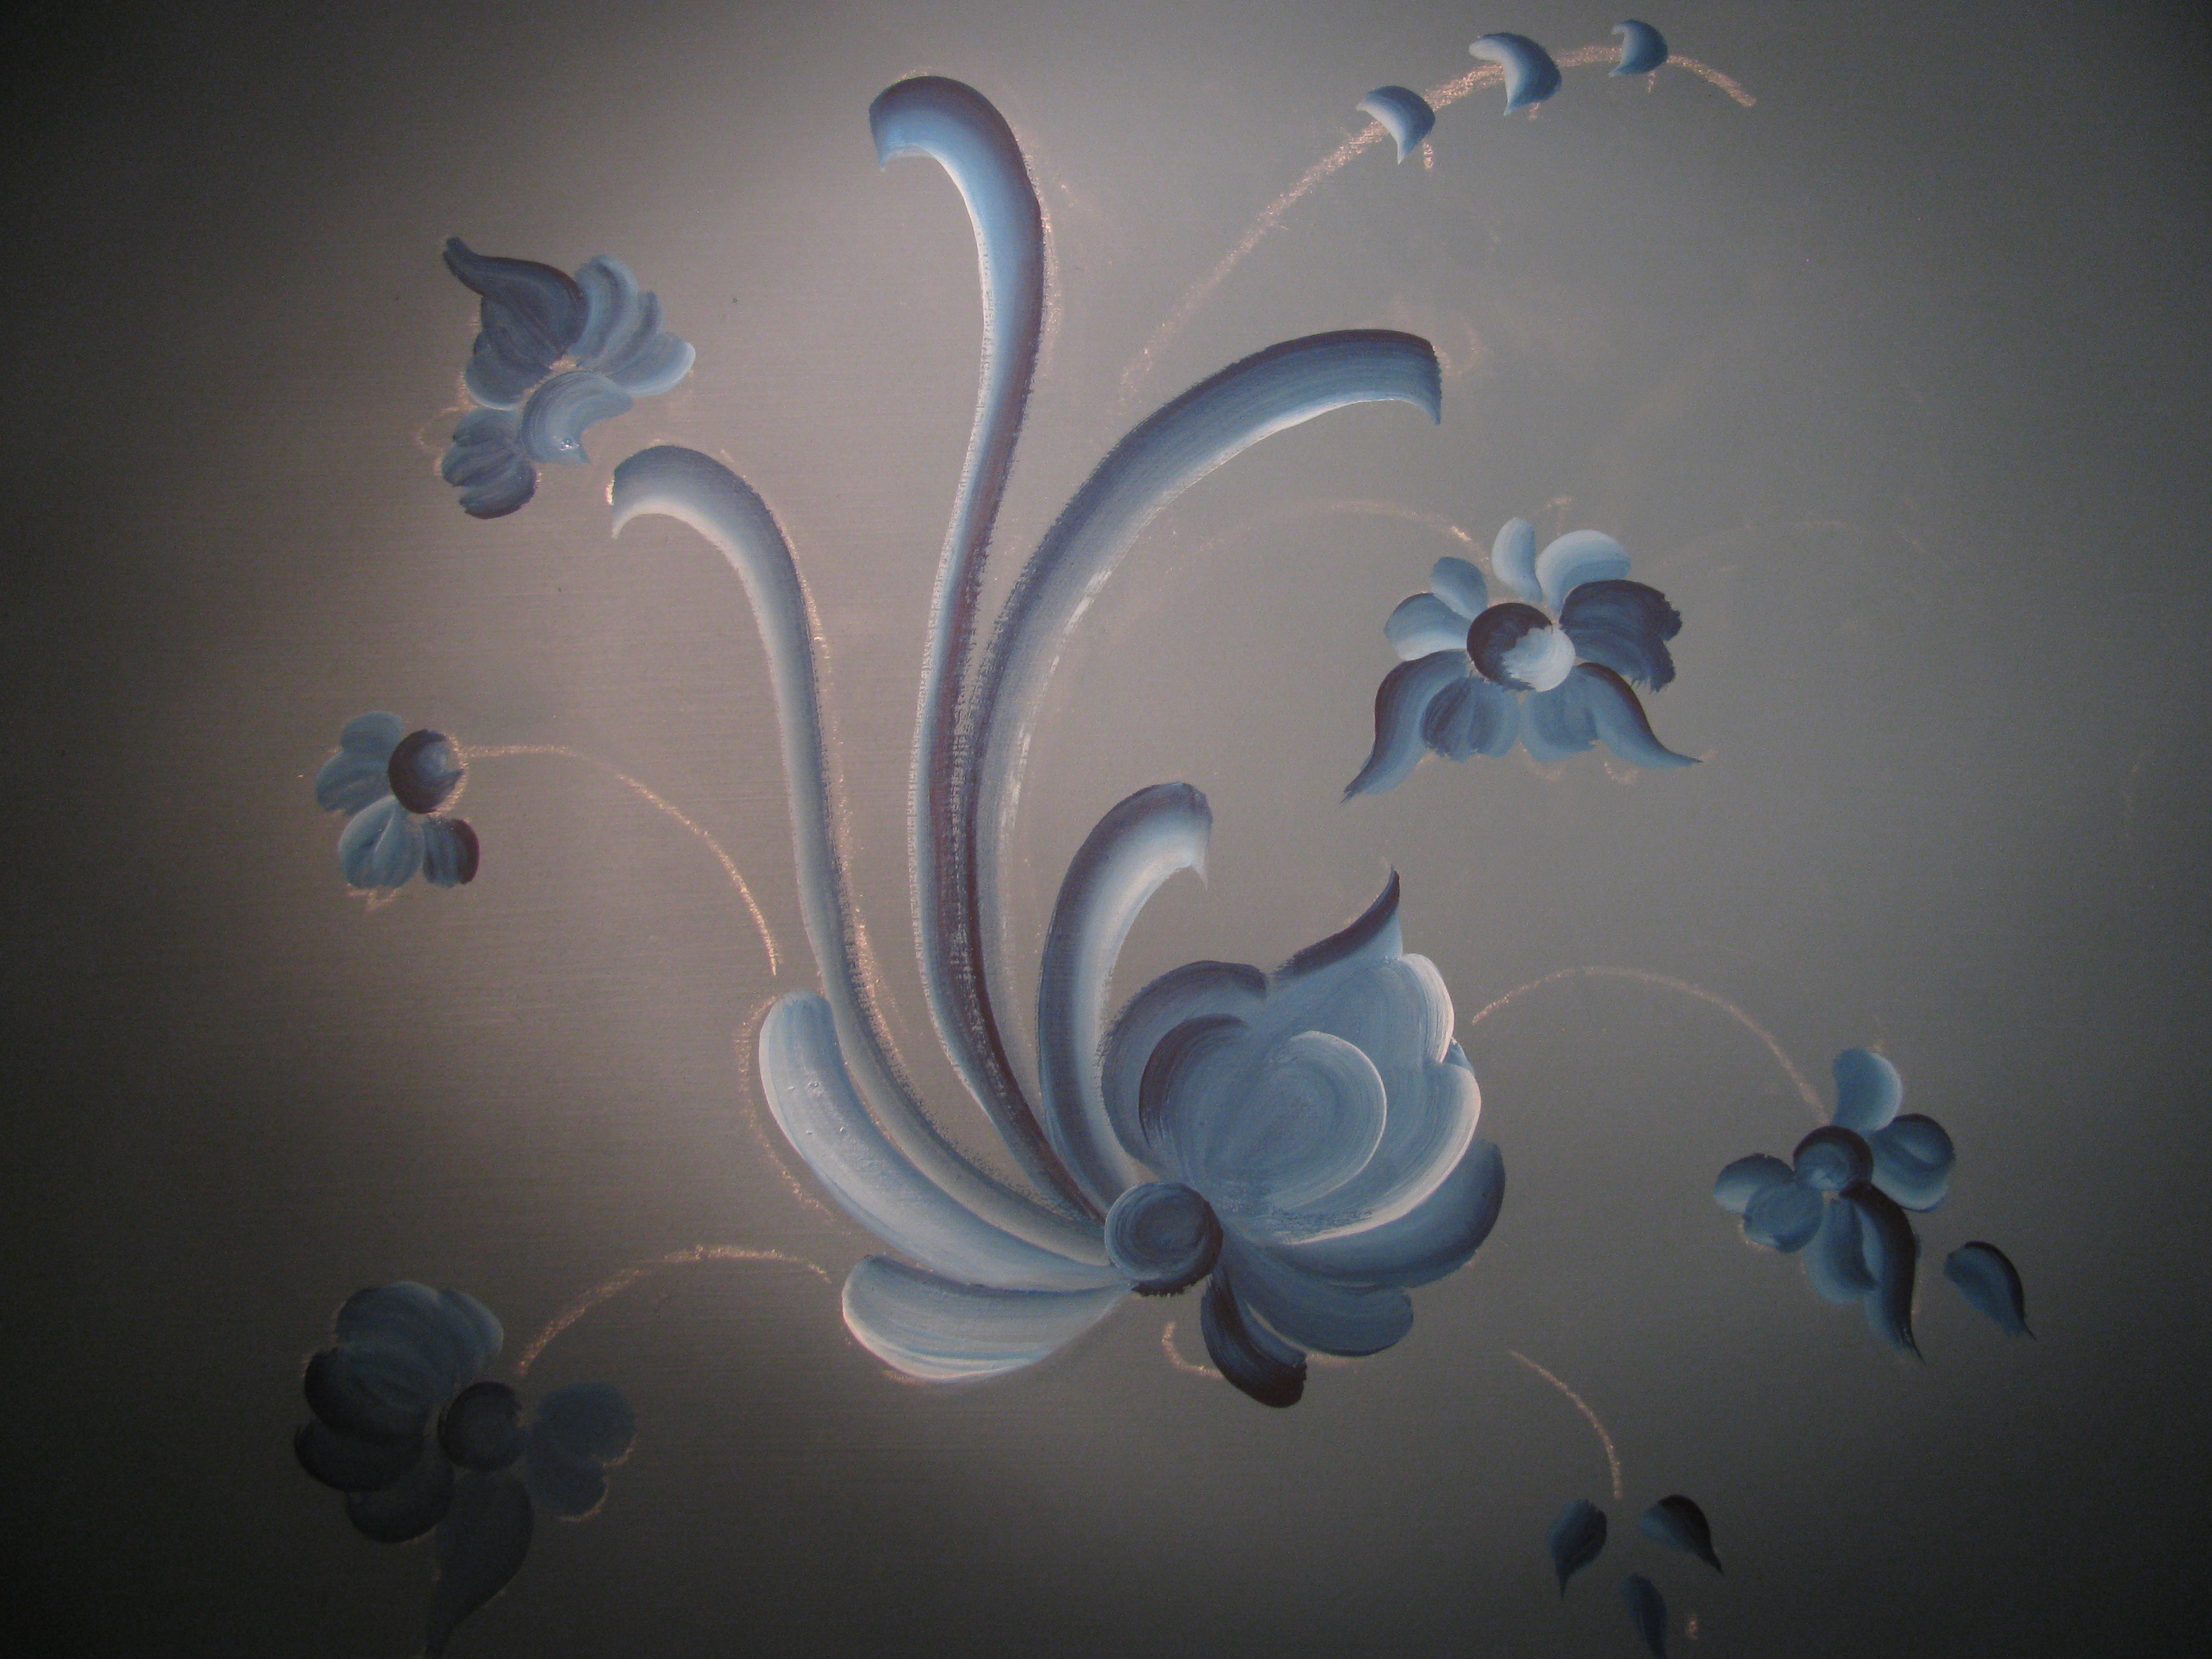
Once you have blocked in the flowers, and are happy with the distribution of colour, you can begin the liner work.
Warning: Liner work is very addictive, and it is easy to get carried away with the embellishments and make the design too busy. Beware! You can always add an extra stroke, later, but rubbing out can ruin a design.
You may also like to try adding something like flow medium to your paint to do some liner work. This will help a beginner. Practise a little on scraps of wood or paper first to get the hang of the brush.
Step 8. Scroll Details
Begin by adding enough water to your paint puddle to ensure a inky consistency. Load the brush in the paint and pull it through twisting it gently a little before you lift it from your palette. Place tip on project and gradually increase the pressure allowing the brush to widen the stroke, then release the pressure as you direct the brush tip towards you.
N.B. For best results, liner work should vary in thickness. The last thing you want is for all the outlines to be the same thickness. Variation creates interest in the design.
Outline all the scrolls in a casual manner. Try to move your arm as opposed to just your hand. This helps to create a sense of movement. Be confident. You can clean up any errors, carefully with a cotton bud or Q-tip.



Step 10. Flower details
Outline flowers in same technique with your liner brush. Be individual and don't follow the same outline each time.
Step 11. Embellishments
Add some small detail strokes with a quill or liner brush. They are completed similar to a reverse comma. Starting off with very light pressure and pressing fully down on the completion of the stroke. I double loaded this brush in the picture here, first loading in blue and then dipping the tip of the brush in white. This gives a white stroke with a blue tip. This stroke is very typical of what you see in traditional rosemaling works. Know when to stop. Overdoing it can make a design look too busy!!
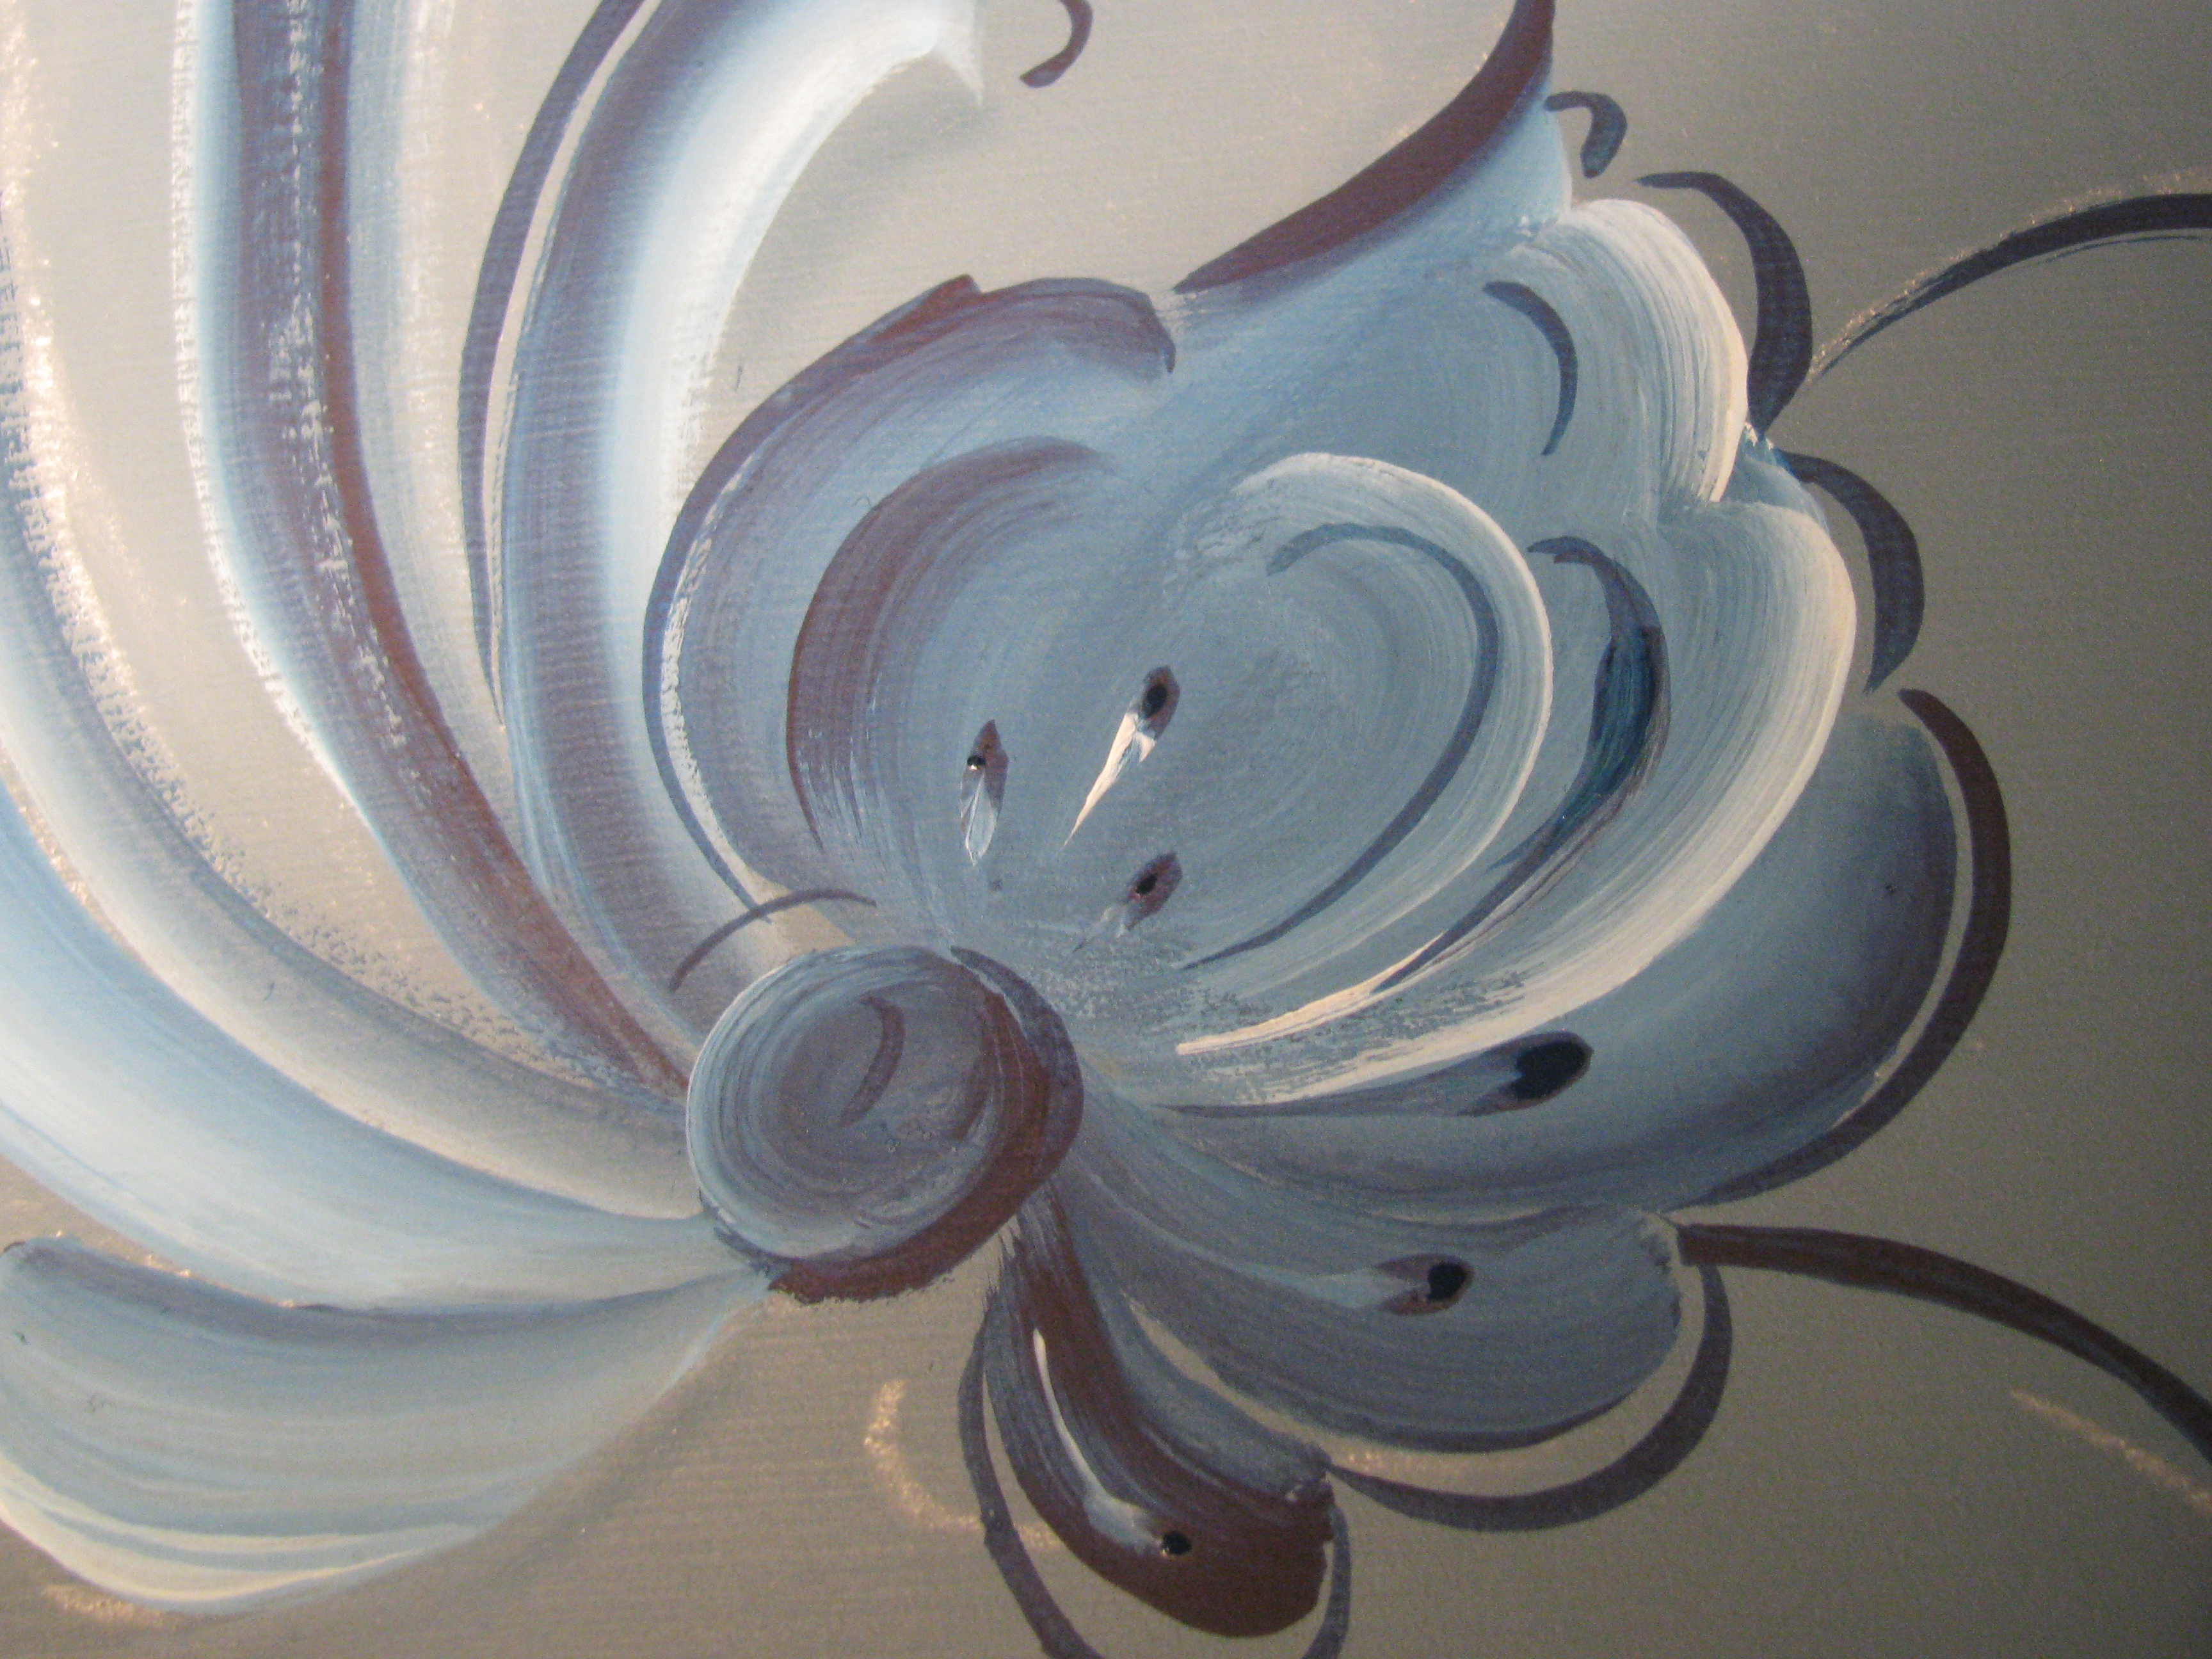
Now you have it! Almost all Rosemaling works have a border design, which can be as individual as you like. I used s strokes around the edges of my box.
All you need to do is allow time for the paint to dry - which can be anything from 2 days to a week depending on weather conditions, oils can take up to 6 weeks to fully dry.
Then a coat of varnish will seal the deal! If you are wondering what type of varnish to use, that is a can of worms to ponder about. Experiment with a few brands and types to see what works. I like to use a matte or a gloss spray varnish for speed. But equally good are the brush on varieties, or even final coat, which is a wipe on polymer. Oil based paints require oil based ( non yellowing ) varnishes.
Thursday, September 13, 2012
Hindeloopen painting
Hindeloopen painting -a Traditional Decorative Art
 Hindelooper art is a type of traditional decorative painting originated in the northern province of Friesland, The Netherlands.
It
is a form of folk art painted by the maritime community of
Hinderloopen, (a small town on the Zuiderzee). During times of bad
weather when there was no fish to sell, sailors/fisherman would turn to
painting as a way to pass the time and make some money.
Hindelooper art is a type of traditional decorative painting originated in the northern province of Friesland, The Netherlands.
It
is a form of folk art painted by the maritime community of
Hinderloopen, (a small town on the Zuiderzee). During times of bad
weather when there was no fish to sell, sailors/fisherman would turn to
painting as a way to pass the time and make some money. Hindeloopen sailors traded with other Hanseatic league member countries
– especially Norway, and often brought home objects painted in other
traditional styles that had developed from the Baroque art, primarily
Norwegian Rosemaling.
Hindeloopen sailors traded with other Hanseatic league member countries
– especially Norway, and often brought home objects painted in other
traditional styles that had developed from the Baroque art, primarily
Norwegian Rosemaling.
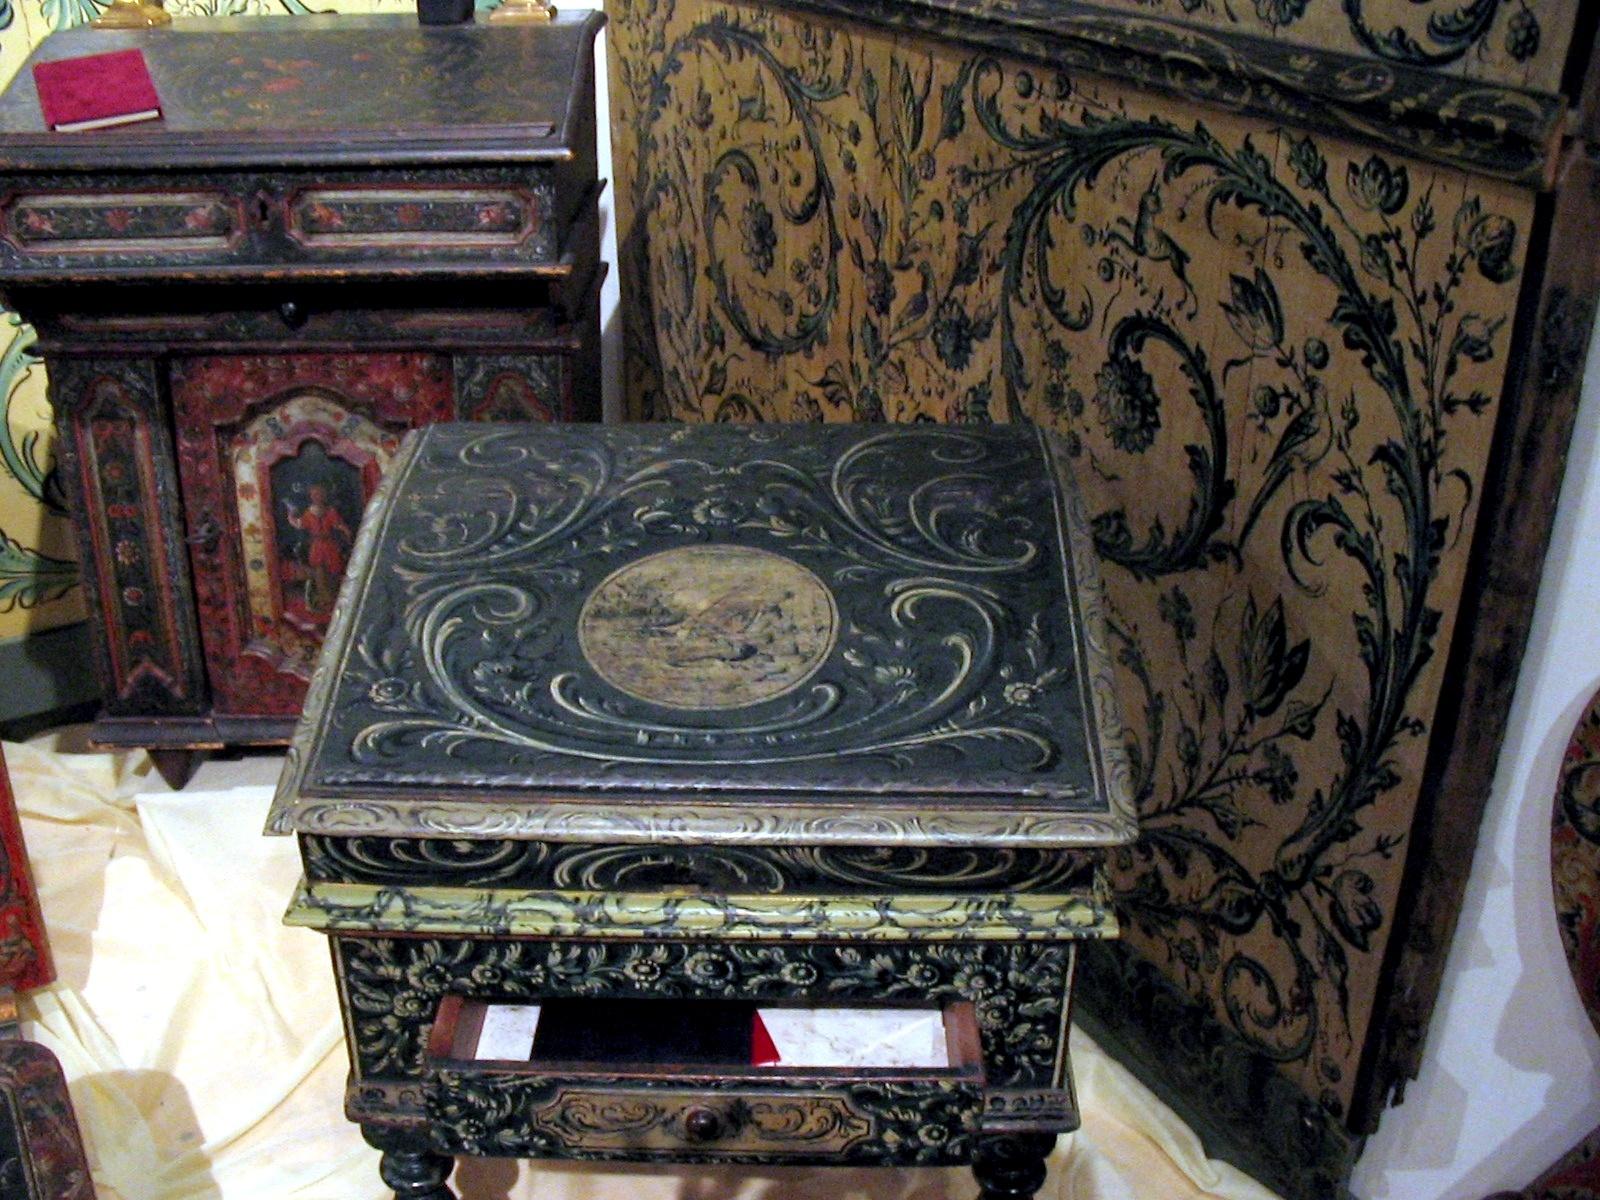 The
presence of these styles in the community, in turn, influenced the
development of the Hinderlooper’s own village painting, until it evolved
into the Hindeloopen art that we see today. The following pieces are my
interpretation of Hindeloopen, inspired by the Australian artist,
Heleen Van de Haar.
The
presence of these styles in the community, in turn, influenced the
development of the Hinderlooper’s own village painting, until it evolved
into the Hindeloopen art that we see today. The following pieces are my
interpretation of Hindeloopen, inspired by the Australian artist,
Heleen Van de Haar.

Hindeloopen Mangle Tray

I have been painting Hindeloopen style of painting and only recently discovered an old family link to Friesland. NO wonder I was attracted to this elegant and very relaxing style of traditional painting. Traditionally it was the men who did the painting in the village itself, but I so enjoy it. Perhaps the women were so busy with domestic chores they had little time for painting, and it was the men who were stuck ashore in times of bad weather that had time on their hands to create and decorate.
I will include a tutorial on Hindeloopen in the coming months. Something for those interested in traditional art, to ponder about…
Visit Book Blogs
Monday, September 10, 2012
Quick Meals from Leftovers: Roast Vegetable Frittata and Chicken Vol au Vents
How do you turn some unwanted leftovers into a delicious meal and save yourself time, energy and food.Turn out a scrumptious meal in a little over half an hour.
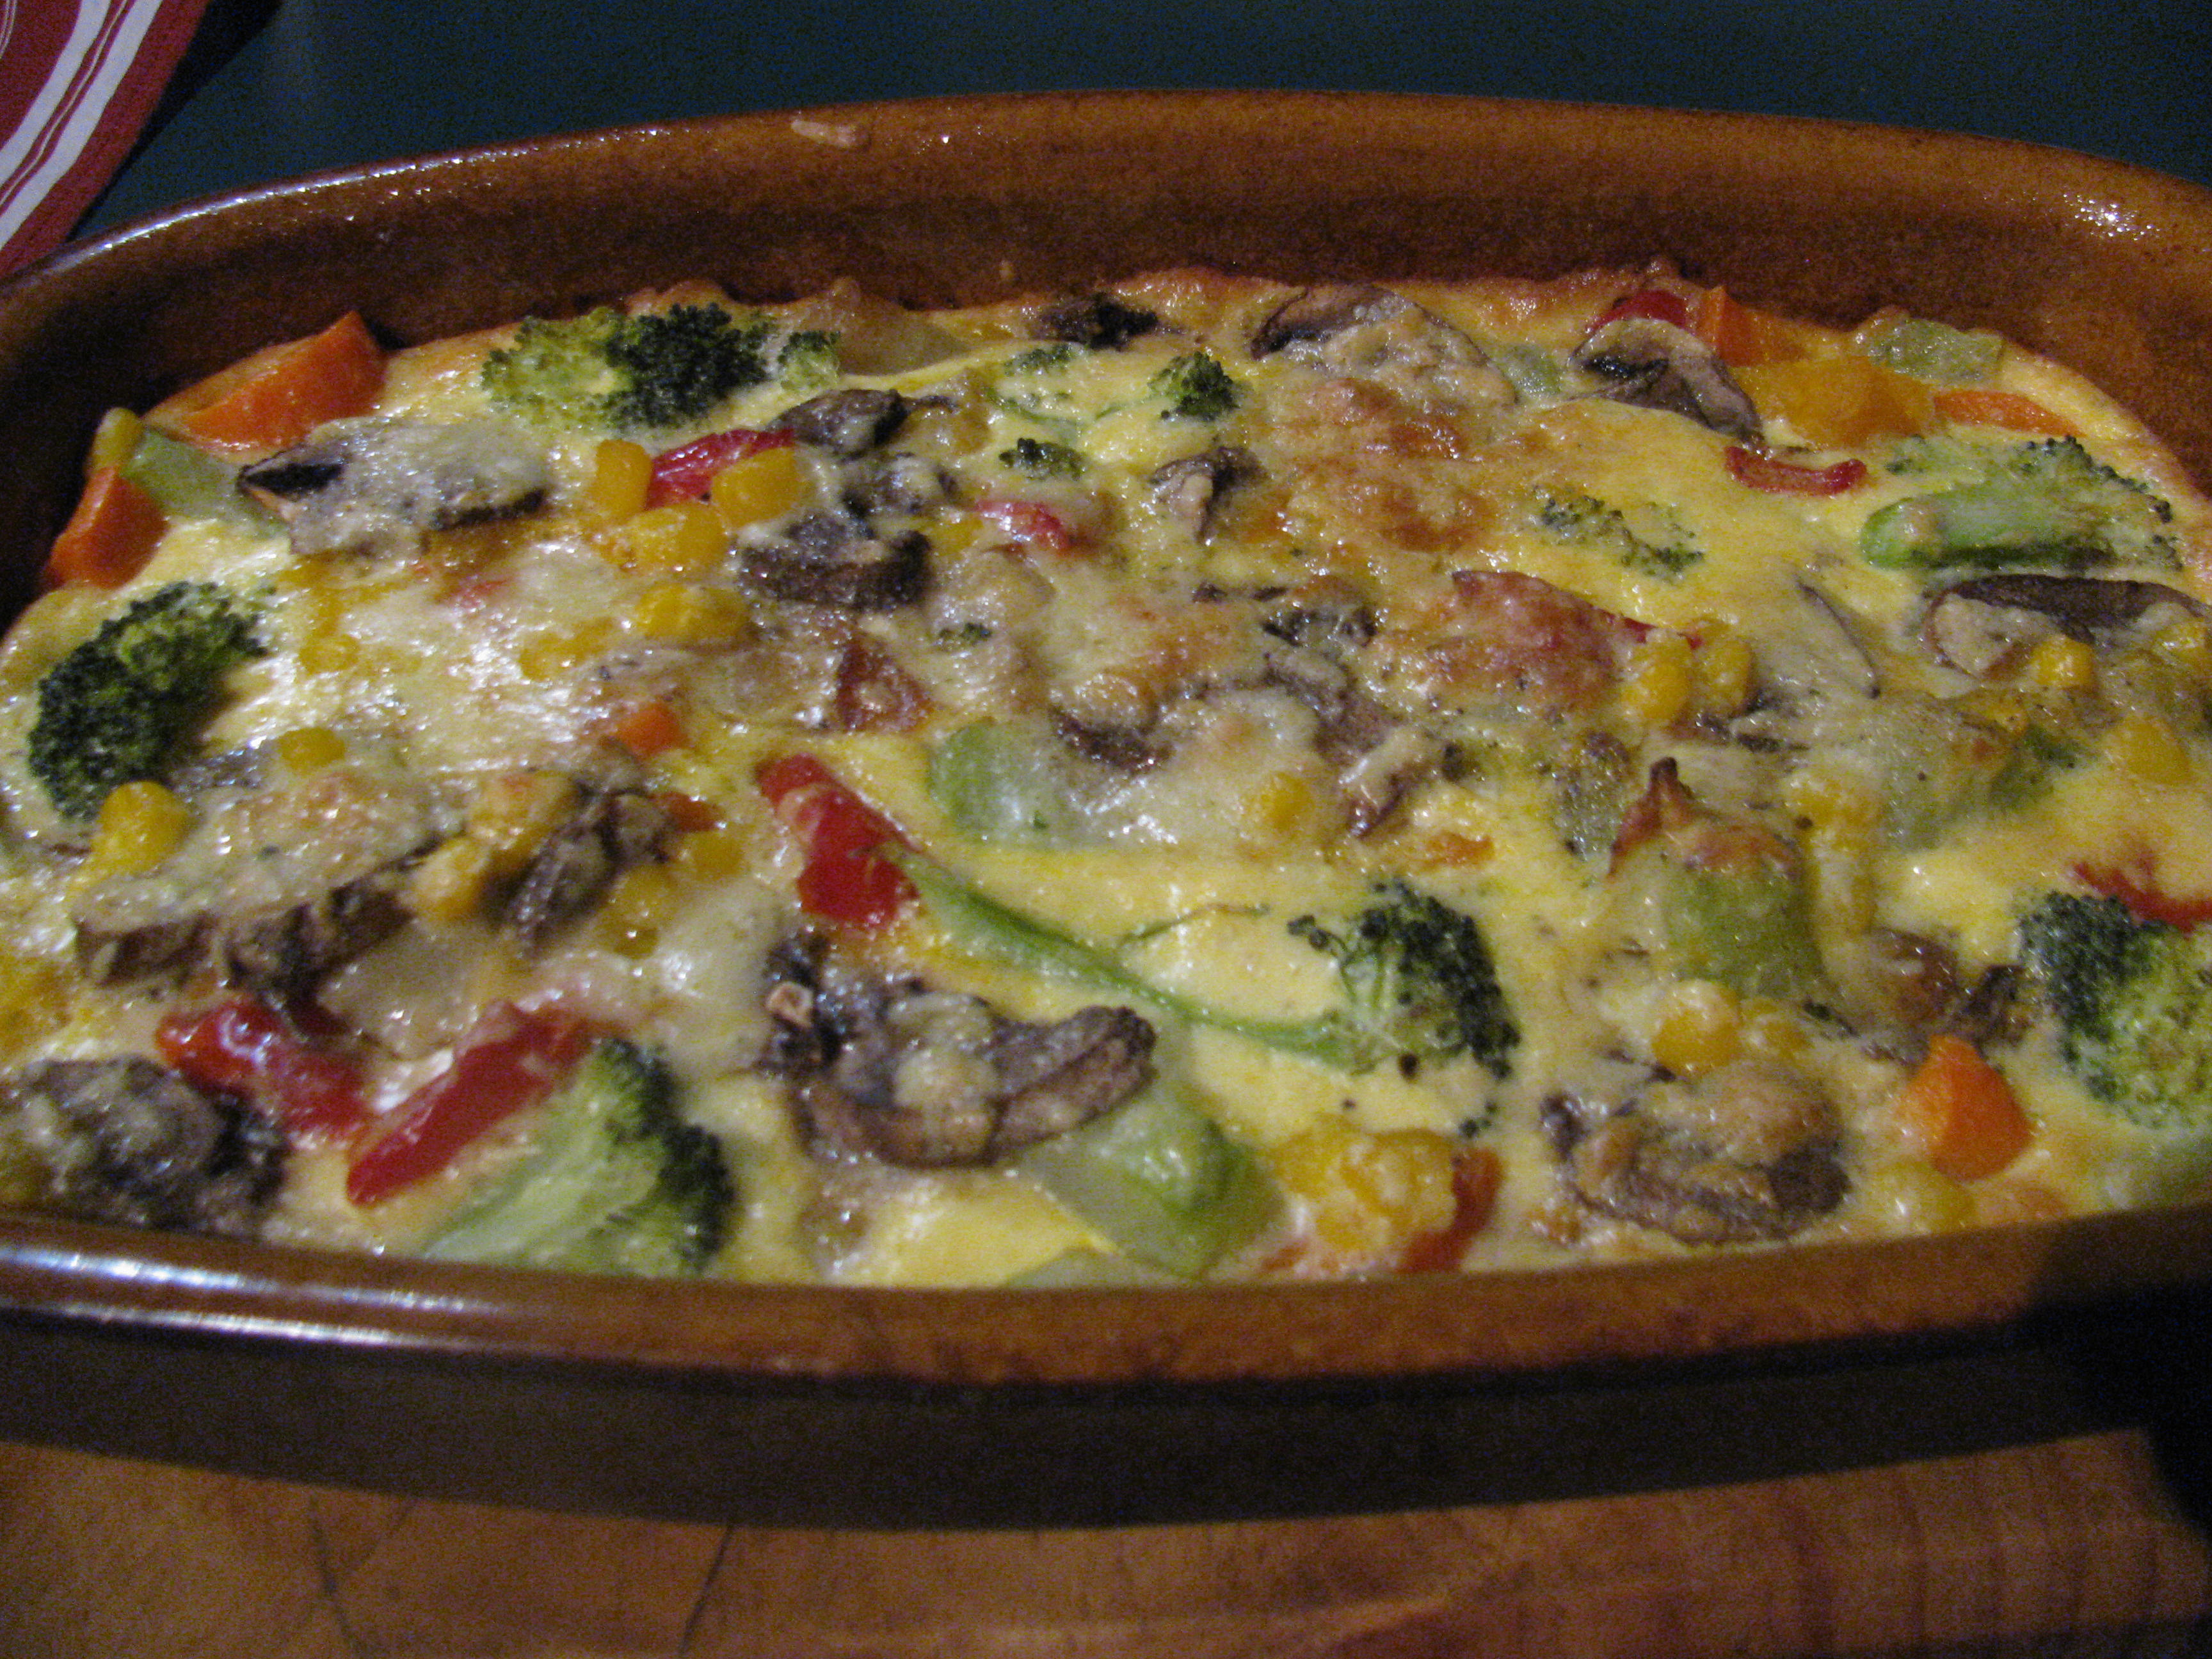
Roast Vegetable Frittata
Pre Heat Oven to 190 degrees Celsius or 375 degrees FahrenheitWhat you need:
A quantity of Roast vegetables
I use Sweet potato or kumara, onion, potato, pumpkin, zucchini, choko, red capsicum, carrot or just about anything. (It is great to have a variety of green, orange white and red if you can.) I usually make up a large batch and if they are all eaten, fine. And if not: I have a delicious meal almost ready to eat the following night.
[Optional extras: Broccoli florets, mushrooms and 1 small can of corn kernels]
1/2 - 3/4 cup cream
2 eggs
1/4 cup milk
Seasoning
1 cup of tasty cheese
1. Chop leftover veges roughly into 1 inch cubes and arrange in ovenproof dish so that they are evenly dispersed. Nothing worse than having all carrot in one portion and all choko in another! You can also add some broccoli, mushroom and a little tin of corn kernels as optional extras.
2. Combine the remaining ingredients and pour over the veges.
3. Top with a your choice of tasty or flavoured cheese. I used basil and pesto Mersey valley cheese. ( you will probably only find this brand in Australia)
4. Cook in moderate oven for a little over 20 minutes till cooked.
If you also have leftover chicken, then you can make a complete meal as follows while the Frittata is cooking:
Chicken Vol au Vents ( using leftover cooked chicken)

Pre Heat Oven to 190 degrees Celsius or 375 degrees Fahrenheit
Ingredients:
3 sliced mushrooms
1 diced onion
Quantity of shredded cooked chicken (leftovers) Approximately 1 - 2 cups
4 Vol au Vent pastries ( round pastry cases that have been pre cooked - readily available in supermarket)
Parsley or herbs as desired.
Method:
1. Saute onion in a little olive oil on medium heat in a frying pan til transparent.
2. Add sliced mushrooms and shredded chicken (leftover)
3. Place Vol au Vent pastries in moderate oven to warm
4. Add 1 cup of sour cream, and 1/2 cup milk to pan and stir through, slowly increasing the heat til sauce is thickened.
5. Place mix in warmed Vol au Vent cases and serve with portions of the above frittata.
A complete and easily prepared meal supplying Protein, fibre, vitamins and delcious taste, all under 45 minutes. We all eat and most of us work, so quick well balanced meals are something we need to ponder about.
Subscribe to:
Posts (Atom)


 Posts
Posts